
The Ultimate Guide to Using Data Encryption on Linux

4 - 7 min read
Mar 28, 2022

Data encryption has never been more important. New data protection and privacy regulations, such as GDPR, mean that companies storing unencrypted customer information are vulnerable to paying heavy fines. The public is now more aware of the importance of encryption, with massive data breaches impacting companies like Facebook receiving major media coverage.
With these issues in mind, it’s only natural that many of us want to start encrypting our sensitive data – both at work and at home. But how exactly should you go about it? This blog aims to answer that question by showing Linux users how to install and set up encryption on their systems.
How to Protect Your Hard Drive from Physical Threats
The good news for Linux users is that most popular Linux distributions offer an option to activate encryption during setup. The encryption built into these Linux distros is called partition encryption, and below we’ll take a closer look at some benefits of this type of encryption.
Partition encryption, along with disk encryption, is one of two major types of data encryption. The main difference between the two is:
- Disk encryption protects the entire drive.
- Partition encryption targets a section of a physical drive which has been defined as a separate partition. If a single partition occupies an entire hard drive, then partition encryption is equal to disk encryption. Yet a hard drive might also have multiple partitions – where partition encryption can naturally encrypt the whole hard drive.
The added sophistication of partition encryption makes it the safer and more secure way to protect data on your PC. One reason for this is that less of your data is exposed when the system is running. Another factor is that partition encryption offers more rigorous security, with each partition capable of having its own unique encryption keys and passwords.
How to Enable Partition Encryption
Now that you know a bit more about partition encryption, let’s go into more detail on how to set it up on your computer. Below we have provided step-by-step instructions on how to enable partition encryption on two of the most popular Linux distributions: Fedora and Ubuntu.
Fedora 32
Step 1: At the ‘Installation Destination’ step of the setup Wizard, select the drive where you want to install Fedora. Check the ‘Encrypt my data’ box in the lower left corner.
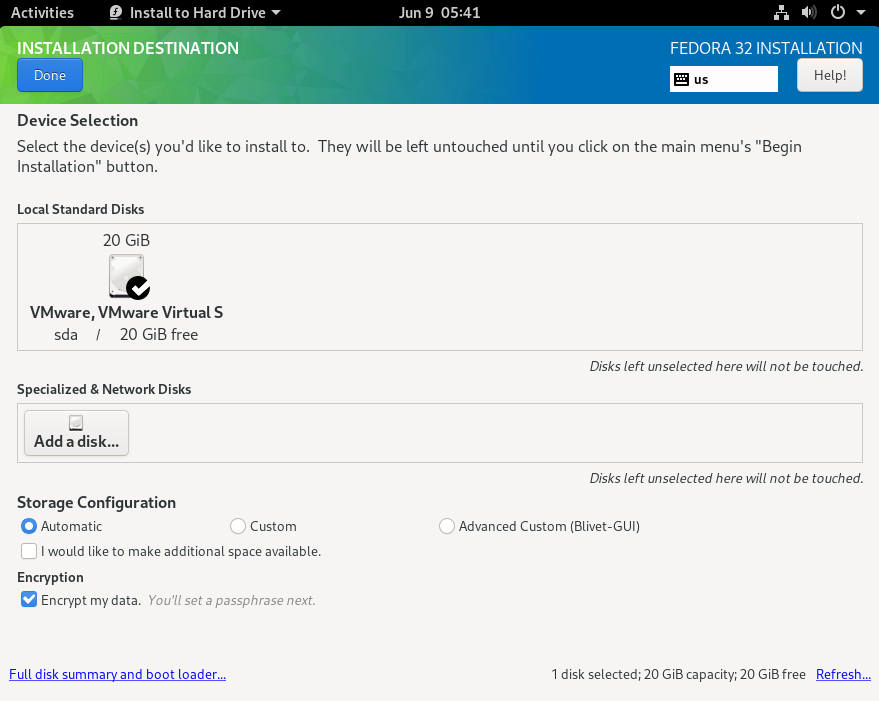
Step 2: Set a strong encryption password.
Step 3: Wait for installation to complete. You’ll need to enter the password you’ve chosen every time you start up your computer.
Ubuntu 20
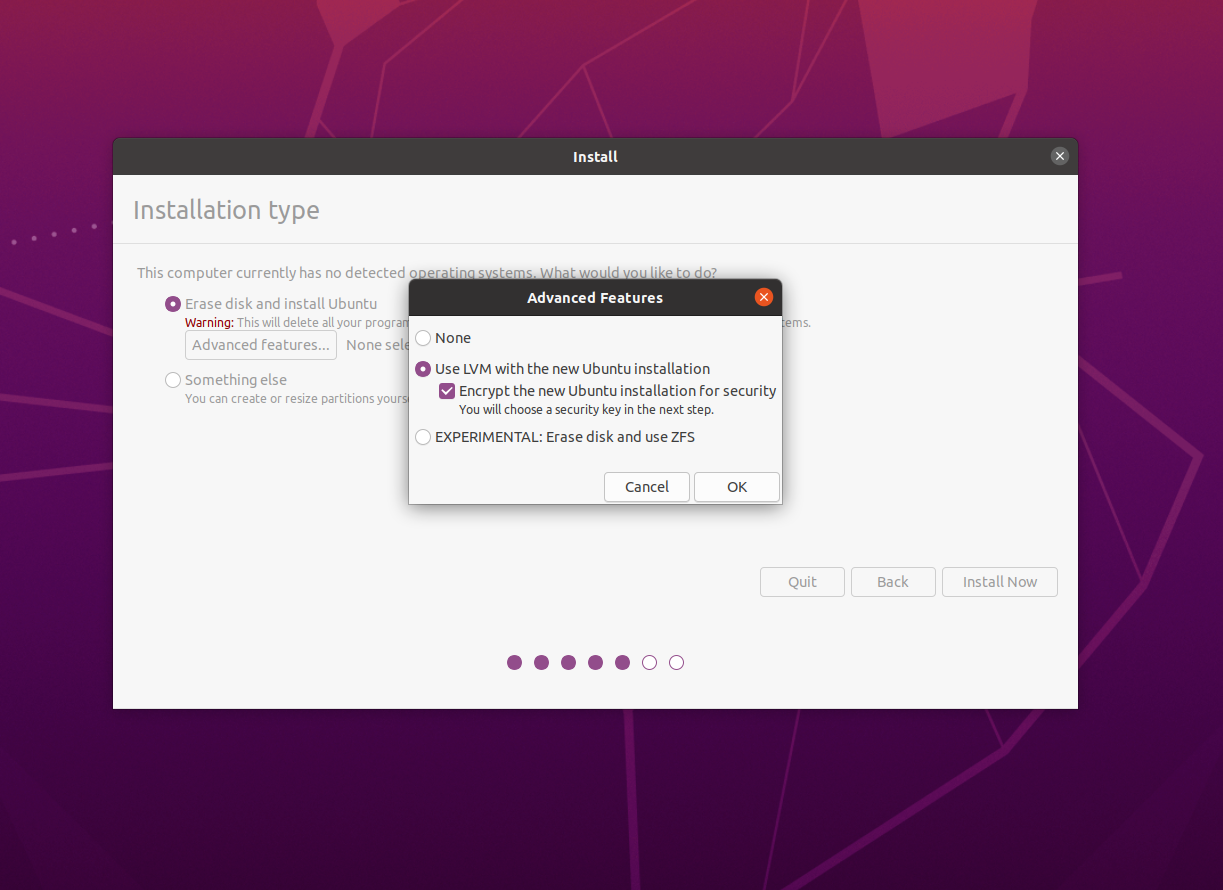
Step 1: At the ‘Installation type’ step of the setup Wizard, make sure ‘Erase disk and install Ubuntu’ is selected, then click on ‘Advanced features...’.
Step 2: Select ‘Use LVM with the new Ubuntu installation’ in the pop-up dialog. Check the ‘Encrypt the new Ubuntu installation for security’ box. Click ‘OK’.
Step 3: You’ll see that ‘LVM and encryption selected’ has now appeared next to ‘Advanced features…’. Click ‘Install Now’ to proceed.
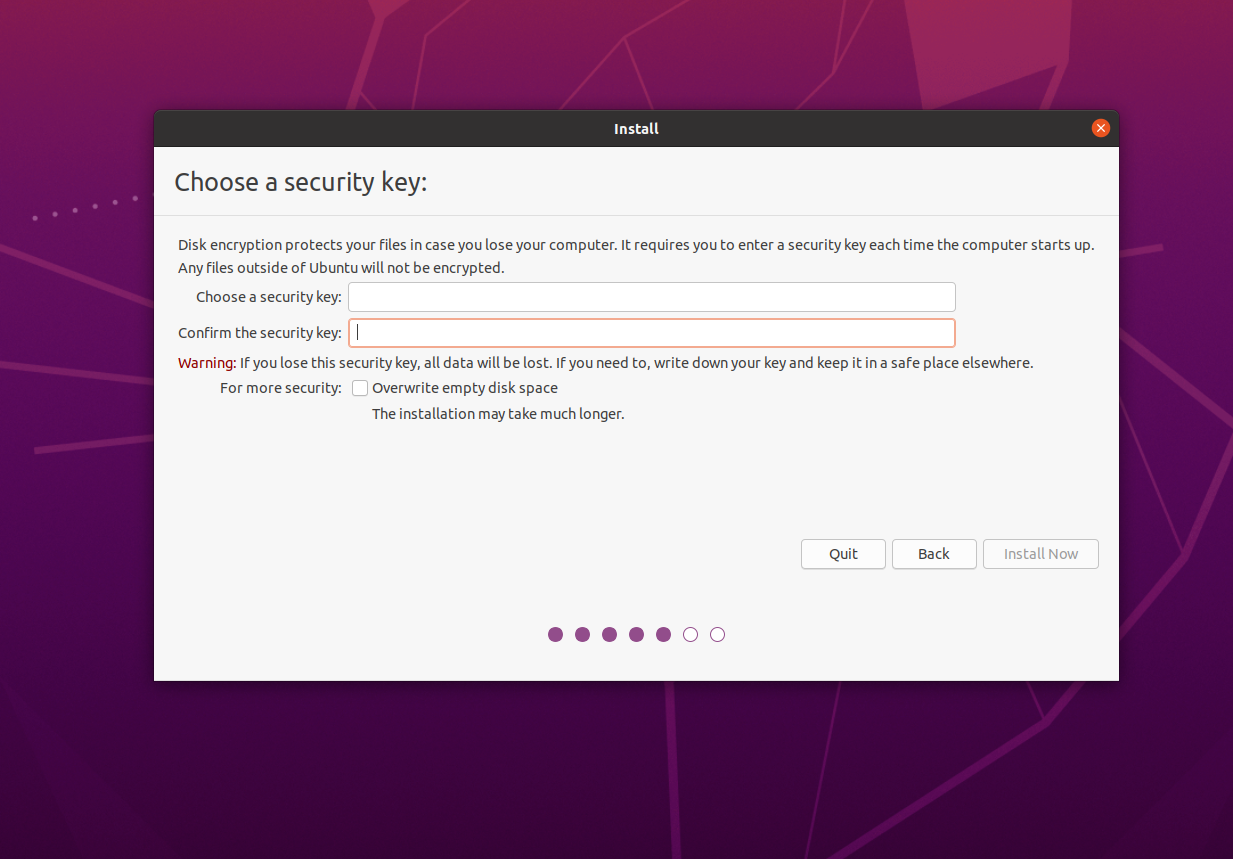
Step 4: Set a strong encryption password. Enter your password (‘security key’ in Ubuntu) twice and proceed with installation.
Step 5: Wait for installation to complete. You’ll need to enter the password you’ve chosen every time you start up your computer.
Good Start, but Not Enough for Complete Endpoint Data Protection
If you want to protect your sensitive information in the event that your computer is lost or stolen, then partition encryption (free with most Linux distributions) is a great solution. However, partition encryption is unable to keep data safe when your computer is turned on and active, when data is stored in the cloud, or when data is being sent to others. Linux users who are concerned about this may want to look into securing their data with file encryption or container encryption in addition to partition encryption.
Stay Secure by Encrypting Your Files
To protect data on your active computer, it’s necessary for sensitive files and folders to be encrypted with an added layer. You can keep your data safe by using either file encryption or container encryption.
By choosing file encryption, you are turning single files into locked, encrypted versions of themselves. Access is then granted after entering the correct password for each individual file. On the other hand, container encryption involves creating a secure virtual drive that is capable of storing many encrypted files at once.
When it comes to security and efficiency, container encryption is the superior choice. Using container encryption means you don’t need to keep track of many different passwords in something like a ‘password book’ - which can present a security risk. Instead, you just need to remember one password to access each container.
How to Create an Encrypted Container to Secure Files
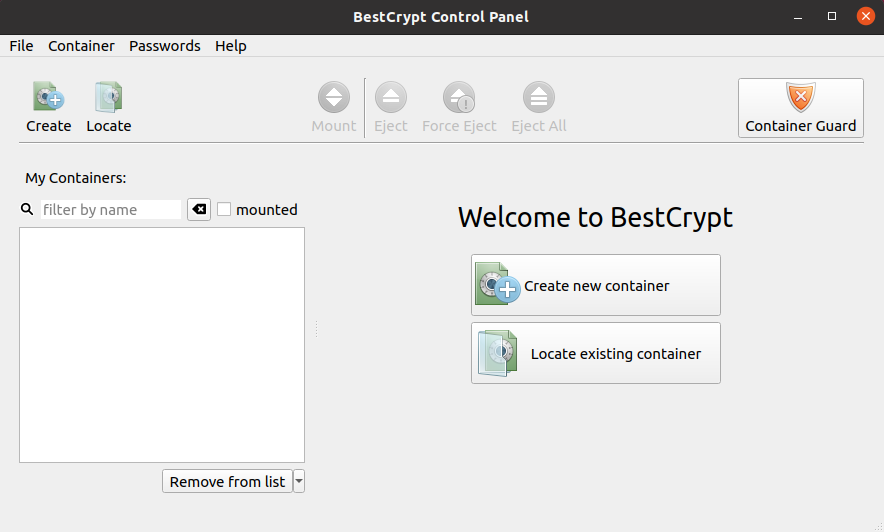
To benefit from this added layer of protection, take a look at the step-by-step instructions below on how to get started with container encryption. We have used BestCrypt Container Encryption as an example.
Step 1: Create an Encrypted Container
To get started, download BestCrypt Container Encryption. The software is also available for a free trial.
-
Open ‘Applications’, select ‘All’, and launch BestCrypt Container Encryption.
-
Click ‘Create new container’ in the window you just opened.
Create a container by choosing a password, then click ‘Create’.
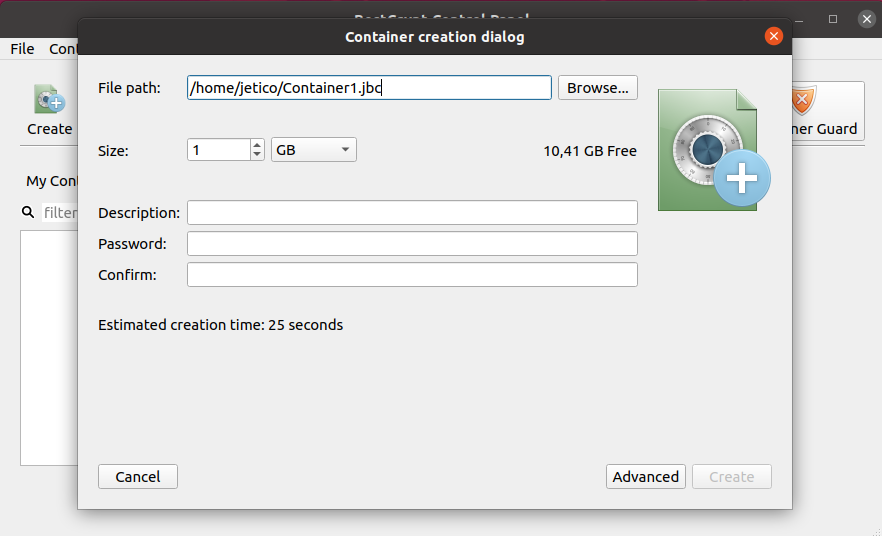 Customize the name, size, and container description (optional).
Step 2: Create and Copy Files to the Container
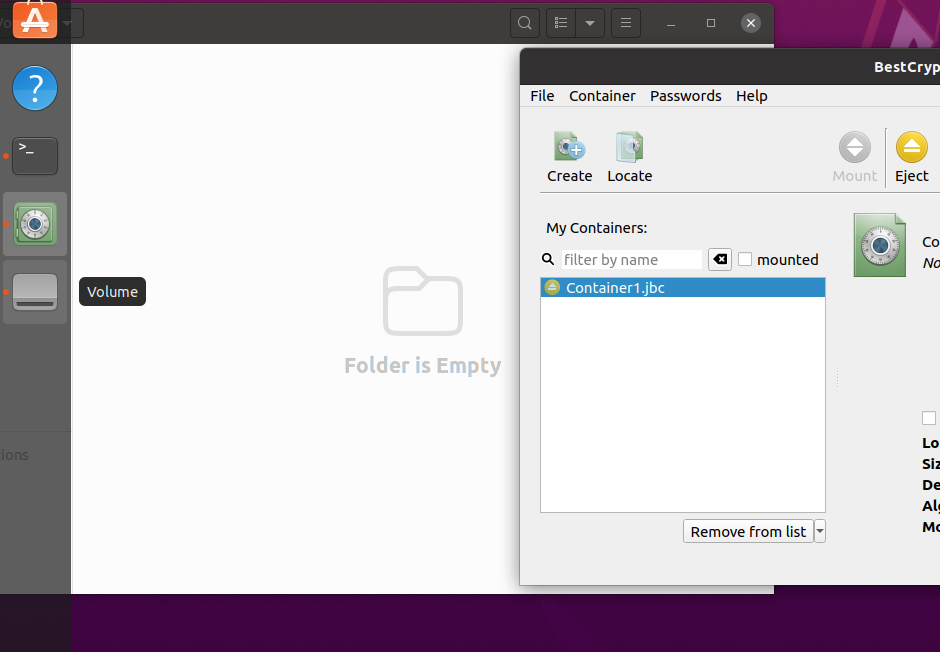
Once the container is created, the virtual folder will open automatically.
Place files in the container by dragging and dropping them into the folder.
You can also create encrypted files within the container in the same way you would create them normally.
Step 3: Work with Your Secure Files
You’ll see your encrypted containers as files with the JBC extension.
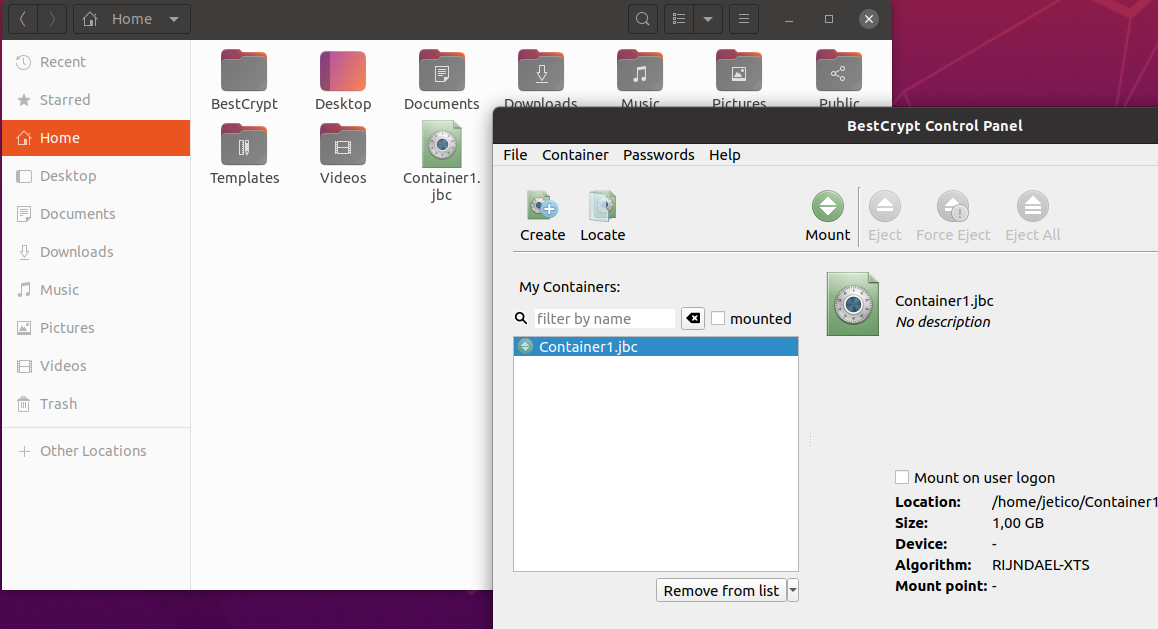
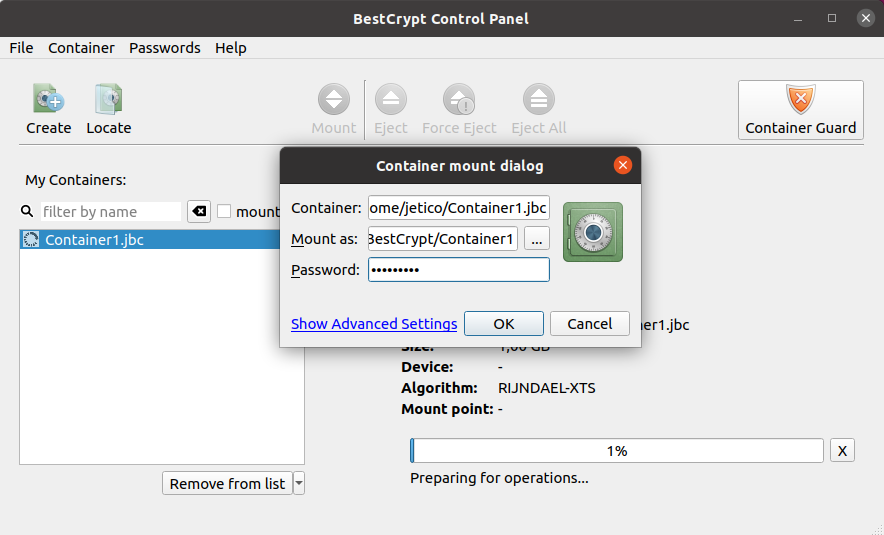
You can work with your encrypted files when the container is mounted (open). To access the container, you’ll need to enter the password you created previously.
Eject (close) the container as soon as you are done working with your files. This step is essential to ensure the protection of your sensitive data.
Copy, move, upload, and backup encrypted containers to the cloud just like you would with any other file.
Safely send your containers over the Internet and open them on any Linux, Mac, Windows, or Android device.
Congratulations! You have now set up a robust encryption solution on your Linux system. However, it’s worth keeping in mind that using encryption on its own still leaves the possibility that your sensitive data could be recovered by a third party. You can make sure this doesn’t happen by erasing traces of information that are left behind after you copy files to an encrypted container.
Happy encrypting!
About the Author
Michael Waksman has been serving as CEO of Jetico since 2011, more than doubling the size of the company during his tenure. He brings over 15 years of communications, technology and leadership experience.
At Jetico, Waksman has led the creation of the corporate identity, raising global brand awareness, building a more commercially-driven team and initiating enterprise customer relations. Jetico has maintained a wide user base throughout the U.S. Defense community, in the compliance market and for personal privacy.
Waksman is vice-chairman of the Cyber Group for the Association of Finnish Defense and Aerospace Industries. Recognized as a security and privacy advocate, he is a frequent speaker at international events, occasionally on behalf of the Finnish cyber security industry. In 2012, Waksman was honored with The Security Network's Chairman's Award for fostering collaboration between the United States and Finland. As a native New Yorker he has been living in southern Finland for over 10 years.


