Overly broad permissions can turn one compromised account into a much larger security problem. Learn how to reduce unnecessary access, review privileges, and apply least privilege across modern Linux systems. Review Linux Privileges×


Stay Ahead With Linux Security HOWTOs
How to Secure My Network incident response network traffic
incident response network traffic Imagine logging into a production Linux server for routine maintenance and noticing background network activity connecting to an unfamiliar external IP address. Your endpoint protection agent is not popping up with an alert, there is no service failure, and on the surface, the system appears to be running normally. . For Linux administrators and security teams, such a situation is a moment of truth: Is this activity a sign of active intrusion or just a tool that was overlooked in the course of...
 Jul 21, 2026
How to Harden My Filesystemsystem hardening open source security
system hardening open source security We all spend a lot of time defending our systems from external threats, but the amount of damage an attacker can cause often depends on what happens after they get in. A single compromised account doesn't always lead to a major incident. The real danger begins when that account has far more access than it actually needs. . That's exactly what the principle of least privilege is designed to prevent. By limiting users, services, and applications to only the permissions required for their jobs,...
Jul 20, 2026

How to Learn Tips and Tricksthreat detection system monitoring
threat detection system monitoring For small security and IT teams, the "enterprise" dream of a fully automated SIEM often feels like a distant luxury. It’s a vision built on massive budgets and dedicated engineering teams—things that, frankly, most of us don't have. But here is the reality: you don’t need a six-figure platform to maintain a secure environment. . Linux systems are, by design, incredibly verbose. Every time a user authenticates, a process executes, or a configuration file changes, your system creates a record of...
Jul 17, 2026
How to Learn Tips and Tricksnetwork security centralized logging
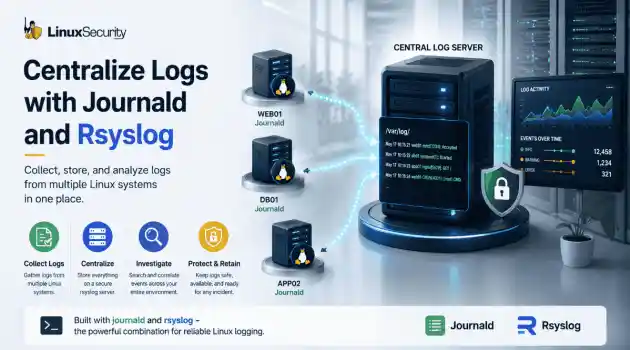
network security centralized logging Linux systems generate a steady stream of authentication, service, kernel, and application logs. On most systems, those logs never leave the machine that created them. If you're responsible for ten or twenty servers, that means checking each one separately. If one disappears before you can investigate it, its logs may disappear with it. Centralized logging solves that by sending log messages to another server as they're created. Instead of searching every machine, you have one place to review...
Jul 15, 2026
How to Secure My Networksecurity advisory audit
security advisory audit When you’re digging through an incident, your logs are the only thing you can actually trust. The problem is, attackers know that too. If someone gets root on your server, their first move is almost always to delete the evidence and cover their tracks. . If you aren't actively protecting your logs, you're basically flying blind the second a breach happens. It’s a miserable feeling to realize you have no idea what an attacker did because they wiped the logs before you even got there. In this...
Jul 11, 2026
 Refine HOWTOs
X Clear Filters
Get the latest News and Insights
Get the latest Linux and open source security news straight to your inbox.
Community Poll
Should Linux servers automatically install security updates?
Loading...
Explore Latest Linux Security HOWTOs
We found 98 articles for you...
166
 network securitycentralized logginglog management
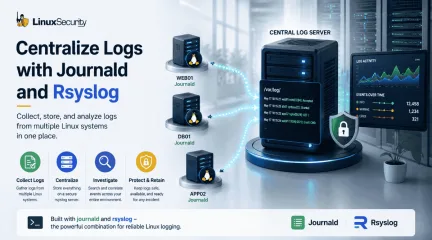
How to Configure Centralized Logging with Journald and Rsyslog
Linux systems generate a steady stream of authentication, service, kernel, and application logs. On most systems, those logs never leave the machine that created them. If you're responsible for ten or twenty servers, that means checking each one separately. If one disappears before you can investigate it, its logs may disappear with it. Centralized logging solves that by sending log messages to another server as they're created. Instead of searching every machine, you have one place to review activity across your environment. This tutorial uses journald and rsyslog to build that setup. . Before You Begin To follow this tutorial, you need: One Linux system to act as the central rsyslog server At least one Linux client that will forward logs Root or sudo access on each system rsyslog installed on the server and clients Network connectivity between the systems TCP port 514 allowed through the server firewall The commands in this guide use TCP because it provides more reliable delivery than UDP. File locations and firewall commands may vary between Linux distributions. What Is Centralized Log Management in Linux? Centralized log management collects logs from multiple Linux systems and stores them on a central server instead of leaving them scattered across individual machines. If all you have is one server, local logs usually aren't a problem. Open journalctl or check the files under /var/log , and you're looking at everything that machine recorded. The workflow changes once more systems are involved. An application error on one server often shows up on another. A failed authentication attempt might appear on several systems within a few seconds. Looking for those events means repeating the same searches until you've checked every machine. Forwarding logs removes most of that work. Each server keeps writing logs locally, but it also sends another copy to a central rsyslog server. When you start investigating, that's normally the firstsystem you open. You'll use two services to make that happen. journald records the log messages. rsyslog forwards them using your Linux syslog configuration. The logs stay on the local machine, but another copy is already waiting on the central server. How Journald and Rsyslog Work Together journald records the logs on each Linux system. rsyslog moves those logs to the central server, while journalctl lets you check the local copy. Component Role in centralized logging journald Records log messages on the local Linux system. journalctl Reads and searches the logs stored by journald . rsyslog Forwards local log messages to the central rsyslog server. Central rsyslog server Receives logs from multiple Linux systems and stores them in one place. Why Centralized Logging Matters Centralized logging keeps another copy of your logs on a separate system, so they remain available even when the original server isn't. Local logs work well until the server becomes part of the problem. A failed disk, an accidental deletion, or a compromised system can remove the records you were planning to review. A central logging server changes that. Every Linux system still keeps its own logs, but it also forwards another copy across the network. If one machine becomes unavailable, the forwarded logs are still there. The difference becomes obvious during an investigation. The same application error, failed login, or service failure can appear on several systems within a few minutes. Searching one central rsyslog server is usually faster than repeating the same search on every machine. Long-term storage gets easier too. Production servers no longer have to keep months of historical logs because the central server is already collecting them. That's one reason centralized log management is commonly used for troubleshooting, compliance, and incidentresponse. Step 1: Verify Journald and Rsyslog Are Installed journald and rsyslog both need to be running before logs can be forwarded to another system. Start with journald . systemctl status systemd-journald The service should report: Active: active (running) That tells you the local journal is running. rsyslog is next. systemctl status rsyslog You're looking for the same status. Active: active (running) An inactive service isn't running. A failed service tried to start but stopped because of an error. Both need to be fixed before log forwarding will work. Step 2: Configure Persistent Journald Storage Persistent journal storage keeps log messages after a system reboot. A reboot can interrupt an investigation just as quickly as a deleted log file. If the journal only exists in memory, everything recorded before the restart disappears with it. Creating /var/log/journal changes that. sudo mkdir -p /var/log/journal Restart journald after creating the directory. sudo systemctl restart systemd-journald From that point on, new journal entries are written to disk instead of temporary storage. journalctl can confirm the change. journalctl --disk-usage You'll see how much space the journal is using. If the output reports disk usage, journald is writing persistent logs. Step 3: Configure Journal Retention Journal retention controls how long journald keeps logs and how much disk space they can use. Persistent storage keeps logs after a reboot. Retention decides how much of that history stays available. Without limits, the journal keeps growing until it reaches the storage limits of the system. The retention settings live in the journald configuration file. sudo nano /etc/systemd/journald.conf You'll find several options that control how the journal stores and removes log data. Setting What it changes Storage= Chooses whether the journal isstored in memory, on disk, or both. Compress= Compresses older journal files to reduce disk usage. Seal= Adds integrity protection so changes to journal files can be detected. SystemMaxUse= Limits how much disk space persistent journals can use. RuntimeMaxUse= Limits how much memory runtime journals can use. MaxRetentionSec= Removes journal files after they've reached the configured age. A small server and a production server rarely need the same retention policy. A development system might only keep a few days of logs. A production server often keeps weeks or months, depending on available storage and internal requirements. One example looks like this. [Journal] Storage=persistent Compress=yes Seal=yes SystemMaxUse=2G RuntimeMaxUse=200M MaxRetentionSec=30day Each setting changes a different part of how the journal grows over time. SystemMaxUse keeps the journal from filling the disk. MaxRetentionSec removes older logs after they reach the configured age. Compress reduces the space used by older journal files, while Seal helps detect whether those files have been modified. Together, these settings keep the journal large enough for troubleshooting without allowing it to consume all available storage. Step 4: Configure Rsyslog to Receive Journald Messages journald already has the logs. The next step is getting those logs to rsyslog . Nothing leaves the server yet. Every log message is still local, even though persistent storage is enabled. Forwarding starts once journald begins passing its messages to rsyslog . Open the journald configuration file. sudo nano /etc/systemd/journald.conf Find this setting. ForwardToSyslog=yes On many Linux distributions, rsyslog already receives messages from journald through its default configuration. If ForwardToSyslog is disabled and rsyslog isn't receivingjournal entries, enable it by removing the leading # or adding the setting if it doesn't exist. Note If your distribution already forwards journal messages through another input module, enabling ForwardToSyslog=yes may create duplicate log entries. Restart both services after saving the file. sudo systemctl restart systemd-journald sudo systemctl restart rsyslog From this point on, new journal entries are handed to rsyslog as they're created. The logs still exist on the local server, but rsyslog can now process and forward them to another system. One quick check is enough before moving on. systemctl status rsyslog rsyslog should report active (running) . The next step is giving it a server to forward those logs to. Step 5: Configure a Central Rsyslog Server A central rsyslog server receives log messages from every Linux system that forwards logs to it. Open the main rsyslog configuration file: sudo nano /etc/rsyslog.conf Add the following lines to enable a TCP listener on port 514 : module(load="imtcp") input(type="imtcp" port="514") Before restarting rsyslog , check the configuration for syntax errors: sudo rsyslogd -N1 A successful check should end with a message indicating that the configuration validation completed without errors. Next, allow TCP port 514 through the firewall. On Ubuntu or Debian systems using UFW : sudo ufw allow 514/tcp On RHEL-family systems using firewalld : sudo firewall-cmd --permanent --add-port=514/tcp sudo firewall-cmd --reload Restart rsyslog : sudo systemctl restart rsyslog Confirm that the service is running: sudo systemctl status rsyslog Then verify that rsyslog is listening on TCP port 514 : sudo ss -lntp | grep ':514' The output should show a listening socket on port 514 . Important Do not expose an unencrypted rsyslog listener directly to the public Internet. Use a private network, firewall restrictions, or TLS-securedforwarding. By default, some Linux distributions write incoming remote messages to the same system log used for local events, while others use different destinations depending on the rsyslog configuration. For larger environments, many administrators create a dedicated directory such as /var/log/remote/ and store logs in separate folders for each hostname to simplify troubleshooting and log retention. Step 6: Configure Linux Clients to Forward Logs Every Linux client needs a forwarding rule before log messages can reach the central rsyslog server. This rule tells rsyslog where to send copies of locally generated log messages. The server is ready to receive logs. The clients still need to know where those logs should go. That's done with a forwarding rule in the rsyslog configuration. A basic forwarding rule looks like this. *.* @@192.168.1.100:514 Replace 192.168.1.100 with the address of your rsyslog server. The *.* selector forwards every facility and every priority. The double @@ sends log messages over TCP. A single @ sends them over UDP. TCP is the better choice for most centralized logging deployments. It confirms messages are delivered before sending the next one. UDP sends messages without waiting for a response. It's faster, but dropped packets stay dropped. Many production environments also encrypt remote logging with TLS. The forwarding rule stays the same. The rest of the Linux syslog configuration adds the certificates needed to secure the connection. Restart rsyslog after saving the configuration. sudo systemctl restart rsyslog New log messages now have somewhere to go. Tip Use @@ to forward logs over TCP. TCP is generally the better choice because it provides connection-based delivery and can detect transmission failures. A single @ uses UDP, which has less overhead but may lose messages without notifying the sender. Step 7: Verify Logs Reach the Central Server A test message confirms the entirecentralized logging pipeline is working. There's no reason to wait for a real event. Generate one instead. logger "LinuxSecurity centralized logging test" The message should appear in the local journal. journalctl -n 10 Search for the test message if it's easier to spot. journalctl | grep "LinuxSecurity centralized logging test" The same message should also appear on the central rsyslog server. On Debian and Ubuntu systems, check: grep "LinuxSecurity centralized logging test" /var/log/syslog On RHEL-family systems, check: grep "LinuxSecurity centralized logging test" /var/log/messages You can also search both common locations: sudo grep -R "LinuxSecurity centralized logging test" \ /var/log/syslog /var/log/messages 2> /dev/null Log file locations vary by distribution and rsyslog configuration. If you configure a custom template for remote logs, search that directory instead. Step 8: Secure Your Logging Infrastructure A centralized logging server holds data from every system that forwards logs to it, so it needs the same level of protection as the systems it monitors. Log forwarding moves copies of your logs across the network. Encrypting that traffic with TLS keeps log messages from being read or modified while they're in transit. That's especially important when remote logging crosses untrusted networks. The logs themselves need protection too. Limit access to the rsyslog server, use restrictive file permissions, and avoid giving unnecessary users access to log data. The fewer people who can modify log files, the easier they are to trust during an investigation. Some environments take another step and use immutable storage. Once the logs are written, they can't be changed without leaving evidence behind. That's useful when logs need to support compliance requirements or forensic investigations. Many organizations also separate logging traffic from normal application traffic. A dedicated logging network reduces unnecessary exposureand keeps large volumes of log data away from production workloads. The logging server should follow the same maintenance routine as any other Linux system. Rotate log files before they fill the disk, back up important log data, and test those backups regularly. A backup that has never been restored is only a backup on paper. Step 9: Troubleshoot Common Logging Problems Most centralized logging problems come down to a small number of configuration or connectivity issues. A journal that disappears after every reboot usually points to non-persistent storage. Check that /var/log/journal exists and confirm the retention settings in journald.conf . Logs that never reach the rsyslog server often trace back to the forwarding rule. Review the Linux syslog configuration, restart rsyslog , and confirm the service is still running. Firewalls block more logging traffic than most configuration mistakes. If the client can generate logs but the server never receives them, verify the listening port is open on both systems. Missing log entries usually mean looking at both ends of the pipeline. Check the local journal with journalctl first. If the event exists there but not on the central server, the problem happened after journald recorded the message. Incorrect timestamps make investigations much harder. Systems that don't share the same time source rarely produce logs that line up correctly. Keeping every server synchronized with NTP avoids that problem. Duplicate log entries usually mean the same message is being forwarded more than once. Review your rsyslog rules and look for overlapping forwarding configuration. A full disk eventually stops log collection. Check available storage on both the client and the rsyslog server, then review your journal retention and log rotation settings before services start dropping messages. Best Practices A few small configuration choices make centralized logging much easier to manage over time. Keep persistent journald storageenabled. Forward logs from every Linux system instead of only critical servers. Encrypt remote logging with TLS whenever possible. Limit access to the rsyslog server and its log files. Monitor available disk space on both clients and the logging server. Rotate logs before storage becomes a problem. Test log forwarding after configuration changes. Keep every system synchronized with NTP . Review your syslog configuration after major operating system updates. Conclusion You now have a basic centralized logging pipeline: journald records events locally, rsyslog forwards them over TCP, and the central server stores another copy for investigation and retention. Local logs remain useful for troubleshooting individual systems, while the central server gives you one place to compare events across your environment. Test forwarding after every configuration change, monitor available storage, and regularly confirm that incoming logs are being retained as expected. Plain TCP forwarding is a good starting point for a private network. For a production deployment, the next step is to secure the connection with TLS and organize incoming logs by hostname. . Explore how to implement centralized logging using Journald and Rsyslog for improved log management and analysis in Linux.. logging management, centralized logging, Linux log analysis, rsyslog configuration. . Dave Wreski
 Jul 15, 2026
•
Jul 15, 2026
• How to Learn Tips and Tricks
167
 network securityLinux administrationsecurity audit
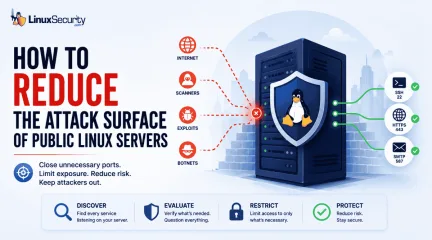
How to Find and Secure Exposed Services on Linux
Open ports have a way of accumulating over time. A test environment gets deployed and never removed. An administrative interface is exposed for troubleshooting and left in place. A database that was supposed to listen internally ends up reachable from the internet. . Attackers look for these mistakes constantly. Redis, Elasticsearch, MongoDB, Jenkins, and similar services still show up on internet-facing systems where they were never meant to be exposed. Sometimes it's a temporary change that becomes permanent. Sometimes a firewall rule was missed during deployment. Sometimes nobody realized the service was listening externally. The result is the same. A service intended for internal use ends up answering requests from anywhere. The first step is figuring out what's actually reachable. From there, it's usually obvious what belongs on the internet and what doesn't. Document Your Current State Before Making Changes Before disabling services or modifying firewall rules, establish a baseline of the system's current configuration. These records can help with troubleshooting, rollback planning, and future audits. Collect the following information: hostnamectl ip addr sudo ss -tulpn sudo lsof -i -n -P sudo systemctl list-unit-files --state=enabled sudo systemctl --failed Save the output to a secure location. At a minimum, you should document: Network interfaces and IP addresses Listening services and ports Enabled system services Existing firewall rules Server role and business purpose Security Tip Create a baseline immediately after provisioning a new server. Comparing future scans against a known-good state makes it easier to identify unexpected changes. How to Identify Exposed Services The first step in reducing the attack surface is understanding what is currently listening for connections. Using ss Modern Linux distributions include the ss utility, which is the preferred replacement for netstat . ss -tulpn Example output: Netid State Recv-Q Send-Q Local Address:Port tcp LISTEN 0 128 0.0.0.0:22 tcp LISTEN 0 128 127.0.0.1:3306 tcp LISTEN 0 128 0.0.0.0:8080 Key fields to review include: Protocol (TCP or UDP) Listening address Port number Associated process ID Executable name Pay particular attention to services in the LISTEN state that are bound to all interfaces. Using lsof To map open ports directly to processes: sudo lsof -i -n -P This command shows which applications own active network connections and listening sockets. Using netstat Many administrators still encounter systems that use netstat . sudo netstat -tulpn 2> /dev/null || echo "netstat is not installed" Although considered legacy, it remains common in documentation and troubleshooting workflows. Which Ports Should Raise Immediate Questions? Not every open port is a security problem. However, every exposed service should have a documented owner and business justification. The following ports frequently deserve additional review: Port Service Why Review It 22 SSH Direct internet exposure 21 FTP Legacy protocol with security concerns 23 Telnet Unencrypted remote access 3306 MySQL Often unintentionally exposed 5432 PostgreSQL Common cloud misconfiguration 6379 Redis Frequent attack target 9200 Elasticsearch Data exposure risk 27017 MongoDB Associated with numerous breaches 8080 Web/Admin Services Often forgotten after deployment An open port does not automatically indicate a vulnerability. Instead, ask: Who owns this service? Why is it exposed? Is internet access required? Can access be restricted? Ifnobody can answer these questions, further investigation is warranted. Determine Whether a Service Is Actually Needed Many production servers accumulate services over time as teams deploy software, perform testing, and forget to remove temporary components. Identify the process associated with a listening port: sudo ss -tulpn Example: LISTEN 0 128 *:8080 *:* users:(("java",pid=1234)) Inspect the process: ps -fp 1234 Then review the service: sudo systemctl status Ask the following questions: Is the application still actively used? Is it part of a supported workload? Does it need external connectivity? Can it be restricted to localhost? Is there a business owner? Unused services should be removed or disabled. Find Services Listening on All Interfaces One of the most common exposure issues occurs when applications listen on every network interface. Find services listening on all IPv4 interfaces: sudo ss -tulpn | grep "0.0.0.0" Find services listening on IPv6 interfaces: sudo ss -tulpn | grep "::" Compare these examples: 127.0.0.1:3306 and 0.0.0.0:3306 The first accepts connections only from the local host. The second accepts connections from any reachable network. For database servers, message brokers, and management interfaces, this distinction is often the difference between a secure configuration and an unnecessary exposure. Disable Unnecessary Services If a service is not required, disable it completely. For example: sudo systemctl stop rpcbind sudo systemctl disable rpcbind sudo systemctl status rpcbind Verify the service is disabled: sudo systemctl is-enabled rpcbind Confirm the listening port has disappeared: sudo ss -tulpn Removing unnecessary services not only reduces attack surface but also decreases maintenance and patching requirements. Restrict Services Instead of Removing Them Not every service can be removed. In many environments, the bettersolution is to limit where the service listens. MySQL # my.cnf bind-address = 127.0.0.1 Verify: sudo ss -tulpn | grep 3306 Why: Verify the change actually took effect. Expected result: 127.0.0.1:3306 not: 0.0.0.0:3306 PostgreSQL # postgresql.conf listen_addresses = 'localhost' Apply and verify: sudo systemctl restart postgresql sudo ss -tulpn | grep 5432 Why: Configuration changes without verification create support headaches. Expected result: 127.0.0.1:5432 Internal Web Interfaces listen 127.0.0.1:8080; This approach allows local applications to function normally while preventing external access. For many organizations, restricting exposure provides nearly the same security benefit as removing the service entirely. Audit Firewall Exposure A service may be listening, but that does not necessarily mean it is reachable. Review firewall policies and compare them against listening ports. Firewalld sudo firewall-cmd --list-all UFW sudo ufw status numbered iptables sudo iptables -L -n -v nftables sudo nft list ruleset Compare: Open firewall ports Listening services Intended application requirements Any discrepancy should be investigated. Verify Exposure from an External Perspective Internal checks alone do not provide a complete picture. Administrators should periodically perform scans from a separate host to see what external users can actually reach. Basic full TCP port scan: nmap -Pn -p- Identify service versions and common configurations: nmap -sV -sC Review results for: Unexpected open ports Service version disclosure Forgotten applications Legacy services This step frequently reveals exposures that internal reviews miss. Real-World Example Numerous Elasticsearch, Redis, and MongoDB exposure incidents have occurred because services intended for internal use were reachable from the internet due tofirewall, cloud security group, or binding misconfigurations. Commonly Overlooked Sources of Attack Surface Attack surface extends beyond traditional services. Forgotten Administrative Panels Review systems for: Jenkins Grafana Kibana phpMyAdmin Portainer Administrative tools often provide direct access to sensitive systems and should rarely be exposed publicly. Development and Debugging Services Look for: Node.js development servers Python development servers Java debugging interfaces Temporary testing environments These services are frequently deployed without security controls. Containerized Workloads Inspect running containers: docker ps docker port Depending on your environment, you may need sudo or membership in the docker group. Why: Many production environments still require root or Docker group membership. Cloud Metadata Services Review access controls for: AWS Instance Metadata Service (IMDS) Azure Instance Metadata Service Google Cloud Metadata Service Improper access controls can increase the impact of server compromise. Legacy Test Environments Old staging systems and proof-of-concept deployments often become forgotten attack vectors. Periodically inventory all externally reachable hosts and retire systems that are no longer required. Monitor Exposure Changes Over Time Attack surface management is not a one-time project. New software deployments, containers, updates, and configuration changes continually alter exposure. Regularly review listening services: sudo ss -tulpn Consider automated auditing tools such as: Lynis sudo lynis audit system OSQuery osqueryi "SELECT pid, port, protocol, address FROM listening_ports;" Why: Produces cleaner output and is more useful in a hardening workflow. Additional options include: OpenSCAP AIDE Scheduled Nmap scans Configuration management compliance checks Continuousmonitoring helps detect exposure drift before attackers do. How Often Should You Review Public Linux Systems? How often you should review public Linux systems depends on your risk profile, but they should be reviewed regularly and continuously monitored as part of attack surface management. Weekly Review new listening ports Check newly enabled services Validate firewall changes Investigate unexpected processes Monthly Perform a complete exposure audit Conduct external Nmap scans Review administrative interfaces Verify service ownership After Major Changes Always reassess exposure after: Software deployments Container updates Cloud migrations Infrastructure changes Major operating system updates The attack surface changes whenever the environment changes. Final Thoughts Most exposure issues aren't discovered during an incident response engagement. They're found later, when someone notices a service listening where it shouldn't be, a firewall rule that was never removed, or a system that changed over time without anyone revisiting the original configuration. Redis, Elasticsearch, MongoDB, Jenkins, administrative interfaces, internal dashboards, test environments. The technology changes, but the underlying problem tends to look familiar. Something that was meant to stay internal became reachable from somewhere it shouldn't. Public Linux systems rarely stay static for long. Services get deployed, containers come and go, firewall rules change, and cloud infrastructure evolves with them. Knowing what is exposed today is often more useful than knowing what was exposed six months ago. For more Linux hardening guidance, vulnerability coverage, and practical security administration tips, subscribe to the LinuxSecurity newsletter. Related Reading How to Harden SSH on Linux After Disabling Password Authentication Guide to Auditing UFW Firewall Rules on Long-Term Linux Environments UFW: Important HardeningPatterns for Long-Lived Linux Servers What is Nmap? How To Use It Effectively for Network Security Lynis Installation Guide: Comprehensive Security Assessments Linux Server Hardening Guide for Secure System Management . Attackers look for these mistakes constantly. Redis, Elasticsearch, MongoDB, Jenkins, and similar se. ports, accumulating, environment, deployed, never, removed. . Dave Wreski
Jun 10, 2026
•
How to Secure My Network

161
 network securitydata protectionegress filtering
Egress Filtering Primer for Monitoring Outbound Traffic
When it comes to firewalls, most people start with the easy part. A port is open or closed, and the rules match whatever service the host is running. Outbound traffic does not announce itself the same way. It stays quiet, and that quiet pushes it to the edge of most reviews. You only notice the gap when something unexpected leaves the network, and by then the system has been running with wide-open defaults for far longer than anyone meant. . You start to see the pattern once you look closely. A workstation reaches a domain no one recognizes. A small service sends data outward for reasons that are not clear at first. None of this needs a sophisticated attack. It usually comes down to missing outbound controls and a bit of egress traffic that never got the same attention as the inbound side. This is where egress filtering fits. It is simply the practice of shaping and reviewing what leaves the host, but it rarely shows up in early firewall training. Beginners learn how to protect the front door and skip the part where the system talks back out. The ideas in this guide stay at that introductory level. We’ll explain the same problems every admin eventually runs into, just easier to fix before they turn into a cleanup job. What Is Egress Filtering and How Does Outbound Control Work? Egress filtering is the part of the firewall that decides what’s allowed to leave the host. People usually picture inbound checks when they think of a firewall, so the outbound side ends up quiet and a bit neglected. Once you start watching real egress traffic, it begins to make more sense. Some of it belongs to the system, some to regular application updates, and a small slice comes from processes no one expected to be talking to the network at all. A simple way to frame it is to look at the types of outbound traffic you’ll see on almost any Linux system: System services reaching out for DNS or time sync. Applications pulling updates or checking for new versions. Unexpected connections from tools,scripts, or background jobs. Outbound rules sit on their own axis. They’re not guarding an exposed service. They’re shaping which processes are trusted to initiate a connection in the first place. That’s why a clean egress policy is valuable. It tells you which applications are meant to talk outward and highlights anything that shouldn’t be generating packets at all. Before beginners start tuning rules, it helps to understand how packets behave as they leave the host. The fundamentals still apply, and the overview in our packet filtering basics guide offers a straightforward foundation when you’re lining up outbound flow with the rest of the firewall model. Why Do Outbound Rules Matter in Egress Filtering? Malware doesn’t need much help once it lands. Most of it tries to call out right away, and on a lot of systems, that path is wide open because no one has reviewed the outbound side in years. Egress filtering doesn’t block every possibility, but it trims enough room to make those callbacks slower, noisier, and easier to catch durin g routine monitoring. Not every outbound leak is malicious. In real deployments, you see drift long before you see an attack. A service starts reaching domains it no longer needs. An old script pushes data to an endpoint that’s been shut down. Small things like that add up, and when the rules aren’t managed, those stray connections blend into normal traffic. Troubleshooting gets harder because you’re sorting through behavior no one expected to see. The real risk is the blind spot that forms around unrestricted outbound access. A compromised process doesn’t need creativity when the host can talk to anything. Exfiltration doesn’t need a clever detour if plain HTTP already slips through without review. Tightening outbound defaults isn’t a paranoid move. It’s a way to keep the surface predictable so anything unusual stands out quickly. For readers new to how these layers fit together, the overview in our Linux firewall basics guidehelps frame why outbound rules deserve the same level of discipline as the inbound side. How Does Egress Filtering Operate in the Firewall Path? Once a process sends an outbound packet, it hits a sequence of checks that decide whether it leaves the host or gets dropped. The first rule that matches is the rule that wins, and that’s where people get tripped up. One misplaced allow can undo an entire outbound policy, and the firewall won’t complain because, technically, it followed the instructions you gave it. It helps to break the path into the pieces beginners run into most often: Stateful checks that track established connections Stateless rules that judge each packet on its own Netfilter chains that decide how packets move through OUTPUT and POSTROUTING Stateful filtering smooths out a lot of normal traffic. If a connection is already established, the firewall usually lets the return packets through without rechecking every rule. Stateless filtering is different. Each packet stands alone, which is why protocols like UDP can behave in ways that surprise new admins. All of this runs through the netfilter workflow that handles Linux packet processing. Once you understand where each checkpoint sits, troubleshooting gets easier. You’re not guessing which rule fired. You’re isolating the one place in the chain where the packet didn’t behave the way you expected. If you want a deeper look at why rule order breaks outbound filtering so easily, the firewall rule ordering basics guide will cover that in more detail when it’s published. Practical Examples of Egress Filtering for Beginners You start to see the value of egress filtering when everyday services brush against outbound rules. DNS is usually the first place it shows up. A host that sticks to two trusted resolvers behaves in a predictable way, and anything outside that pattern becomes interesting. It also shuts down a fair amount of quiet tunneling activity that beginners don’t notice until they review logs. SMTP tells a similar story. Outbound mail belongs on a relay, not on random applications trying to deliver messages straight to the internet. Once you tighten that path, stray mail traffic comes into view. A workstation that was never meant to send mail will hit a deny, and that denial becomes the clue you needed. Package updates fit the pattern, too. A system should only reach the repositories it actually uses. When it wanders off to an unapproved mirror, troubleshooting turns into guesswork. A narrow set of outbound rules keeps the update path simple, and the errors make more sense when something goes wrong. The same logic applies to applications that should never reach external networks in the first place. When a local tool suddenly starts firing outbound HTTP requests, a deny entry in the logs gives you a clean starting point instead of silent traffic leaving the host. Beginners often work through this with UFW, and the UFW basics material gives a clear look at how outbound rules behave there. It helps set expectations before you start trimming policies and watching which services still try to leave the box. How Beginners Should Think About Outbound Restrictions You notice the shift in thinking once you stop treating outbound rules like an afterthought. Most people are comfortable opening what they need and leaving the rest untouched. That pattern works for inbound traffic, but it falls apart when you watch how a system behaves on its way out. Egress filtering asks a different question. It asks what the machine is meant to reach, not what it could reach if everything were left open. A beginner gets more traction when they start framing outbound access around intent. That single change cuts a lot of noise before any rules go into place. It also forces a closer look at which applications actually need the network. Older deployments tend to collect services that talk outward for reasons no one remembers, and mapping those patterns is useful in its own right. A few habits help anchor thatmindset: Define the destinations a host truly depends on Review which applications initiate outbound traffic during normal work Tighten broad allows so unexpected connections stand out immediately Once you reduce the number of allowed paths, the stray traffic becomes easier to see. A system that was never supposed to generate egress traffic becomes obvious the first time it tries. The goal is not to make the host fragile. It is to shape a baseline that is steady enough to reason about, so anything outside that baseline shows up quickly. Beginners sometimes worry that outbound rules will break half their workflows. That worry fades once they realize how little outward access most workloads need. You are not chasing perfection here. You are building a predictable outward path that reflects the way the system is actually used. How Egress Filtering Fits Into a Healthy Firewall Setup Inbound rules cover what everyone sees first, but they only explain part of the story. You start to understand the full picture once outbound controls sit beside them. Egress filtering fills in that missing half. When both directions line up, the firewall stops feeling like a chain of small exceptions and starts behaving like a single flow you can reason about. That steadiness helps later when you are tracing an odd connection or trying to explain why a host behaved in a way no one expected. The mechanics are still familiar. Outbound packets move through OUTPUT, and then POSTROUTING, and each step decides whether the packet leaves the system. When those rules match how the host is supposed to behave, troubleshooting becomes more focused. Instead of chasing a long list of false leads, you are isolating the packet that does not fit the pattern. The work feels closer to a process of elimination than a guessing game. With time, outbound control becomes another piece of regular hygiene. You read egress traffic the same way you read inbound exposure, and the rules stay honest because they describe realworkloads rather than the assumptions that were in place years ago. That habit makes the whole firewall setup steadier, especially when new services appear quietly or when an environment shifts under load. If you want to see how this ties into diagnostic work, our firewall troubleshooting steps outline a method that matches how most teams approach incident cleanup in practice. Common Beginner Mistakes in Outbound Filtering Most of the trouble with egress filtering shows up long before a packet reaches the wire. You start to see the pattern once you look at how rules are ordered. A single allow placed too early stops later denies from ever running, and nothing in the logs complains because the firewall followed the rule exactly as written. The mistake only becomes visible when outbound traffic appears that no one expected to see. Default policies add their own weight. An outbound policy set to allow feels simple at first, but it pushes people into writing exceptions only when something breaks. Months pass, sometimes years, and the rule set turns into inherited behavior. You find hosts reaching DNS servers that were never approved or pulling updates from mirrors that no one actually uses. None of it was intentional. It just grew in the gaps. The common pitfalls tend to cluster in a few places: Rules are ordered in a way that allows too much too early Outbound defaults are set to allow, which hides drift in behavior Missing DNS or update server entries that turn into confusing failures Assumptions that outbound traffic is harmless by default Logging is disabled to keep noise down, leaving no evidence when you need it DNS trips people up more than they expect. If the allowance is not clear, the failure looks like a flaky resolver rather than a blocked query. Update paths behave the same way. A system reaches for a repository, gets denied, and throws an error that does not point anywhere near the firewall. Another pattern is the belief that outbound equals safe. Malwarerelies on that gap. When a host can talk to anything, it does not need clever exfiltration. A denied packet with a clean log entry is far easier to work with than quiet traffic slipping through an open default. Logging usually sits at the bottom of the stack, but it changes the experience of troubleshooting. Beginners often disable it to cut noise. The quiet feels tidy until something odd happens. Then there is nothing to trace. A few targeted log rules give you enough signal to see what is happening without drowning the system in detail. FAQ: Egress Filtering for New Linux Users Does UFW support outbound filtering? Yes, and it works well enough for most small deployments. UFW exposes outbound rules in a way that’s easy to reason about, which is why beginners lean on it. If you want a quick refresher on how UFW structures those controls, our guide on choosing a Linux firewall gives a broad comparison of common Linux firewall tools. It helps frame where UFW fits and when you might outgrow it. Should home users bother with egress filtering? If the system runs exposed services or handles mail, yes. Even on a workstation, limiting egress traffic can highlight unwanted connections from background applications. The policy doesn’t need to be strict. A few targeted rules catch most of the noise without adding work. Will this break updates? Only if the update servers aren’t accounted for, most update failures traced to egress filtering come from missing allow rules, not from over-tightening. Once the correct repositories are listed, updates run cleanly, and the outbound path stays predictable. Do I need complex rules to make this worthwhile? Not at the start. A simple outbound baseline catches far more than people expect. Over time, the policy grows around the actual behavior of the system instead of imagined risks. That makes egress filtering easier to maintain and easier to audit when workloads shift. Next Steps After Learning Egress Filtering Once the outbound side isunder control, the rest of the firewall picture becomes simpler to manage. You start seeing how each rule fits into the larger flow, and the policy becomes something you can adjust without worrying about hidden side effects. That clarity helps when environments change or when a new service lands on the host and needs to be folded into the existing model. A good next move is to revisit the inbound rules with the same discipline. Look for places where the policy drifted or where exceptions piled up during past troubleshooting. With egress filtering in place, the contrast between expected and unintended traffic becomes sharper, which makes cleanup faster. From there, broaden the view. Packet flow fundamentals, logging discipline, and routine audits form the rest of the baseline. These pieces reinforce each other. When they stay aligned, the firewall stops feeling like a set of patches and starts functioning like a predictable system you can rely on. When it comes to firewalls, most junior sysadmins start with the inbound side because it feels tangible. . Ingress protection enhances cybersecurity by preventing unapproved incoming traffic that could threaten internal systems.. Egress Filtering, Network Safety, Outbound Protection, Cyber Hygiene, Data Security. . Mak Ulac
Jan 22, 2026
•
How to Secure My Firewall
161
 network securityfirewallnetworking
Key Considerations for Selecting a Linux Firewall Solution (Understanding the Types of Firewalls)
Choosing a firewall on Linux looks simple until you try to match a tool to a real environment. Most teams already understand the basic types of firewalls, but the gap between a conceptual model and day-to-day usability can be wider than expected. A tool that feels lightweight on a workstation can become restrictive on a production host. Another that works well in distributed environments might be overkill when all you need is a small ruleset and predictable behavior. . Linux offers several mature options, each shaped by different assumptions about how administrators work. UFW favors clarity. iptables reflects years of legacy deployments. nftables streamlines policy design and replaces older components. firewalld tries to make large or changing systems easier to manage. None is universally the best Linux firewall, but each is the best fit for someone. This guide focuses on how to evaluate those differences without getting buried in packet flow charts or rule syntax. Our goal here is simpler. Identify what matters when selecting a firewall, explain how these tools differ in practice, and give you enough clarity to choose the one that aligns with your environment, your workflow, and your tolerance for complexity. What Do Firewalls Do in Linux? A firewall on Linux has one job. It decides what gets in, what goes out, and what stays on the cutting room floor. The mechanics vary across the different types of firewalls, but the outcome is the same. You are defining the boundaries of a system and the conditions under which traffic is allowed to cross them. Most teams working with Linux already understand this, yet it helps to reset the frame before comparing tools. A firewall is not a cure-all, and it is not a substitute for sound architecture. It is a policy enforcement point that happens to sit very close to the operating system. The value comes from its consistency. If the rules are clear and the structure is predictable, the host behaves the way you expect. Overview of the Main Linux FirewallOptions Most administrators choose between four tools when they evaluate the best Linux firewall for a given environment. The differences are not subtle, but they are also not complicated once you look at how each one expects you to work. The goal here is not to walk through syntax or rule construction. It is to explain how each option approaches policy control so you can match the tool to the way your team operates. UFW: A Simple Firewall Option for Beginners UFW was designed for people who want to express intent without wrestling with low-level primitives. It offers a clean, high-level interface that makes sense in smaller environments, especially when the rule set is short and the workflow is predictable. Many administrators use it on laptops, developer machines, and lightweight servers because it removes friction without hiding too much. Anyone who needs a quick refresher on its behavior can use the UFW basics guide available at linuxsecurity.com. iptables: A Legacy Linux Firewall Framework iptables still appears everywhere. Long-running fleets, older distributions, and embedded systems rely on it because it has been the default for so long. It remains a stable choice when compatibility matters more than modernization. The tradeoff is that it mirrors the structure of the underlying packet filter, so it expects you to understand how traffic moves through those chains. If you want to revisit the fundamentals behind that model, our article on packet filtering basics gives helpful context without diving into deep engineering detail. nftables: The Modern Successor for Linux Firewall Management nftables replaces several older components and introduces a cleaner rule model that better reflects how administrators think about policy. It reduces duplication, organizes logic more efficiently, and ties long-term maintenance to a single, consistent framework. Teams planning future deployments tend to favor it because it avoids the pitfalls that accumulated around legacy tooling. Beforeworking with it, many administrators find it useful to review material on rule structure and ordering. firewalld: A Zone-Based Firewall Manager for Dynamic Environments firewalld takes a service-oriented approach. Instead of writing rules directly, you work with zones and service definitions that can shift with the system. This approach fits hosts that change roles or sit in environments where network conditions vary. It also makes sense in data centers or virtualized platforms where interfaces and services do not stay static. When something behaves unexpectedly, troubleshooting often comes down to verifying which zone is active and how the service definitions map to the rule backend. Those who want to revisit common diagnostic steps can look at the firewall troubleshooting steps overview at linuxsecurity.com for context. Strengths and Weaknesses of Firewalls for Beginners When people compare the types of firewalls on Linux, they often get lost in syntax, even though the real differences show up in how these tools frame policy. Each one sets its own expectations for structure, clarity, and scale. Looking at those factors side by side helps you see why a tool may feel intuitive in one setting and awkward in another. Some firewalls focus on abstraction. UFW falls into that category. It presents intent through a simplified interface, which works well when your rules are short and the system does not change much. The advantage is speed. You can express policy without parsing long tables of chains or translating a decision into multiple rule entries. The tradeoff is that you have limited visibility into the underlying logic, which can matter later if you begin to stack more complex conditions. Others favor granularity. iptables is the clearest example. It exposes the structure of the packet filter directly, so your policy ends up expressed in a sequence of tightly scoped rules. This approach appeals to administrators who want to see every step of the decision path. It also scales in ways simpleinterfaces cannot, but it carries a cost. The more detailed the policy becomes, the harder it is to follow the flow unless you are already comfortable with the underlying model. Tools like nftables and firewalld sit between these extremes. nftables streamlines logic and reduces duplication, which helps when rulesets grow or when multiple teams maintain the same policy. firewalld organizes behavior through zones and services, which works well in changing environments where interfaces and requirements shift. Both tools reward administrators who value organization and long-term maintainability over step-by-step detail. Understanding these differences helps you set realistic expectations. A tool that feels accessible today might become restrictive when your environment changes. Another that seems complex at first might be the only option that handles the scale or clarity you need later. The next section gets into how to evaluate those factors when choosing the best Linux firewall for your situation. How Do I Choose the Right Linux Firewall? Selecting the best Linux firewall is less about feature lists and more about how each tool fits the way you already manage systems. Administrators rarely choose a firewall in isolation. They choose it in the context of their workflow, their operational habits, and the level of complexity they are willing to support long term. One of the simplest ways to narrow the field is to look at your comfort level with networking concepts. If you want high-level control without interpreting detailed rule structures, UFW usually feels natural. It gives you fast results and predictable behavior, which is why many teams use it on smaller servers and individual workstations. Your environment matters just as much. Servers with a static role often do fine with straightforward tools. Systems that shift between networks or services benefit from the zone-based model firewalld uses, since it adapts more easily when interfaces move or when new roles come online. In largerdeployments, especially those that span multiple hosts, nftables tends to stand out because it organizes policy in a cleaner way and avoids the duplication that creeps in with legacy tooling. Some administrators need more than simple allow or deny decisions. They want consistent outbound control or detailed filtering of egress traffic. If that is part of your threat model, you will want to factor it into your choice. If you want a clear explanation of how outbound control works, you can reference the Egress filtering basics guide at linuxsecurity.com. Maintenance is another practical consideration. Policies tend to grow over time. A ruleset that starts small can evolve into something dense after a few service additions or operational changes. If your team expects to revisit the firewall regularly, choose a tool that keeps rules readable as they expand. nftables and firewalld often age better in that respect, although the right choice still depends on how your team writes and reviews policy. No single tool solves every use case. The decision comes down to how much detail you want to manage, how often the system changes, and how you plan to maintain the rules over the life of the host. The goal is not to memorize internal mechanics. It is to choose the firewall that aligns with your environment and reduces the friction your team deals with day to day. Common Beginner Misunderstandings When Choosing Among Types of Firewalls People run into the same predictable issues when they compare the types of firewalls on Linux. Most of these misunderstandings come from expectations shaped by older deployments, half-remembered tutorials, or outdated advice. The most common patterns include: Thinking iptables is obsolete. nftables replaces several legacy components, but iptables is still everywhere. Teams keep it because the behavior is predictable and because migrations take time. Treating it as deprecated creates the wrong assumptions when you’re supporting long-running hosts. Assuming UFW isinsecure because it simplifies the interface. Its security posture comes from the policies you apply, not the level of abstraction. UFW remains popular on workstations and smaller servers because it reduces configuration drift without weakening control. Believing firewalld is only for servers or large deployments. Its zone-based structure helps on any host where interfaces or roles change. Many unexpected decisions come from the rule order rather than the tool itself. If you want a clearer picture of how ordering affects outcomes, see our firewall rule ordering basics guide. All of these misunderstandings share a pattern. They focus on the surface of the tool instead of the policy beneath it. Once the interaction between rules feels familiar, the differences among these firewalls become easier to interpret. Our Final Thoughts on What Matters Most When You Compare Linux Firewalls Most firewall decisions get easier once the core ideas feel familiar. All of the major Linux tools work from the same principles. They inspect traffic, compare it against the rules you define, and enforce a policy that reflects your expectations. The structure changes from tool to tool, but the intent stays constant. A clear understanding of those fundamentals is usually what prevents confusion later, especially when a system behaves in a way that does not match your first impression. If you want a closer look at how Linux evaluates traffic, you can explore our article on Linux firewall basics . This guide keeps the focus on selection rather than mechanics, which is usually the part that stalls teams. Once you know the boundaries you need to enforce, the rest of the work comes down to picking a tool that represents those policies in a way you can maintain. Once you know how your environment handles traffic, the choice between UFW, iptables, nftables, and firewalld turns into a practical evaluation instead of a theoretical one. Each option fits a particular workflow and a particular tolerance forcomplexity. That is why most teams refine their choice as their infrastructure grows. What works for a single host may not scale in a multi-tenant setup, and what feels heavy on a workstation might be exactly what you want on a production system. . Linux offers several mature options, each shaped by different assumptions about how administrators w. choosing, firewall, linux, looks, simple, until, match, environment. . Anthony Pell
Dec 03, 2025
•
How to Secure My Firewall
167
 security advisorynetwork securityLinux administration
Improving SSH Security on Linux with the Help of Fail2Ban Tool
SSH is an indispensable part of Linux administration, enabling access to remote servers and desktops for admin tasks. Although SSH offers more secure credentials than what it replaced (Telnet), its security alone cannot guarantee safe operations. For instance, an attacker could launch a brute-force attack on your machine by constantly attempting to login until he or she gets the correct credentials. . Luckily, fail2ban software provides an effective solution to such issues by automatically blocking IP addresses that attempt to login, effectively protecting against these login attempts. Today, I'll share a tutorial that helped me understand how to install and configure fail2ban on my Ubuntu desktop. But first, let's examine the security limitations of SSH and how fail2ban can help you overcome them to improve Linux network security. What Are the Security Limitations of SSH? Secure Shell (SSH) has long been considered a standard method for secure remote administration, providing encryption for data in transit and granting secure server access. But SSH doesn't come without limitations and risks. An ongoing challenge associated with SSH is its vulnerability to various forms of attack if not properly secured. Brute force attacks remain an ever-present danger. Attackers attempt multiple login attempts at once to guess passwords and gain entry. SSH configurations that use defaults or weak passwords leave systems vulnerable to attack. Another limitation of SSH key management lies with poor or inactive SSH keys. Unrotated or poorly managed SSH keys allow attackers unwarranted access after passwords or accounts have been changed or disabled, underscoring the importance of managing a secure SSH key lifecycle. SSH's flexibility can be invaluable in many situations; however, its expansive capabilities can inadvertently widen the attack surface. Features like port forwarding and X11 forwarding may allow attackers to bypass network security measures like firewalls to tunnel traffic or gain access toservices intended to remain unavailable from outside. For this reason, meticulous configuration and frequent review of SSH settings are vital in maintaining a secure implementation. What Is fail2ban & How Does It Help Secure SSH on Linux? Fail2Ban is an open-source software tool that protects Linux systems against brute-force attacks and other common network attacks. It works by monitoring log files (such as those for SSHd and Apache) to detect patterns indicative of malicious activities. When too many failed login attempts or suspicious activity occurs from one IP address within a set period, Fail2Ban will update firewall rules to temporarily or permanently block that IP address - providing proactive protection from unauthorized access by temporarily or permanently banning IPs involved in illicit or suspicious activities. Fail2Ban on Linux systems enhances the security of services exposed to the internet, such as SSH, FTP, and web servers. Fail2Ban can act as an essential layer in an overall security plan by blocking automated and manual intrusion attempts, protecting servers against vulnerabilities that attackers might exploit. Fail2Ban can provide extra defense against automated attacks that use brute-force or dictionary attacks against systems running Linux systems and threaten their resources and password strength. By making it harder for attackers to gain unauthorized entry through these methods, Fail2Ban strengthens overall system security while helping maintain the integrity and availability of these crucial assets. . Boost your SSH defense using fail2ban. Discover the setup process and safeguard against brute-force intrusions successfully.. Fail2Ban Setup, SSH Protection, Network Attack Prevention. . Anthony Pell
Aug 21, 2024
•
How to Secure My Network
167
 network securitysecurity assessmentsecurity tools
Boost Linux Pentesting with BlackArch Linux's Extensive Tools and Features
Penetration testing (or pentesting) plays an integral part in cybersecurity. Ethical hackers employ this practice to simulate cyberattacks against systems, networks, or applications to locate vulnerabilities before malicious hackers do. The goal of pentesting is identifying and repairing security weaknesses. . Pentesters often rely on operating systems designed for security assessment, such as BlackArch Linux , ParrotOS , and Kali Linux . In this article, we'll focus on BlackArch Linux, outlining its benefits and discussing its prominent use cases alongside its counterparts, ParrotOS and Kali Linux. We aim to highlight how BlackArch Linux could enhance your Linux pentesting and network security efforts while helping you decide which secure Linux distro best fits your needs. Pentesting: What Is Its Importance and Its Purpose? Pentesting serves as a digital military exercise. It prepares organizations to deal with real-world cyber threats by identifying vulnerabilities. By strengthening defenses against potential attacks, this practice helps ensure data integrity and security. Pentesting should not focus on finding and fixing bugs but should explore an organization's overall security posture. Without effective pentesting, organizations remain vulnerable to data breaches, malware infections , and other cyberattacks that could have devastating consequences. What Is BlackArch Linux & What Are Its Main Benefits for Pentesters? BlackArch Linux is an advanced Arch Linux distribution designed specifically to meet the needs of security researchers and ethical hackers. What sets BlackArch apart is its vast repository and minimalist approach, coupled with over 2,700 security tools designed to aid security researchers in their work. These tools cater to every facet of pentesting, from vulnerability assessment and cryptography to reverse engineering and forensic analysis. Pentesters rarely need to search elsewhere for additional software solutions. There are various advantages associatedwith its Arch Linux base, including: Minimalism: Arch Linux is known for its elegance and minimalism. BlackArch adheres to this philosophy by providing an efficient operating system tailored to user needs. Customizability: BlackArch's Arch foundation makes it highly configurable, allowing pentesters to tailor their environment to their specific requirements. Rolling Release Model: Arch Linux and BlackArch Linux adhere to a rolling release model to ensure the up-to-dateness of tools and system components. Efficiency: BlackArch Linux was specifically created to be lightweight and efficient, which makes it essential for pentesters who operate in resource-constrained environments like virtual machines or older hardware. BlackArch's speed and efficiency allow users to complete their tasks quickly. Community and Documentation: At first glance, BlackArch may seem to lag in community support due to its smaller user base than Kali Linux or ParrotOS; however, that is far from true. Its active community remains strong while offering comprehensive documentation even for beginners in Arch. Comparing BlackArch Linux, ParrotOS, and Kali Linux BlackArch Linux, KaliLinux, and ParrotOS are all excellent options for Linux pentesters. That said, each has its own strengths and limitations: Ease of Use: Kali Linux is designed with beginners in mind, boasting an intuitive user interface. Community and Support: BlackArch offers more comprehensive options in terms of toolset capacity than other secure Linux distros. Security Focus: ParrotOS' primary security focus is privacy and sandboxing, featuring tools like Anonsurf for anonymizing network connections and isolating applications. Flexibility: ParrotOS caters to pentesting, forensic analysis, and secure software development projects. User Experience: BlackArch Linux offers a more user-friendly experience that is appealing to newcomers and intermediate users. Though its learning curve may be steeper dueto Arch Linux as its foundation, its benefits outweigh these drawbacks substantially. BlackArch is an efficient, lightweight solution for ideal resource management in environments with limited resources. Here are its primary use cases. Security Assessments: BlackArch Linux provides everything needed for comprehensive security assessments, from surveillance and scanning to exploiting and reporting. Its toolset caters to every stage of pentesting, from the initial survey to full exploitation and reporting. Research and Development: BlackArch is ideal for security researchers and developers working on new exploits or tools. Its vast repository offers abundant resources for security research and tool creation. BlackArch also provides tools for post-incident investigations, making it suitable for post-pentesting investigations. Our Final Thoughts on Improving Linux Pentesting with BlackArch Linux With cybersecurity constantly morphing and shifting, having access to appropriate tools and platforms is critical. BlackArch Linux is an exceptional choice among pentesting platforms thanks to its vast tool repository, Arch Linux core OS base platform, and lightweight nature - an ideal combination for pentesters. Although BlackArch may require more effort when learning than Kali Linux or ParrotOS due to its steep learning curve and a wide array of customizable features compared to those two alternatives, its customizability, efficiency, and breadth of tools make it invaluable for experienced security professionals. Whether conducting comprehensive security assessments, developing exploits, performing forensic analyses, or performing forensic investigations, BlackArch Linux provides a robust and versatile environment suitable for performing these activities and more! You can learn how to install BlackArch Linux and use the pacman package manager in the tutorial linked below. . BlackArch Linux is a potent OS tailored for penetration testing, featuring over 2700 tools for comprehensive securityresearch and vulnerability assessment. BlackArch Linux, Pentesting Tools, Ethical Hacking Techniques, Linux Security Assessment. . Brittany Day
Jul 24, 2024
•
How to Secure My Network
162
 network securityubuntuprivacy protection
Configuring OpenVPN Securely On Ubuntu For Enhanced Privacy
Virtual private networks, or VPNs , are essential for any Linux user who values privacy. By establishing a secure VPN connection, you can protect your device's IP address as well as encrypt the internet traffic between yourself and the VPN server. . Each VPN protocol has its pros and cons. The guide linked below will show you how to set up a secure OpenVPN connection on Ubuntu. . Every VPN protocol carries its strengths and weaknesses. Discover how to configure a robust WireGuard connection to safeguard your anonymity.. OpenVPN Setup, Ubuntu VPN, Network Security, Protect Privacy, Linux VPN. . Dave Wreski
Apr 19, 2024
•
How to Strengthen My Privacy
167
network securitysoftware releasesecurity toolKali Linux 2024.1 Release: New Tools and Enhanced Security Features
Kali Linux recently unveiled its first release of 2024, version 2024.1 , packed with new features that are both promising and intriguing for security practitioners and Linux enthusiasts. Kali Linux is renowned for its robust security testing capabilities, the update showcases notable enhancements such as a Micro Mirror Free Software CDN, a theme refresh, desktop environment changes, NetHunter updates, and introducing four new tools. With a focus on ethical hacking and penetration testing , Kali Linux stands out as a powerful distribution that caters to various aspects of cybersecurity. . What Notable Updates and Features Can I Expect in Kali Linux 2024.1? The introduction of the Micro Mirror Free Software CDN, aimed at strengthening the network of community mirrors for Kali Linux, signifies a strategic move towards optimizing bandwidth distribution for essential projects within the Linux community. The concept of Micro Mirrors, aligned with hosting highly demanded projects and offering increased bandwidth, highlights the project's commitment to efficient resource allocation. However, questions arise about the long-term impact of this new infrastructure on the overall ecosystem of open-source software distribution. The 2024 Theme Refresh introduces aesthetic enhancements to the user experience by revamping the interface and key elements such as the login screen and desktop wallpapers. While these updates enhance visual appeal and usability, it prompts reflection on the importance of balancing functionality with design in security tools to ensure a seamless user experience without compromising on core capabilities. Desktop Environment Changes The upgraded Xfce desktop brings a streamlined approach to managing VPN IP addresses, allowing users to copy their IP addresses with a single click. This user-friendly addition enhances productivity and workflow efficiency, underscoring Kali Linux's commitment to user convenience. Additionally, integrating eye-of-gnome (eog) image viewer withLoupe on the Gnome desktop indicates a shift towards GTK4 applications and improved file management efficiency with the latest Nautilus file manager version. New Tools and NetHunter Updates Adding new tools such as blue-hydra, opentaxii, readpe, and snort provides cybersecurity professionals with expanded capabilities for Bluetooth device discovery, taxii server implementation, Windows PE file manipulation, and network intrusion detection. Concurrently, updates to the Kali NetHunter platform to support Android 14 and introduce new attack features enhance the mobile penetration testing experience. These advancements raise consideration regarding the evolving landscape of cybersecurity threats and the necessity for cutting-edge tools to combat emerging vulnerabilities. Our Final Thoughts on the Kali Linux 2024.1 Release The Kali Linux 2024.1 release significantly fortifies the platform's capabilities for security researchers, pentesters, and Linux admins. The blend of aesthetic improvements, enhanced functionalities, and new tools underscores Kali Linux's dedication to staying at the forefront of the cybersecurity domain. As users delve into the latest release, they are invited to explore new cybersecurity testing and defense possibilities, shaping the future of ethical hacking and penetration testing practices. Have you given Kali Linux 2024.1 a try? Connect with us on X @lnxsec - we'd love to hear your thoughts! . Delve into the latest advancements in Kali Linux 2024.1, highlighting improved utilities alongside streamlined design modifications aimed at enhancing network defense.. Kali Linux 2024.1, network security, penetration testing tools, software enhancements. . Anthony Pell
Mar 04, 2024
•
How to Secure My Network

Get the latest News and Insights
Get the latest Linux and open source security news straight to your inbox.
Community Poll
Should Linux servers automatically install security updates?
Search Topics
Powered By

Linux Security - Your source for Top Linux News, Advisories, HOWTOs and Feature Releases
QUICK LINKS
subscribe to newsletters!
Like staying secure? So do we.
Sign up for updates, tips, and alerts!