Explore top 10 tips to secure your open-source projects now. Read More
×


Stay Ahead With Linux Security Features
 open-source infrastructure risk
 Security scanners flag exposed API keys in public repositories every day. The initial response is usually predictable: delete the commit, revoke the credential, and move on. That’s a mistake. . In a real Linux environment, an API key never stays in one place. By the time it hits a public repo, it’s already everywhere. It’s in the CI/CD pipeline. It’s in your container registry. It’s in the build logs. It’s in the backups. Git makes this worse because the history never dies. Deleting a file in...
 Jul 11, 2026
 open-source rootkit
 Most of us think of Linux rootkits as ancient history—the stuff of 90s hacking forums and clunky malware that would crash your system if you looked at it the wrong way. But if you think they’ve gone away, you’re mistaken. They’ve just gotten smarter. . Modern attackers aren't using the noisy tools of the past. Today’s threats are surgical. Many of today’s most advanced Linux rootkits operate at the kernel level or abuse legitimate system features to blend in with normal traffic. They’re...
Jul 09, 2026
 security advisory hardening
 A 16-year-old KVM vulnerability recently hit the news, and honestly? It’s a healthy dose of reality. We like to think of our hypervisors as these impenetrable walls, but this is a reminder that VM isolation isn't a permanent guarantee. Even in the most mature Linux virtualization stacks, you’ve got code paths that haven't been touched in over a decade, just waiting for the right researcher to pull on the wrong thread. For those of us running KVM hosts, this isn't just about grabbing the latest...
Jul 07, 2026
 security advisory linux
 If you think you know what’s running on your Linux host, you’re probably wrong. Not because you’re bad at your job—but because the kernel is lying to you. . I remember the first time I saw a kernel-level rootkit in the wild. We were debugging a performance spike on a cluster of web servers. Everything looked fine. top showed nominal CPU usage, ps listed the expected worker processes, and our security agent—a standard EDR tool—reported that the system integrity was "Green." But the network...
Jul 02, 2026
 network security threat detection
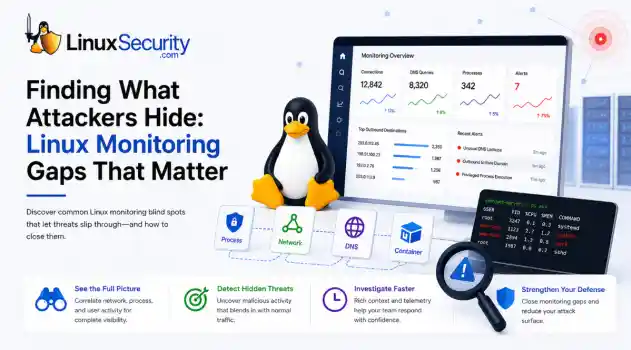
 If you’re relying on standard network logs to protect your Linux infrastructure, you’re flying blind. Most organizations believe they have network security monitoring because they’re capturing traffic, but they’re actually just collecting noise. Real security—the kind that stops an attacker—happens in the gaps between the network, the process, and the host. When an attacker breaches a Linux server, they rarely reach for a custom zero-day. They use what’s already there: curl, bash, python, or...
Jun 30, 2026
 Refine features
X Clear Filters
Get the latest News and Insights
Get the latest Linux and open source security news straight to your inbox.
Community Poll
Is application sandboxing truly safe?
Loading...
Explore Latest Linux Security features
We found -3 articles for you...
102
 network assessmentvulnerability scanneropen source tool
Top Linux Vulnerability Scanners in 2026: A Guide to Open-Source Security Tools
Computer systems, software, applications, and Linux servers are all vulnerable to network security threats. Failure to identify these cybersecurity vulnerabilities, often through modern vulnerability scanning tools, can leave companies exposed . Running vulnerability scans regularly makes it easier to spot weaknesses and close them through security patching. Assessment results help developers and network administrators understand potential network security issues so they can implement the right defensive measures against them. In this article, we’ll discuss what a vulnerability scanner is and introduce our top free, adaptable tools, including practical vulnerability assessment tools and open-source vulnerability scanning software designed to improve security without adding cost. What is a Vulnerability Scanner? A Linux vulnerability scanner assesses the network security issues in a system or application. Scanners automate website, server, and cloud security auditing to improve security posture by checking for threats. Vulnerability scanners can also provide a prioritized list of issues you should patch. This list describes the type of vulnerability and the steps to fix it. Some vulnerability tools integrate with patch management systems, but fully automated patching is uncommon — most scanners focus on detection and reporting. It’s crucial to patch problems quickly because leaving them unaddressed puts a system at higher risk of attack. These network security threats let hackers enter your system and exploit weaknesses, potentially causing serious damage to your business. Vulnerability scanning tools rely on large databases of known flaws to automatically test systems — this is where a vulnerability scanner Linux setup shows its strength. Like fail2ban or antivirus software, these scanners are essential in maintaining maximum data and network security. The best open-source vulnerability assessment tools make this process affordable and adaptable for anyenvironment. Types of Vulnerability Scanners Vulnerability scanners are often categorized into types such as network-based, host-based, web application, and cloud-based. Database scanning tools also exist, but they are usually considered a subset of host or application-level scanning. Network-based vulnerability scanners Network-based vulnerability scanners scan the devices, services, and ports across a network to find weaknesses like misconfigurations, open ports, or version issues. They don’t generally monitor traffic in real time — instead, they take snapshots of your network at scheduled intervals. On wired and wireless subnets alike, they help you map out network exposures so you can take action before attackers find them. Host-based vulnerability scanners Even though web hosting and Linux servers include built-in protections, weak spots remain. A Linux security scanner can be installed on every host to provide in-depth insight into potential vulnerabilities, whether from insiders or outsiders with partial access. Web application vulnerability scanners Web applications are a common attack target, especially those relying on user input or integrations. A vulnerability scanner Linux setup can help test for issues such as SQL injection, cross-site scripting, and insecure configurations — areas that attackers often probe to gain access. Cloud-based vulnerability scanners The growing shift to cloud security solutions , especially with remote work, has pushed more companies to adopt cloud-focused scanning. Instead of just checking websites, these tools look at virtual machines, containers, and APIs. A Linux vulnerability scanner built for the cloud can catch weaknesses in those environments before they’re exploited. Top Linux Vulnerability Scanners in 2026 These tools range from lightweight scripts to full vulnerability assessment software platforms used in enterprise environments. Many vulnerability scanners are available online that you can purchase, grab for free,or run as open source. The key is choosing a Linux vulnerability scanner you can rely on. Here are some free and open-source vulnerability scanners worth considering. Modern teams are shifting toward actively maintained alternatives, increasingly leveraging AI-assisted vulnerability scanners to help prioritize critical risks and reduce noise in their security workflows. Aircrack-NG Open Source Vulnerability Scanner Aircrack-ng is an open-source wireless auditing toolkit used for Wi-Fi security. It captures traffic and can crack WEP and WPA keys, but it’s not a general-purpose vulnerability scanner and doesn’t cover web application issues. Here are Aircrack-ng’s key benefits : Support for a wide range of wireless hardware and protocols Coverage of Wi-Fi security issues, including WEP and WPA-PSK cracking Command-line driven, with extensive documentation and tutorials Can perform both active and passive scanning Aircrack-ng’s specialized focus on wireless networks makes it a useful tool for testing and improving Wi-Fi security. For a broader Linux setup, it’s often combined with other tools in a full security stack (see our best secure Linux distros ). Anchore Open Source Vulnerability Scanner Anchore is an open-source Docker container policy compliance and static analysis tool. It looks inside container images to analyze and evaluate them against security and policy requirements. The result is a report that indicates whether each image passes or fails, making Anchore one of the more practical open-source vulnerability assessment tools for container security. Anchore runs static analysis at the build or registry stages. It does not run real-time or runtime scans; it focuses on image content before deployment. Anchore checks image contents — packages, dependencies, configurations — to catch problems early. It also integrates with registries and CI/CD pipelines, which makes it easier to fold into DevOps workflows. Anchore is often describedas a Linux vulnerability scanner for containerized environments, though its focus is image analysis. It’s well-suited for teams running containerized workloads that need a reliable way to find and track vulnerabilities. Security teams also use it alongside other open source VAPT tools to cover more ground in testing. Here are Anchore’s key features: Scans container images for known vulnerabilities and provides detailed reports Breaks down image contents, including software packages and dependencies Gives you control to define and enforce policies, making sure that only trusted images are deployed. Integrates directly into CI/CD pipelines to catch issues early Anchore is actively maintained and supported by a strong open-source community. You can find it on Anchore Engine and adapt it to your environment as part of a broader container security stack. Arachni Open Source Vulnerability Scanner Arachni is an open-source vulnerability scanner built for web applications. It was widely used for its speed and flexibility, and for a while, it was one of the more capable tools in this space. Here are Arachni’s key benefits: Detects common web vulnerabilities like SQL injection, cross-site scripting, and directory traversal Built for scanning dynamic applications — it does not cover static HTML content. Customizable scan options and detailed reports Works with other security frameworks and toolkits Includes documentation and tutorials for setup and use Arachni’s scanning engine combined heuristics and signatures to catch issues that other tools sometimes missed. The modular setup meant you could extend it or plug in new modules as needed. For years, it was a go-to for web app testing on Linux, but that time has passed. Note: Arachni hasn’t been updated since 2017. You can still find the Arachni scanner, though it’s long outdated Burp Suite Free Edition Open Source Vulnerability Scanner Burp Suite Free Edition is a proprietarytool with a free version, not an open-source vulnerability scanner. It’s part of the larger Burp Suite platform and is often used for web application security testing by intercepting and modifying HTTP requests. Here are Burp Suite Free Edition’s benefits: Runs on multiple operating systems and platforms Provides manual testing features for web applications It lets you intercept and modify HTTP requests and analyze responses User-friendly interface with documentation and tutorials Can be paired with other frameworks and toolkits The Free Edition does not include automated scanning for issues like SQL injection or cross-site scripting — that’s only available in the Professional or Enterprise editions. Still, the ability to intercept and work with requests makes it useful for testing smaller applications and APIs. For Linux users, it’s often added to a toolkit as a linux vulnerability scanner companion, even though its scope is limited in the free version. Clair Open Source Vulnerability Scanner Clair is an open-source vulnerability scanner project designed for container security. It’s API-based, letting you query and analyze container layers for known issues. Clair regularly collects vulnerability metadata from multiple sources, indexes container images, and exposes this information through an API for security teams to use in their workflows. Here are Clair’s key benefits: Comprehensive coverage of container images and their associated vulnerabilities Support for many container image formats and registries Integration with orchestration systems like Kubernetes and Docker Swarm Reports that are detailed but easy to work with Performs static image analysis before deployment — it does not scan in real time and is not designed to detect wireless vulnerabilities. Clair is focused on containerized environments, not general-purpose scanning. Security teams often add it to their stack as a linux vulnerability scanner for images, usingit to flag problems before containers move into production. You can find and contribute to the project on Clair GitHub . Lynis Open Source Host Vulnerability Scanner Lynis is an open-source vulnerability scanner built for hosts, especially Linux and other UNIX-based systems. Lynis is widely used among vulnerability assessment tools for Linux system auditing and hardening, valued for its lightweight design and flexibility. You’ll find it running on everything from production servers to lab VMs. Key features include: Detects misconfigurations, weak permissions, service issues, and vulnerabilities Opportunistic scanning that adapts to the system without external dependencies Compliance checks for standards like PCI, HIPAA, and CIS Clear reports with scoring and step-by-step guidance Customizable controls to fine-tune what gets tested Installation is straightforward and works across most major distributions. The Lynis installation guide explains the basics, while administrators on Ubuntu or Rocky can follow a setup tutorial tailored to those platforms. Once installed, Lynis scans in stages — detecting components, applying the right tests, and producing both logs and reports with prioritized findings. Reports are one of its strengths. They don’t just list issues; they provide warnings, suggested fixes, and a scoring system to track improvements over time. The complete Lynis guide shows how to interpret these results and fold them into regular security workflows. Beyond scanning, Lynis plays a role in system hardening. Many organizations pair it with other Unix hardening tools to enforce stronger defaults across fleets of servers. That combination gives teams a practical way to improve resilience without adding commercial software or heavy overhead. Metasploit Open Source Vulnerability Scanner and Framework Metasploit is a penetration-testing framework that can identify and exploit holes in systems and networks. While it’s sometimes lumpedin with scanners, Metasploit is not a traditional vulnerability scanner — it’s a framework for exploitation and validation. For that reason, teams usually run a vulnerability scanner on linux first, then use Metasploit to validate the findings. Metasploit can be used to test for: Remote code execution SQL injection Cross-site scripting (XSS) Directory traversal Buffer overflow issues Authentication bypasses File inclusion problems Misconfigured services and applications Beyond listing issues, Metasploit can launch controlled attacks and exploit them directly. That makes it useful for testing defenses and showing what a real compromise would look like. With its large library of modules and payloads, it’s a standard framework for penetration testers and red teams. Nmap Open Source Vulnerability Scanner Nmap is best known as a network mapper and port scanning tool. It was built for network discovery, finding hosts, services, and open ports, and it remains one of the most widely used tools in security. With its scripting engine (NSE), Nmap can also probe for specific flaws; however, it’s not a comprehensive vulnerability scanner. It doesn’t patch or sandbox systems; it focuses on reconnaissance. Key things Nmap can do: Scan large networks quickly and identify live hosts Detect open ports and the services running on them Fingerprint operating systems and service versions Run scripts to check for misconfigurations and known vulnerabilities Because of that flexibility, Nmap is often treated as a linux vulnerability scanner even though that’s not its primary role. For administrators, it’s a way to map networks and spot weak points before attackers do. Linux setups can be extended with custom scripts, making it a bridge between simple port scanning and deeper assessment tools. Nmap is still under active development and works across all major platforms. That consistency is why it’s trusted in open-source security circles.It’s flexible enough for quick scans but can also be tuned for deeper checks. For a closer look at how it fits into Linux workflows, see our guide on Nmap basics . OpenSCAP Open Source Vulnerability Scanner OpenSCAP is an open-source framework for compliance and vulnerability scanning. It’s widely used in enterprise Linux environments because it combines automated compliance checks with configuration management and security assessments. Key benefits of OpenSCAP: Runs on multiple operating systems and platforms Automates compliance checks with standards like PCI-DSS and CIS benchmarks Manages configurations at scale across large environments Integrates with other security frameworks and toolkits Open-source, with ongoing development and community support OpenSCAP is more than a simple scanner. It can audit Linux systems against compliance baselines, report vulnerabilities, and suggest remediation steps. For administrators who want a Linux vulnerability scanner with built-in compliance features, it’s one of the most practical open-source vulnerability assessment tools available today. OpenVAS Open Source Vulnerability Scanner OpenVAS is an open-source vulnerability scanner used across many Linux distributions. It’s free under the GNU General Public License (GPL) and actively maintained by Greenbone. Because of that support, OpenVAS is one of the most comprehensive vulnerability scanning tools available today. OpenVAS utilizes an automatically updated community-sourced vulnerability database of over 50,000 known Network Vulnerability Tests. It thoroughly examines entire systems and tests both authenticated and unauthenticated protocols. The scanning is detailed, providing an in-depth look at how well protected your computers and servers are. OpenVAS can also run from external servers to give administrators the perspective of an attacker, allowing issues to be fixed before they can be exploited. Some of the criticalbenefits of OpenVAS include: Support for multiple operating systems, making it a dependable Ubuntu vulnerability scanner Ability to scan for more than 50,000 known vulnerabilities Customizable scanning options and detailed reports Integration with other network security toolkits and frameworks Ongoing development and improvement from the Greenbone community OpenVAS works as both a linux vulnerability scanner and a linux security scanner, giving administrators detailed reports and compliance checks. It’s still actively maintained by Greenbone, which makes it a dependable option in the open-source space. Trivy Open Source Vulnerability Scanner Trivy is an open-source vulnerability scanner that detects CVEs in open-source software. Trivy has become a popular option among lightweight vulnerability scanners for container environments, providing a quick explanation of network security issues so developers can decide whether to use it for security patching. Most scanners run static image checks after the fact, but Trivy can be integrated earlier in the process. Teams often add it to build pipelines or IDEs so vulnerabilities surface during development, not just in production. With strong backing from Aqua Security and the open-source community, Trivy has wide support and steady updates. It also complements other open-source VAPT tools well, making it a practical choice for anyone who needs a lightweight Linux vulnerability scanner in containerized environments. Wapiti Open Source Vulnerability Scanner Wapiti is an open-source vulnerability scanner designed for web applications. It’s known for speed and accuracy, and many security professionals use it to test sites and services running on Linux. Key benefits of Wapiti include: Finds common flaws like SQL injection, cross-site scripting, and file inclusion Works with both static pages and dynamic content Customizable scans to fit different environments Generates clear, actionable reports Can be extended or paired with other toolkits Wapiti’s scanning engine combines heuristics with signatures, increasing its ability to detect issues that lighter tools might overlook. Its modular setup also makes it easy to adapt. While it doesn’t cover wireless networks, it remains a practical linux vulnerability scanner for web application testing. Wireshark Open Source Protocol Analyzer Wireshark is an open-source protocol analyzer, often referred to as a packet sniffer. It doesn’t scan for vulnerabilities — instead, it shows you what’s happening on the network. Security teams, universities, and even government agencies use it to trace issues and spot suspicious traffic. It can capture data across various protocols, including Bluetooth, wireless, Ethernet, Token Ring, and Frame Relay. The output isn’t locked to a complex interface either. You can export results into plain text, which makes them easier to read and share, even with less technical users. Key benefits of Wireshark: Captures and inspects network traffic in real time Works with a wide range of protocols Filters traffic for targeted analysis Visualizes network patterns and anomalies Backed by strong documentation and community support Useful for finding bottlenecks and performance issues Wireshark is not a linux vulnerability scanner, but it adds another layer to security workflows. By analyzing network traffic in detail, it can highlight behaviors that other scanners might miss. SQLmap Open-Source Vulnerability Scanner SQLmap is a penetration testing tool designed to detect and exploit SQL injection vulnerabilities. It automates much of the process, helping security teams evaluate risk and document results. While sometimes grouped with linux vulnerability scanner tools, SQLmap is focused specifically on SQL injection, not general system flaws. Sqlmap is written in Python and runs on any system with a Python interpreter. It can recognize password hashes and supportsmultiple techniques to detect SQL injection. An SQL injection attack targets a database by inserting malicious code into input fields, search forms, or login pages. More on this type of attack can be found in the OWASP SQL Injection guide . SQL injection can expose sensitive data, allow changes to records, or even hand control of a system to an attacker. These attacks are common in: Web applications that rely on user input Content management systems and e-commerce platforms Legacy systems with outdated database code Mobile apps that query a backend database through APIs Mitigation requires secure coding practices such as parameterized queries and strict input validation. Sqlmap itself supports a wide range of databases, including Oracle, PostgreSQL, MySQL, SQL Server, and Access. Within the space of open source vulnerability assessment tools, it remains one of the most recognized options for testing SQL injection. OnSecurity (Honorable Mention) It’s designed to run continuous checks on internet-facing assets, carrying out more than 70,000 tests for missing patches, weak or default passwords, and common misconfigurations. The platform keeps an inventory of assets and applies CVSS scores to each issue, making it clear which ones matter most. Alerts show up in the portal but can also be pushed to Slack or Microsoft Teams. If needed, findings can even be turned into tickets in Jira or ServiceNow. While OnSecurity isn’t open source, some teams still use it alongside community tools. For those managing Linux environments, a linux vulnerability scanner that’s community-driven and transparent often remains the preferred option. Final Thoughts on Using Open-Source Vulnerability Scanning Tools to Secure Your Linux Systems Regular scanning is one of the simplest defenses against attack. A properly configured vulnerability scan can flag weak spots early. That might be a misconfigured service, an outdated package, or a forgotten policy rule. Catching theseissues before they’re exploited gives teams time to respond. It also reduces guesswork and provides a clearer view of overall risk. The open-source ecosystem has grown wide. Wireshark looks at traffic. OpenVAS digs into hosts and services. Nmap maps networks and finds what’s running where. None covers everything, but together they paint a fuller picture of your environment. That mix is what allows administrators to prioritize fixes instead of chasing noise. Cost is another reason these tools matter. Open-source scanners are free to use, and they don’t stand still. Communities update signatures, refine features, and share improvements. They’re transparent enough to audit and flexible enough to adapt to different workflows. For example, see our work on open-source security automation and this guide to open-source security scanners. Used consistently, these scanners form the backbone of an open-source security program. They won’t replace strategy, but they give it something solid to stand on. . Running vulnerability scans regularly makes it easier to spot weaknesses and close them th. computer, systems, software, applications, linux, servers, vulnerable, network, security. . MaK Ulac
 Apr 14, 2026
•
Apr 14, 2026
•
102
 security assessmentvulnerability scannerNessus
Nessus Installation and Configuration Guide for Linux Users
Nessus is a vulnerability scanner which performs scanning a target network to seek for vulnerabilities in the network, such as, software bugs, backdoors, and etc. The program is developed by Renaud Deraison. . Introduction In this article, we will describe the basics of installing and using Nessus. Nessus operates as a client and server system. The server can run on the Unix operating system platform, including Linux and Open BSD, whereas the client can run on various operating systems, e.g., Windows. In this article, we will show the installation and usage for both the client and server on Linux. Nessus installation Download the Nessus source distribution from web site https://www.tenable.com/ under the topic Download and follow the instructions below. There are three ways for installation. Select either way and follow. Install Nessus via Internet using the program Lynx. (Lynx is a web browser program which can be downloaded from Use the following command to install: #lynx -source | sh Install Nessus using the script called nessus-installer.sh which is located under the directory nessus-installer/. Use the following command: #sh nessus-installer.sh Download the compilation software package consisting of: nessus-libraries-x.x.tar.gz libnasl-x.x.tar.gz nessus-core.x.x.tar.gz nessus-plugins.x.x.tar.gz (x represents the version of the software at the time.) Untar and unzip all the files above using the command. #tar xvfz nessus-libraries-x.x.tar.gz #tar xvfz libnasl-x.x.tar.gz #tar xvfz nessus-core.x.x.tar.gz #tar xvfz nessus-plugins.x.x.tar.gz Compile each file starting from nessus-libraries as follows: #cd nessus-libraries #./configure #make #make install (For the last command, make install, you must be root to do so.) Compile libnasl: #cd libnasl #./configure #make #make install (For the last command, make install, you must be root to do so.) Compile nessus-core: #cdnessus-core #./configure #make #make install (For the last command, make install, you must be root to do so.) Compile nessus-plugins: #cd nessus-plugins #./configure #make #make install After all compilation has been done, there are two important files created, i.e., nessusd which is Nessus' server and nessus which is its client. In case of using Linux, add path /usr/local/lib to the file /etc/ld.so.conf to incorporate Nessus' library (as compiled above) so that Nessus when started will be able to find its library. Use the following command to update the new path. #echo "/usr/local/lib" > > /etc/ld.so.conf #ldconfig Nessus usage To use Nessus, there are two things one has to do. The first is to create a new user account, together with specifying his/her access privilege. The second is configuring Nessus' client. 1. New user account creation and access privilege Use the script nessus-adduser located in /usr/local/sbin to generate a new account for a user. The user will login to use Nessus via this account. Fig. 1. New user account creation. In Figure 1, specify a new user name, in which case joey is the user name as shown in Figure 2. Fig. 2. Selecting the method to keep a password. In Figure 2, select the method to keep the password (joey's password) on the server. Select plaintext if the password is to be kept as it is. Select cipher if the password is to be kept encrypted. Let us call account joey 'login-name' in Nessus and call account root on Linux 'user-name'. This is just to make calling the two names different. Fig. 3. Connection privilege. In Figure 3, the system administrator can assign a privilege to allow which part of network joey can connect or can login to. For example, the administrator can assign only the IP address which is joey's machine or a subnet like 192.168.1.0/24. In the figure, the default value is anywhere which means joey can connect from anywhere. Fig. 4 Specifyingone-time password. Figure 4 shows assigning the password for account joey. This password is requested by the server but is asked only once. That is, the first time joey logins to use Nessus and the next time onwards the server will no longer ask for this password. Therefore, this is the reason why we call this password one-time password. In logging in to use Nessus, it is necessary to supply a passphrase which is another, not the one-time password. After the passphrase supplied, if this is the first time login, Nessus will ask the user to provide his/her one-time password. If not, Nessus will just let the user pass as long as the passphrase is correct. Fig. 5. Network scan privilege allowed to joey. Figure 5 is specifying the network scan privilege allowed to joey. That is, which part of network can joey scan? For example, we may allow joey to scan only an IP address or a subnet. When done, press Ctrl-D to finish the process. If the privilege is not specified, joey is then allowed to scan everywhere in the network. See more details about the privilege specification in the manual pages nessus-adduser. Fig. 6. Confirmation for data item correctness. In Figure 6, Nessus will ask for confirmation for correctness of all the data items given above. Fig. 7. Add-user process completed. If y (yes), the new user joey is added to the system and the screen will show 'user-added' message which means the process has been completed as shown in Figure 7. nessusd has the configuration file /usr/local/etc/nessusd.conf for the system administrator to fine-tune the server via this file. We can use the command nessusd –s in Figure 8 to show up all configuration values on screen. Fig. 8. Configuration values for server nessusd. After checking all the values already, we are now ready to start nessusd. To do so, we must login on Linux as root. The command to start the server is shown in Figure 9. Fig. 9. Starting server nessusd To check ifthe server is running, use the command like in Figure 10. Fig.10. Checking the opearation of nessusd server. 2. Nessus client configuration The client program client nessus is located in /usr/local/bin/nessus. Use the follwing command to start the client. Fig.11. Starting the client program nessus. The symbol & in the figure is starting the program in background mode. Note that the user who starts the client program uses 'user-name' snort on Linux. Fig. 12. Specifying a passphrase. In Figure 12, when a user starts the nessus client program the first time, Nessus creates a private key for the user according to 'user-name' on Linux, snort in this case. That is, one 'user-name' on Linux matches one unique private key, which is one-to-one relationship. Having created the private key already, Nessus will ask the user to enter a passphrase for the key just created. The user must keep it secret. The second line in the figure is confirmation for the passphrase. Fig. 13. Nessus login window. This is the login window. Before logging in to use Nessus with an account (joey in the figure), the user needs to supply the IP address where nessusd is running, nessusd's port, and encryption method used in communicating between a client and the server. In the figure, nessusd server is running at address 192.168.176.210 at port 1241 (which is Nessus' default port) and twofish/ripemd160:3 as the encryption method. Note that 'login-name' in Nessus is Fig 13 is joey whereas 'user-name' on Linux is snort. If this is the first time joey logs in to use Nessus, the server will ask joey to supply his/her one-time password (as given in Figure 4). With the correct password, the server will bind 'login-name' joey with the private key of 'user-name' snort on Linux. This means 'login-name' joey won't be able to login to use Nessus under other 'user-name's, except 'user-name' snort. For subsequent logins of joey (not the first time login) to use Nessus, the server will askfor his/her passphrase (for the private key) only but will no longer ask for his/her one-time password. However, one 'user-name' on Linux can have many 'login-name's in Nessus, e.g., apart from joey for 'user-name' snort, there can be other 'login-name's for snort whose network scan privileges can be different. Fig. 14. One-time password window. In Figure 14, after entering joey as 'login-name', the server will ask joey for his/her one-time password (which was selected at the time 'login-name' joey was created by nessus-adduser). Fig. 15. Plugin selection window. After login, Nessus will start at the plugin selection window. The user can select the plugins that s/he wants by enabling or disabling the little squares on the right hand side. The lower window shows various choices of a plugin that the user can enable or disable. In the figure, the user is on the FTP plugin where s/he can further select various FTP vulnerabilities to scan for. Fig. 16. Further details for the vulnerability: Anonymous FTP Enabled. In Figure 15, when the user clicks on the vulnerability Anonymous FTP Enabled in the lower window, the system shows additional details for this vulnerability, which describes that if the organisation doesn't need to share information with others, then turn off the anonymous FTP. Fig. 17. Plugin preference window. In this window, the user can configure additional options for the plugins selected. For example, in pinging machines in a network, the user can ping using the TCP or ICMP protocol. Fig. 18. Scan options window. In this window, the user can specify the scan details, e.g., ports to scan (in the figure from port 1-15,000), the number of simultaneous scans (8 scans in the figure), the location for CGI scripts. Typically port scanning in Nessus is done through another program called nmap. Fig. 19. Target selection window. In this window, the user can select a target machine or a subnet to scan forvulnerabilities. In the figure a subnet 192.168.176.0/24 is to be scanned. Use a comma ',' to separate between targets to scan. The user can also check if a machine with DNS can be zone-transferred by selecting a button 'Perform a DNS zone transfer'. (For security reasons, zone information is allowed to transfer only by the machine with access privilege.) Fig. 20. User window. The user can change his/her passphrase to get in Nessus or even remove the private key and also specify additional network scan privileges using the Add-rule button. Fig. 21. Credits window. This window shows all the Nessus developers, the current version, and its web site to find more information about Nessus. Fig. 22.1. Simultaneous scan status. Fig. 22.2. A single-machine scan status. After checking all the windows' setting, the user can now start scanning the target network as specified in the target selection window by clicking the button 'Start the scan' at the bottom of the window. Figure 22.1 shows the status of scanning a subnet whereas Figure 22.2 shows scanning a single machine. At any time, the user can stop scanning an individual machine if desired by clicking 'Stop' to the right hand side or even stop all the scans completely by clicking 'Stop the whole test'. Fig. 23. The scan result on machine 192.168.176.130. This figure shows the result of scanning the machine 192.168.176.130. The left window shows security alerts about the vulnerabilities found. For the right window, when clicking on each little circle, the user will get more details about the vulnerability. Fig. 24. Security risk piechart. Figure 24 displays the result of scanning the machine 192.168.176.130 on Web. After scanning a machine, Nessus produces a file index.html which can be displayed on Web, just like the one for the machine 192.168.176.130. The piechart shows in percent the four categories of security risks, Low, Medium, High, and Serious. This showsthe level of security problems found in the network which potentially leads to seeking ways to cure these problems. Plugins Plugins are the heart of Nessus because they contain a set of scripts to check vulnerabilities in a network, e.g., backdoors, DoS, wide-open ports, etc. These scripts are written in the language called NASL (Nessus Attack Scripting Language) and can be found in /usr/local/lib/nessus/plugin. The user can also develop their own scripts by studying this language from Documentation | Tenable™ . Furthermore, more new scripts to test our network can be found in /plugins . Discover the steps to set up and utilize OpenVAS, an advanced application for network analysis and risk assessment.. Nessus Installation, Network Audit Tool, Security Scanning, Nessus Setup. . Brittany Day
Jun 07, 2002
•


Get the latest News and Insights
Get the latest Linux and open source security news straight to your inbox.
Community Poll
Is application sandboxing truly safe?
Search Topics
Powered By

Linux Security - Your source for Top Linux News, Advisories, HOWTOs and Feature Releases
QUICK LINKS
subscribe to newsletters!
Like staying secure? So do we.
Sign up for updates, tips, and alerts!