Overly broad permissions can turn one compromised account into a much larger security problem. Learn how to reduce unnecessary access, review privileges, and apply least privilege across modern Linux systems. Review Linux Privileges×


Stay Ahead With Linux Security HOWTOs
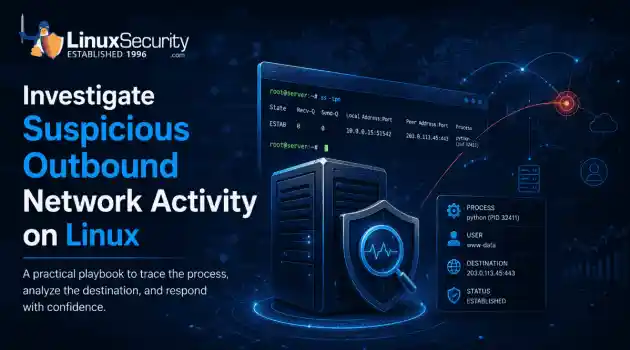
How to Secure My Network incident response network traffic
incident response network traffic Imagine logging into a production Linux server for routine maintenance and noticing background network activity connecting to an unfamiliar external IP address. Your endpoint protection agent is not popping up with an alert, there is no service failure, and on the surface, the system appears to be running normally. . For Linux administrators and security teams, such a situation is a moment of truth: Is this activity a sign of active intrusion or just a tool that was overlooked in the course of...
 Jul 21, 2026
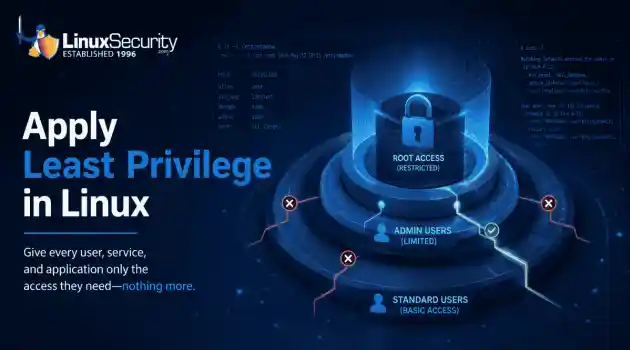
How to Harden My Filesystemsystem hardening open source security
system hardening open source security We all spend a lot of time defending our systems from external threats, but the amount of damage an attacker can cause often depends on what happens after they get in. A single compromised account doesn't always lead to a major incident. The real danger begins when that account has far more access than it actually needs. . That's exactly what the principle of least privilege is designed to prevent. By limiting users, services, and applications to only the permissions required for their jobs,...
Jul 20, 2026
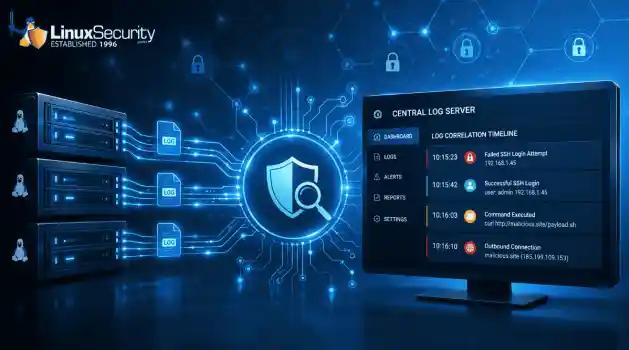
How to Learn Tips and Tricksthreat detection system monitoring
threat detection system monitoring For small security and IT teams, the "enterprise" dream of a fully automated SIEM often feels like a distant luxury. It’s a vision built on massive budgets and dedicated engineering teams—things that, frankly, most of us don't have. But here is the reality: you don’t need a six-figure platform to maintain a secure environment. . Linux systems are, by design, incredibly verbose. Every time a user authenticates, a process executes, or a configuration file changes, your system creates a record of...
Jul 17, 2026
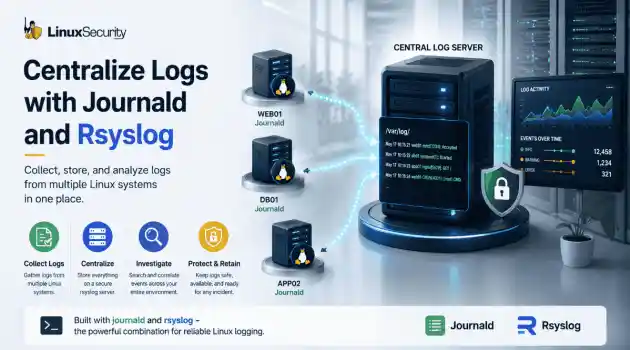
How to Learn Tips and Tricksnetwork security centralized logging
network security centralized logging Linux systems generate a steady stream of authentication, service, kernel, and application logs. On most systems, those logs never leave the machine that created them. If you're responsible for ten or twenty servers, that means checking each one separately. If one disappears before you can investigate it, its logs may disappear with it. Centralized logging solves that by sending log messages to another server as they're created. Instead of searching every machine, you have one place to review...
Jul 15, 2026
How to Secure My Networksecurity advisory audit
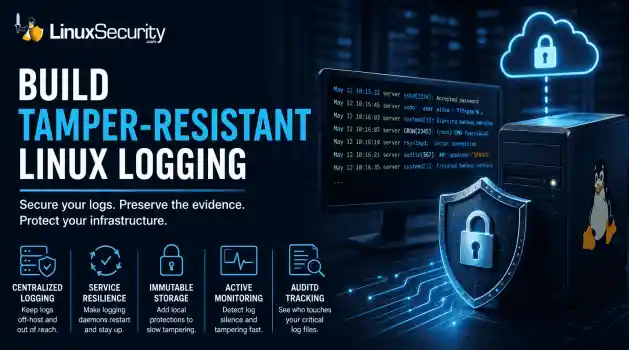
security advisory audit When you’re digging through an incident, your logs are the only thing you can actually trust. The problem is, attackers know that too. If someone gets root on your server, their first move is almost always to delete the evidence and cover their tracks. . If you aren't actively protecting your logs, you're basically flying blind the second a breach happens. It’s a miserable feeling to realize you have no idea what an attacker did because they wiped the logs before you even got there. In this...
Jul 11, 2026
 Refine HOWTOs
X Clear Filters
Get the latest News and Insights
Get the latest Linux and open source security news straight to your inbox.
Community Poll
Should Linux servers automatically install security updates?
Loading...
Explore Latest Linux Security HOWTOs
We found 53 articles for you...
163
 security advisoryserverubuntu
How to Install and Secure MariaDB on Ubuntu 24.04
On Ubuntu 24.04, it doesn’t take much to get MariaDB running. Update the system first so the packages are current. Then install the server with apt install mariadb-server . Once it’s in place, check that the service came up cleanly. To lock it down, run mysql_secure_installation — that’s where you strip out the defaults attackers love to find. . This tutorial explains how to install MariaDB on Ubuntu and secure the configuration so it’s ready for real-world use. You’ll learn how to: Update package indexes before installation Install MariaDB with the apt install mariadb command Check the service status and enable it at boot Run mysql_secure_installation to handle the defaults that leave a fresh install exposed — the test database, anonymous accounts, and remote root logins. Once those are gone, the system is far less attractive to attackers. Installing MariaDB on Ubuntu 24.04 On Ubuntu 24.04, the installation is straightforward. These steps show how to install MariaDB on Ubuntu systems cleanly and securely. Update the package lists, install the server package, and confirm the service is running. The last step is securing the defaults — removing test databases, anonymous accounts, and remote root access — so the system isn’t left exposed. Done in this order, MariaDB installs cleanly and is ready for real workloads. Update Package Indexes Before installing MariaDB, refresh the package indexes so Ubuntu pulls the latest information about software packages: sudo apt update This command only updates package lists; it doesn’t install or upgrade anything. Most administrators also follow with: sudo apt upgrade -y Running an upgrade at this stage keeps the system current and avoids dependency issues when you install MariaDB. Install MariaDB After updating the package indexes, bring in MariaDB with: sudo apt install mariadb-server -y This installs the server package and its dependencies in one step. During setup, you may beasked for confirmation; press “Y” to continue. That single command installs the server and its dependencies. Many admins shorthand this as apt install mariadb when searching for the right syntax. If you’ve used MySQL before, note that mariadb install ubuntu works the same way — it’s designed as a drop-in replacement. Ubuntu 24.04’s default repositories provide MariaDB 10.11 (the current long-term support release). If you need MariaDB 11.x features, add the official MariaDB APT repository — but confirm it supports Ubuntu 24.04 and is production-ready. MariaDB was built as a fork of MySQL and remains fully compatible. In most cases, it can replace MySQL directly without breaking applications that rely on it. Check MariaDB Status and Enable Auto-Start After installing MariaDB, confirm that the service is running: sudo systemctl status mariadb If the output shows the service as active, enable it to start automatically on boot: sudo systemctl enable mariadb For another quick check, run mariadb --version to confirm the installed version, or connect directly with sudo mariadb . Both verify that the server is installed and working properly. With the service confirmed, move on to securing the installation. Secure the Installation Run the secure installation script to close off the defaults that aren’t safe for production: sudo mysql_secure_installation The script covers the basics. It sets a root password, removes anonymous accounts, disables remote root login, drops the test database, and reloads the privilege tables. Each step reduces risk and tightens the configuration. On Ubuntu, the root account usually uses Unix socket authentication, meaning sudo mariadb logs you in without a password. If you only manage MariaDB locally, socket authentication is safe and often easiest. If you plan to connect remotely as root or through tools that require password-based login, switch to mysql_native_password and set a strong password: ALTER USER'root'@'localhost' IDENTIFIED VIA mysql_native_password USING 'your_strong_password'; Setting a root password is useful if you later change authentication methods or allow remote access. Anonymous accounts should never remain in place. They let anyone connect without credentials. The same goes for the test database — it’s open to all users by default and should always be removed. Remote root logins are another weak point. Unless there’s a clear need for remote administration, keep them disabled. When the script finishes, the privilege tables reload and the changes apply right away. The details may differ between environments, but the goal stays the same: reduce exposure and stop unwanted access. Common Questions About MariaDB on Ubuntu Even with the basics covered, a few questions often come up when installing and securing MariaDB. Can MariaDB encrypt data? Yes. MariaDB supports column-level encryption and tablespace/data-at-rest encryption (often called TDE). Availability depends on the build and version — in community editions, some features are limited. Many admins rely on full tablespace encryption when supported, while others use OS-level or disk encryption (e.g. LUKS) if TDE isn’t available. How do I upgrade MariaDB? On Ubuntu, keep MariaDB patched with: sudo apt update && sudo apt upgrade -y This brings in security and point releases. For major upgrades (e.g. 10.x → 11.x), you’ll need to add the MariaDB APT repository and follow the official upgrade steps — these are not always seamless and should be staged and tested first. What’s the best way to back up a MariaDB database? For small setups, mysqldump is quick and dependable. It dumps everything into a file you can restore anywhere. Larger environments run MariaDB’s native backup utilities instead, which handle incremental and full copies without dragging performance down. The tool doesn’t matter as much as the process. Test the backups. A file that’s never been restored isn’ta backup — it’s just a copy. Where can I find more details on MariaDB? The official MariaDB documentation has everything from basic configuration to performance tuning and advanced security. It’s the reference most admins keep open when they’re running MariaDB in production. Final Thoughts: Install and Secure MariaDB on Ubuntu 24.04 MariaDB installs cleanly on Ubuntu 24.04 with apt install mariadb-server , but the real work is in what follows. Updating packages, checking the service, and running the secure installation script take away the weak defaults that make a fresh database easy to target. Most admins will be fine with 10.11 from Ubuntu’s repositories if you need 11.x features, use the official MariaDB repo. Whatever the version, don’t skip the basics: patch the system, test your backups, and review configuration against your environment. Set up this way, MariaDB isn’t just running — it’s hardened enough to handle production or development without leaving obvious gaps. . This tutorial explains how to install MariaDB on Ubuntu and secure the configuration so it’s ready. ubuntu, doesn’t, mariadb, running, update, system, first, packa. . MaK Ulac
 Sep 30, 2025
•
Sep 30, 2025
• How to Secure My Webserver
163
 data securitydata protectioninformation security
Essential Security Strategies for Your Linux Server in 2024 Ahead
Protecting your web server is crucial for the security of your website and sensitive information. Linux servers are a popular choice among developers and businesses. Ninety-six percent of the top 1,000,000 web servers are Linux-based. Linux is a huge market force, and it is important to protect your data if you use it. . You must, therefore, engage in Linux server security best practices to ensure data security and prevent leakages. The article linked below will provide you with these best practices for data protection. The link for this article located at Security Boulevard is no longer available. . Implement robust Linux server security protocols to safeguard critical assets and mitigate data exposure risks. . Linux Server Security, Data Protection Practices, Server Best Practices. . Brittany Day
Apr 17, 2024
•
How to Secure My Webserver
163
certificate managementhttpsssl certificateEnable HTTPS Using Free ZeroSSL Certificates for Linux Admins
ZeroSSL is a free SSL certificate authority created by CodeNotary, a software company known for its immutability and blockchain solutions for data integrity. . Launched in 2018, ZeroSSL emerged as an alternative SSL certificate provider focused on providing domain-validated (DV) certificates for free to individuals, developers, and small businesses. As an automated certificate authority, ZeroSSL issues browser-trusted SSL certificates for HTTPS encryption within minutes through an easy-to-use API. This enables any website or application to enable HTTPS and SSL/TLS encryption for secure connections. Some key features of ZeroSSL certificates include: Completely free SSL certificates with unlimited issuance and no account required. Automated validation and issuance processes for obtaining SSL certificates almost instantly. Trusted by all major browsers and devices for enabling HTTPS and encrypting connections. Supports wildcard certificates and allows securing multiple subdomains. 90-day certificate lifetime with automated renewal and reissuance processes. Friendly customer support by the CodeNotary team. With its focus on ease-of-use and automated workflows, ZeroSSL aims to make HTTPS security accessible for everyone through free SSL certificates. Why Use ZeroSSL? ZeroSSL has emerged as a popular choice for open-source enthusiasts looking to enable HTTPS on their websites and web applications. There are several key reasons why admins and developers opt for ZeroSSL certificates over other SSL providers: Free SSL certificates - ZeroSSL provides free TLS/SSL certificates with unlimited validity and wildcards at no cost. This makes ZeroSSL one of the only providers offering completely free certificates ideal for personal projects, testing environments, intranets, and more. Automatic renewal - Once the certificate is installed, ZeroSSL handles renewing it automatically before expiration so you don't have to worry about any disruptions. Therenewal process happens seamlessly in the background. Easy installation - Installing ZeroSSL certificates follows a simple and straightforward process across all major platforms like Apache, Nginx, HAProxy and more. The detailed documentation makes the installation easy even for beginners. The combination of being free, automated, and easy to install makes ZeroSSL a top choice among the open-source and self-hosted communities. For developers and administrators managing multiple sites and applications, the convenience of ZeroSSL can be invaluable. Prerequisites Before installing a ZeroSSL certificate, you'll need to have a few things set up: Domain name : You'll need a registered domain name that points to your web server's IP address. This is the domain name that your SSL certificate will be issued for. Web server installed : ZeroSSL certificates can be installed on any web server software like Apache, Nginx, IIS, etc. So you'll need to have your web server already set up and running on your server. The web server should be accessible from the internet on port 80 and 443. Generating a Certificate To generate an SSL certificate with ZeroSSL, we'll use the certbot tool. Certbot is an automatic client that fetches and deploys SSL/TLS certificates for your web server. First, install certbot on your Linux system if you don't already have it: sudo apt install certbot Once certbot is installed, you can generate your certificate by running: sudo certbot certonly --manual Certbot will prompt you to enter your domain name and validate domain control. You must add some DNS TXT records to prove you own the domain. After providing your domain details, certbot will communicate with the ZeroSSL API to generate your certificate. The certificate files will be saved to /etc/letsencrypt/live/yourdomain/ . The key part is proving domain ownership to ZeroSSL via DNS validation. As long as you can add the necessary TXT records to your DNS zone, you can generate SSLcertificates for any domains you own. Installing the Certificate Once you've generated your certificate using ZeroSSL, it's time to install it on your server. This will allow your site to be served over HTTPS using the SSL certificate you obtained. To install the certificate, we'll use the Certbot tool. Certbot is a popular automatic certificate installation and renewal tool provided by Let's Encrypt. Here are the steps: Run the certbot command, specifying the path to your certificate and key files: sudo certbot certonly --cert-path /path/to/cert.pem --key-path /path/to/privkey.pem Certbot will install the certificate in the correct location on your server. By default, Certbot places certificates in /etc/letsencrypt/live/your-domain/ . Once installed, your certificate and private key will be available in the following locations: /etc/letsencrypt/live/your-domain/fullchain.pem - Certificate file /etc/letsencrypt/live/your-domain/privkey.pem - Private key Certbot also handles automatically configuring your web server (Apache, Nginx, etc) to use the new certificate. That covers the key steps for installing your ZeroSSL certificate using the Certbot tool. The certificate will now be active and enable HTTPS for your website using the trust of Let's Encrypt. Verifying the Installation Once the certificate is installed, verifying everything works properly is important. Here are a couple ways to confirm your site is now being served over HTTPS with the new SSL certificate: Checking HTTPS Use the curl command to check that your website is returning content over HTTPS: curl -I Look for a 200 OK response code and confirm the page is served over HTTPS. Testing on Browser Simply navigate to your website URL in a browser, making sure to use https:// . The browser should show a lock icon and identify the domain as secure. You can click the lock to inspect the certificate details and confirm it matches the one you installed. Try accessingsome pages on the site to verify they are all loading securely over HTTPS without any certificate warnings or errors being shown. Renewing the Certificate Certificates issued by ZeroSSL are valid for 90 days, after which you'll need to renew them to maintain valid HTTPS encryption. There are a couple ways to renew your certificate: Automatic Renewal ZeroSSL supports auto-renewal of certificates through ACME clients like Certbot. If you used Certbot to generate and install your certificate initially, it can automatically renew it when it nears expiration. Certbot runs twice daily in the background to check certificate expiration. If a certificate is within 30 days of expiring, Certbot will automatically renew it. This ensures your certificate stays valid and your site remains securely encrypted. Manual Renewal You can also manually renew your ZeroSSL certificate by regenerating and reinstalling it. The steps are the same as the initial installation: Go to your ZeroSSL Dashboard and log in. Under 'Certificates', click the 'Download' button next to the expiring certificate. This will generate a new 90-day certificate with the same domains as before. Install the new certificate on your web server, replacing the expiring certificate. Restart the web server process so it uses the renewed certificate. Manually renewing ensures you get a fresh 90-day certificate. However, automatic renewal through ACME clients like Certbot is usually more convenient. Revoking the Certificate There may come a time when you need to revoke your ZeroSSL certificate. The most common reasons to revoke a certificate are: Your private key has been compromised. If your private key is exposed, revoking the certificate immediately is important so an attacker can't use it. You're migrating to a new certificate. When migrating to a new certificate for the same domain, it's best practice to revoke the old certificate. Your domain ownership has changed. If you no longer control the domain tied tothe certificate, you should revoke it. The certificate contains inaccurate information. If any information in the certificate becomes inaccurate, like the domain name or company details, it should be revoked. Revoking a certificate is easy with ZeroSSL. Just log into your ZeroSSL account and go to the "Certificates" section. Find the certificate you want to revoke, click the actions menu, and select "Revoke Certificate." ZeroSSL will immediately revoke the certificate and be added to certificate revocation lists (CRLs). This prevents the certificate from being trusted by browsers and other software. When you revoke a certificate, it's important to replace it immediately to avoid downtime for your website or application. Be sure to generate and install a new certificate before revoking the old one. Overall, revoking certificates when appropriate helps maintain the security of your website and prevents misuse. ZeroSSL makes it simple to both obtain and revoke free SSL certificates. Troubleshooting Issues If you encounter any errors during the ZeroSSL installation and configuration process, here are some common issues and debugging steps to try: Browser not trusting the certificate Ensure the certificate files are in the correct location for your web server. For Nginx this is usually /etc/ssl/certs . Check that the certificate file permissions allow the webserver to read the files. Confirm that your server configuration properly specifies the certificate and key file paths. Try clearing your browser's SSL cache and restarting the browser. Certificate not renewing automatically Check your cronjob configuration to renew the cert. Make sure the cron script can execute and has the proper permissions. If using auto-renewal with Certbot, verify it is installed and configured correctly. Manually run the renewal command as root/sudo to see if it works when executed directly. Web server not listening on HTTPS Double-check that the web server configurationspecifies a valid SSL certificate. Confirm that an HTTPS/SSL listening port is enabled and not being blocked by a firewall. Try restarting the web server and network services. Getting certificate issuer errors Ensure you use the latest intermediate certificates from your CA (Certificate Authority). Regenerate the certificate if a no longer trusted CA issued it. Ensure the root CA certificate is distributed to clients for privately issued certificates. Site visitors getting SSL warnings Verify the certificate is valid and signed by a trusted authority. Check the expiration date. Ensure you are not using self-signed certificates, which will cause SSL warnings. Confirm that you have the full certificate chain, not just the domain certificate. Final Thoughts on Securing Your Website with the Free ZeroSSL SSL Certificate Installing SSL certificates with ZeroSSL provides a quick and easy way for Linux administrators to enable encrypted HTTPS connections on their websites and applications. As outlined in this guide, ZeroSSL offers free certificates that are trusted by all major browsers, with automated validation and issuance through ACME. Some key benefits to using ZeroSSL include: Free TLS/SSL certificates that are valid for 90 days, with unlimited renewals. This removes the cost barrier to enabling HTTPS. Automated certificate issuance through integration with the ACME protocol. After generating a certificate request, the rest of the process is automated. Trusted certificates that are recognized by all major browsers. The certificates use industry-standard 2048-bit RSA encryption. Fast issuance with certificates issued in under 10 minutes in most cases. This enables admins to quickly enable HTTPS. Easy renewal and revocation. Certificates can be easily renewed before expiration or revoked if needed. Feature-rich control panel for managing all certificates from one dashboard. Overall, ZeroSSL provides an excellentfree option for Linux administrators to implement HTTPS and SSL/TLS encryption. The automated process through ACME combined with trusted certificates removes the typical barriers to enabling HTTPS security across websites and applications. Are you using ZeroSSL to secure your website? We'd love to hear how your experience has been! Connect with us on X @lnxsec, and let's discuss! . Obtain complimentary SSL certificates from Let’s Encrypt for instant HTTPS implementation, recognized by top web browsers, and user-friendly for systems admins on Linux.. Free SSLCertificates, HTTPS Security, Linux Admin, Automated Certificate Generation. . Brittany Day
Jan 09, 2024
•
How to Secure My Webserver
163
apacheintegrationubuntuSetting Up ModSecurity 2 and OWASP CRS with Apache on Ubuntu 22.04 or 20.04
For those seeking to bolster their server’s defenses against web-based threats, understanding “How to Install Modsecurity 2 with Apache on Ubuntu 22.04 Jammy Jellyfish or its older stable release Ubuntu 20.04 Focal Fossa” is paramount. ModSecurity, a leading open-source web application firewall (WAF), seamlessly integrates with the Apache HTTP Server. . It offers real-time surveillance, logging, and access control, ensuring your web applications remain impervious to prevalent vulnerabilities. A significant component of its protective arsenal is the OWASP Core Rule Set (CRS), a meticulously curated set of rules by the Open Web Application Security Project (OWASP). This rule set is designed to counteract attacks, including SQL injection, cross-site scripting (XSS), and other notable OWASP Top Ten threats. Key Attributes of ModSecurity and the OWASP Core Rule Set : Real-time Surveillance : ModSecurity continuously monitors HTTP traffic, promptly identifying and neutralizing malicious requests. Detailed Logging : With its comprehensive logging and auditing capabilities, ModSecurity provides insights into security breaches and attack methodologies. Rule Flexibility : ModSecurity’s adaptability shines through its capacity to customize and modify rules, aligning with specific security needs. Anomaly Scoring System : The OWASP CRS adopts a scoring approach, assigning values to requests based on the gravity of detected threats, ensuring precise security configurations, and minimizing false alerts. This guide will elucidate the steps to integrate ModSecurity with Apache and deploy the OWASP Core Rule Set on Ubuntu platforms. By adhering to this guide, you’ll be poised to fortify your web applications against a spectrum of cyber threats. . Fortify your server's protection by implementing ModSecurity along with OWASP Core Rule Set on Ubuntu for superior web application safeguarding.. ModSecurity, Apache Configuration, Web Security, OWASPRules, Cyber Threats. . Brittany Day
Sep 29, 2023
•
How to Secure My Webserver
163
 mysqlauthenticationdatabase security
Step-By-Step Guide to Change MySQL or MariaDB Root Password in Linux
MySQL and MariaDB are popular relational database management systems used for storing and managing data. The root user in MySQL and MariaDB has extensive privileges and control over the databases, making it a prime target for potential security breaches. It is crucial to change the root password regularly to enhance the security of your system. In this article, we will explore the step-by-step process of changing the root password of MySQL or MariaDB in Linux. . Changing the root password of MySQL or MariaDB in Linux is a fairly straightforward process. First, you need to log in to the machine as the root user. Once logged in, you can use the mysqladmin program to change the root password by running the command “mysqladmin -u root password ‘new_password'”. After entering the command, the root password of MySQL or MariaDB will be changed to the new_password you provided. You can also use the command line program mysql to change the root password by running the command “SET PASSWORD FOR ‘root’@’localhost’ = PASSWORD(‘new_password’);”. Once the command is executed, the root password will be changed to the new_password you provided. It is important to remember to use a strong password for your root user to ensure the security of your database. Changing the root password at regular intervals is essential for maintaining the security of your MySQL or MariaDB server. The root user has complete access and control over all databases and tables within the system. By changing the root password periodically, you can prevent unauthorized access to your data and protect against potential server breaches. . Enhancing the safety of MySQL and MariaDB involves updating the root password, which is crucial. Follow this tutorial for steps applicable to Linux.. MySQL Password Change,MariaDB Authentication,Database Root Access. . Brittany Day
Sep 08, 2023
•
How to Secure My Webserver
163
 web applicationpentesting toolsenumeration
Best Directory Bursting Tools For Linux Web Application Testing
Looking for free-to-use tools to enumerate hidden directories and files on a web server? Here are the best Linux tools for directory bursting. . In the reconnaissance stage of every web application pentest, it is essential to find possible directories on the application. These directories might hold significant information and findings that would help you greatly to find vulnerabilities in the application and improve its security. Luckily, there are tools on the internet that make directory brute-forcing easier, automated, and faster. Here are five directory-bursting tools on Linux to enumerate hidden directories on a web application. Directory bursting , also known as "directory brute forcing", is a technique used in ethical hacking to discover hidden directories and files on a web server or application. It involves systematically attempting to access different directories by guessing their names or enumerating through a list of common directories and file names. The process of directory bursting typically involves using automated tools or scripts that send HTTP requests to a web server, trying different directories and file names to find resources that are not explicitly linked or advertised on the website's navigation or sitemap. . Powerful directory enumeration tools for web application penetration testing reveal concealed directories and enhance security protocols.. directory bursting tools, web application security, pentesting techniques. . Brittany Day
Aug 19, 2023
•
How to Secure My Webserver
163
 access controlapacheconfiguration
Configuring SELinux for Apache Web Server on RHEL-Based Systems
SELinux can make it a challenge to get newly installed or custom applications to run because it blocks them from having access to certain directories in the file system hierarchy. Instead of disabling SELinux, the better option is to configure the security system so applications and services can function as expected. This is especially important when you have an application or service that requires a nonstandard configuration. . Take, for example, the Apache web server. Apache on RHEL-based distributions defaults to the /var/httpd directory as the document root and ports 80 (for HTTP) and 443 (for HTTPS ) when installed. Admins who want to use a different directory and port for a website might opt for /srv as the document root and port 8080. Out of the box, SELinux denies those nonstandard options, so they must be configured to work properly. . Follow key steps to configure SELinux for Apache, ensuring it operates securely while adapting policies to meet application needs effectively. SELinux Configuration, Application Access Control, RHEL Security. . Brittany Day
Aug 11, 2023
•
How to Secure My Webserver
163
 server deploymentLinux servercloud hosting
Comprehensive Step by Step Guide for Launching Linux Server on AWS EC2
When you want to quickly spin up a Linux server in the cloud, AWS EC2 is your best bet. . Hosting web servers on the internet can be very challenging for a first-timer without a proper guide. Cloud service providers have provided numerous ways to easily spin up servers of any kind in the cloud. AWS is one of the biggest and most reliable cloud-based options for deploying servers. Here's how you can get your Linux-based server running in the cloud with AWS EC2. . Get detailed guidance on deploying a Linux server on AWS EC2 with ease and efficiency.. Linux Server,AWS EC2,Cloud Hosting,Server Deployment,Cloud Infrastructure. . Brittany Day
Feb 11, 2023
•
How to Secure My Webserver

Get the latest News and Insights
Get the latest Linux and open source security news straight to your inbox.
Community Poll
Should Linux servers automatically install security updates?
Search Topics
Powered By

Linux Security - Your source for Top Linux News, Advisories, HOWTOs and Feature Releases
QUICK LINKS
subscribe to newsletters!
Like staying secure? So do we.
Sign up for updates, tips, and alerts!