Overly broad permissions can turn one compromised account into a much larger security problem. Learn how to reduce unnecessary access, review privileges, and apply least privilege across modern Linux systems. Review Linux Privileges×


Stay Ahead With Linux Security HOWTOs
How to Secure My Network incident response network traffic
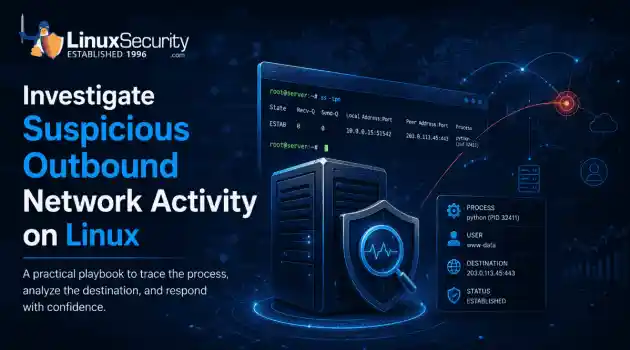
incident response network traffic Imagine logging into a production Linux server for routine maintenance and noticing background network activity connecting to an unfamiliar external IP address. Your endpoint protection agent is not popping up with an alert, there is no service failure, and on the surface, the system appears to be running normally. . For Linux administrators and security teams, such a situation is a moment of truth: Is this activity a sign of active intrusion or just a tool that was overlooked in the course of...
 Jul 21, 2026
How to Harden My Filesystemsystem hardening open source security
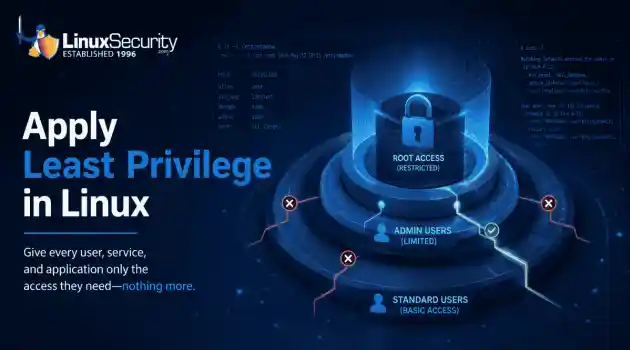
system hardening open source security We all spend a lot of time defending our systems from external threats, but the amount of damage an attacker can cause often depends on what happens after they get in. A single compromised account doesn't always lead to a major incident. The real danger begins when that account has far more access than it actually needs. . That's exactly what the principle of least privilege is designed to prevent. By limiting users, services, and applications to only the permissions required for their jobs,...
Jul 20, 2026

How to Learn Tips and Tricksthreat detection system monitoring
threat detection system monitoring For small security and IT teams, the "enterprise" dream of a fully automated SIEM often feels like a distant luxury. It’s a vision built on massive budgets and dedicated engineering teams—things that, frankly, most of us don't have. But here is the reality: you don’t need a six-figure platform to maintain a secure environment. . Linux systems are, by design, incredibly verbose. Every time a user authenticates, a process executes, or a configuration file changes, your system creates a record of...
Jul 17, 2026
How to Learn Tips and Tricksnetwork security centralized logging
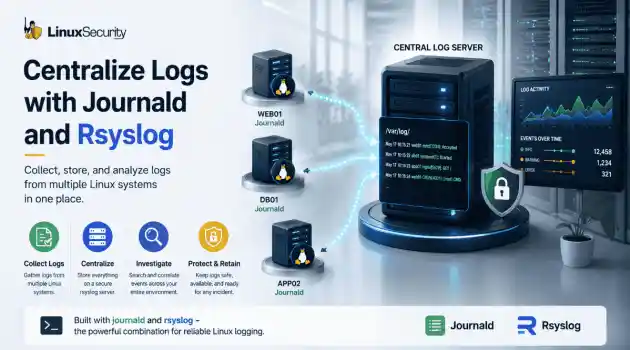
network security centralized logging Linux systems generate a steady stream of authentication, service, kernel, and application logs. On most systems, those logs never leave the machine that created them. If you're responsible for ten or twenty servers, that means checking each one separately. If one disappears before you can investigate it, its logs may disappear with it. Centralized logging solves that by sending log messages to another server as they're created. Instead of searching every machine, you have one place to review...
Jul 15, 2026

How to Secure My Networksecurity advisory audit
security advisory audit When you’re digging through an incident, your logs are the only thing you can actually trust. The problem is, attackers know that too. If someone gets root on your server, their first move is almost always to delete the evidence and cover their tracks. . If you aren't actively protecting your logs, you're basically flying blind the second a breach happens. It’s a miserable feeling to realize you have no idea what an attacker did because they wiped the logs before you even got there. In this...
Jul 11, 2026
 Refine HOWTOs
X Clear Filters
Get the latest News and Insights
Get the latest Linux and open source security news straight to your inbox.
Community Poll
Should Linux servers automatically install security updates?
Loading...
Explore Latest Linux Security HOWTOs
We found -2 articles for you...
167
 security advisoryauditcentralized logging
How to Build a Tamper-Resistant Logging Infrastructure for Linux
When you’re digging through an incident, your logs are the only thing you can actually trust. The problem is, attackers know that too. If someone gets root on your server, their first move is almost always to delete the evidence and cover their tracks. . If you aren't actively protecting your logs, you're basically flying blind the second a breach happens. It’s a miserable feeling to realize you have no idea what an attacker did because they wiped the logs before you even got there. In this guide, I’m going to show you how to actually lock these things down. We’re going to build a setup that keeps your audit trail safe—even if the host itself is completely compromised. The Strategy: A Layered Defense A tamper-resistant logging strategy combines multiple defensive layers to make the cost of log destruction too high for an attacker: Centralized Logging: Preserves evidence off-host where an attacker cannot reach it. Service Resilience: Prevents the logging daemon from being easily stopped or killed. Immutable Local Storage: Adds "speed bumps" to local files to slow down tampering. Active Monitoring: Detects tampering attempts or "log silence" the moment they occur. 1. The Golden Rule: Centralized Remote Logging Local logs are a liability. By streaming logs to a dedicated centralized server—where even administrators cannot easily modify previously written logs—you ensure that if an attacker wipes the local disk, the evidence is already safely archived elsewhere. Action: Configure rsyslog for TLS forwarding Most modern systems use rsyslog or systemd-journald . For production, use TCP (@@) rather than UDP (@) to ensure packets aren't dropped. Edit /etc/rsyslog.conf : # Encrypted transport via TCP $ActionSendStreamDriver gtls $ActionSendStreamDriverMode 1 $ActionSendStreamDriverAuthMode x509/name *.* @@logserver.example.com:514 Stick with TCP for this. A lot of people use UDP because it’s easy, but it’s 'fireand forget'—meaning you’re going to lose packets the second your network gets busy. You can’t afford to lose audit logs. You should be running TCP, and frankly, you need to layer TLS on top of it. That’s the only way to stop someone from sniffing your traffic or spoofing the logs while they’re moving across the wire. Quick warning: Don’t try to wing the TLS setup. If your client and server aren't playing nice with the same Certificate Authority (CA) , it’s just not going to connect, period. Seriously, check your distro’s docs on how to handle the certs first—don't just force the connection and hope for the best. How to make sure it’s not broken: Once you’ve got the config saved, don't just hope for the best. Run this on your client: logger "Test log message" Then, jump over to your central server. Tail the logs—use journalctl , your SIEM, or whatever standard log file your distro uses (usually /var/log/syslog or /var/log/messages ). If you don’t see that test message pop up, your pipeline isn't working 2. Service Resilience: Making the Daemon Stick Attackers often try to kill the logging service to stop the flow of information. You can use systemd to make the service self-healing. While this example uses rsyslog , the same logic applies to systemd-journald if you are managing it directly. Action: Configure service overrides sudo systemctl edit rsyslog Add this block: Ini, TOML [Service] Restart=always RestartSec=1 StartLimitBurst=5 StartLimitIntervalSec=10 Why this matters: This forces the daemon to restart immediately if killed. While a root user can technically override this, it forces them to continuously fight the system, increasing the likelihood that your monitoring will catch the activity. Verification: Manually kill the process with sudo pkill rsyslog and immediately run systemctl status rsyslog to watch it restart. 3. Local "Speed Bumps": Immutable Attributes If you havesensitive logs that must reside locally, you can use the chattr command to add an "append-only" flag. Action: Set the attribute sudo chattr +a /var/log/auth.log That’s the only way to stop someone from sniffing your traffic or spoofing the logs while they’re moving across the wire. Quick warning: Don’t try to wing the TLS setup. If your client and server aren't playing nice with the same Certificate Authority (CA), it’s just not going to connect, period. Seriously, check your distro’s docs on how to handle the certs first—don't just force the connection and hope for the best. 4. Detecting "Log Silence" A sudden stop in log volume is often an early indicator of compromise. A sudden absence of logs is often just as suspicious as malicious entries. Action: Monitor the heartbeat If you aren't running a full SIEM, add a simple cron job to verify the service is running: pgrep -f rsyslog > /dev/null || logger -p crit "CRITICAL: Logging service is down!" Pro Tip: Hook this logger command into your alerting system (like Prometheus, Zabbix, or Slack notifications) so you know within seconds if your logging goes dark. 5. Auditd: Tracking the Tamperer auditd is one of the most effective tools for detecting unauthorized changes to log files. Action: Add a watch rule Add this to /etc/audit/rules.d/audit.rules : -w /var/log/auth.log -p wa -k log-tamper Verification: Run sudo ausearch -k log-tamper -i to see the results. It will show you exactly which user account or process touched that file. Best Practice: Hardening local logs is valuable, but remote logging should always be your first priority. Once an attacker has root access, no local protection is completely trustworthy. Common Mistakes to Avoid The UDP Trap: Using UDP for production logging leads to lost data. Always prefer TCP or RELP (Reliable Event Logging Protocol), which provides stronger delivery guarantees than traditional syslogover TCP. Ignoring Rotation: Making a file immutable without configuring logrotate will cause your system to fill up or services to crash. Assuming Local Safety: No local log is safe if the host is compromised. Centralization is your only true insurance. Final Implementation Checklist Remote Logging: Enabled TLS/TCP forwarding. Verification: Confirmed messages appear on the central server. Resiliency: Set systemd restart policies on the logging daemon. Monitoring: Set up an alert for "Log Silence." Auditd: Active watch rules on critical files. Next Steps: If you are using immutable log files ( chattr +a ), your next task should be integrating those protections with logrotate so your logs continue to manage themselves without manual intervention. Want more Linux security news, vulnerability analysis, and software supply chain updates? Subscribe to the LinuxSecurity Newsletter and get the latest threats, advisories, and expert insights delivered directly to your inbox. Related Reading Exploring Log Management Tools for Efficient Linux System Monitoring Practical Guide to Hardening Linux Servers for Enhanced Security How to Read Linux Audit Logs During an Intrusion Auditd vs eBPF: Modern Approaches to Linux System Monitoring Linux Features Enhancing Security for 2026: Predictability and Control . Explore strategies to build a tamper-resistant logging infrastructure in Linux to enhance incident response and logging security.. Linux logging security, tamper-resistant logs, incident response. . MaK Ulac
 Jul 11, 2026
•
Jul 11, 2026
• How to Secure My Network
167
 security advisoryremote accessauthentication
How to Detect Unauthorized SSH Keys on Linux Systems
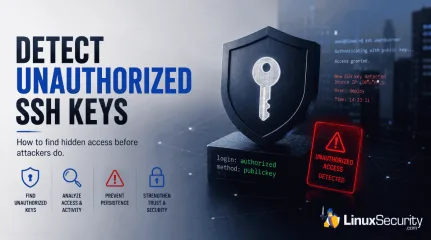
Most of the time, nobody notices. SSH authentication succeeds, no alerts are generated, and the connection looks exactly the way it did the day the key was installed. That's part of the problem. . When security teams investigate unauthorized access on Linux systems, they often focus on passwords, exposed services, or vulnerable software. Trusted access receives less attention. Yet a single forgotten or unauthorized SSH key can provide the same access as a legitimate user while attracting very little scrutiny. This guide explains how to identify unauthorized SSH keys, investigate suspicious SSH activity, and determine whether the trust you've granted over time still belongs there. Why Unauthorized SSH Keys Are So Dangerous SSH keys bypass many controls that organizations traditionally depend on. A password-based attack often generates warning signs. Failed authentication attempts appear in logs. Lockout thresholds trigger. Users report suspicious activity. Security tools generate alerts. A valid SSH key behaves differently. When an attacker possesses a legitimate private key, the authentication process may look completely normal. The SSH daemon sees a trusted credential. The login succeeds. No password failures occur. No brute-force signatures appear. Nothing obviously breaks. That makes SSH keys attractive for persistence. An attacker who gains administrative access frequently adds a new public key to an existing account. Sometimes they create a new account. Sometimes they target the root directly. Other times, they hide inside a service account that rarely receives attention because administrators assume it belongs to an application. The objective is simple: maintain access after the original vulnerability gets patched. Keys also support lateral movement. Once attackers compromise one Linux host, they often search for private keys stored in home directories, automation scripts, CI/CD systems, backup repositories, or deployment servers. A single exposed private key can unlockmultiple systems. Suddenly, one foothold becomes several. The dangerous part is that none of this necessarily looks suspicious. The attacker is using a trusted authentication method exactly as it was designed to work. Where SSH Key Abuse Usually Starts Unauthorized SSH key usage rarely begins with SSH itself. The problem usually starts somewhere else in the attack chain: Developer Workstations: A compromised laptop may contain private keys used for production access. Public Repositories: Developers occasionally commit private keys, configuration files, backup archives, or deployment scripts. Automated scanning tools continuously search for exposed secrets. Service Accounts: Many organizations grant broad permissions to automation accounts because restricting access requires additional engineering work. Those accounts often hold keys that provide access across multiple environments. Vendor Access: A contractor receives temporary access to support a project. The project ends. Nobody removes the key. Months later, the account still works. Manually Added Keys: An administrator troubleshooting an outage might temporarily add a key for convenience and forget about it afterward. Step 1: Inventory Authorized SSH Keys Across Linux Systems The first step is understanding what trusted access currently exists. Many organizations cannot answer a simple question: Which SSH keys are authorized across the environment right now? Start by identifying every authorized_keys file . Most administrators immediately think about user accounts, but SSH keys appear in many places: Root accounts Service accounts Application users Automation accounts Dormant accounts Document the username, home directory, public key fingerprint, source system, key owner, business purpose, and date added, if available. This process can be tedious, but detection depends on knowing what normal looks like. If a SOC analyst discovers a public key during an investigation, the first question should be: Who owns this key? Too often, the answer is unknown. That uncertainty creates management blindness. Step 2: Compare Keys Against Known Owners Once an inventory exists, every key should be mapped to a specific owner and business purpose. A key without an owner should immediately attract attention. The same applies to keys associated with former employees, retired systems, completed projects, old vendors, or abandoned automation. Duplicate usage is another warning sign. If the same public key appears across unrelated accounts or systems, investigate why. Shared keys often emerge from convenience-based administration practices. One administrator creates a key pair and distributes it widely because it simplifies management. Convenient. Also dangerous. Compromise that one key and the attacker inherits every trust relationship attached to it. Step 3: Monitor Changes to authorized_keys Periodic audits help, but they are not enough. An attacker does not need to wait for the next quarterly review. They only need a few seconds to add a new key. Focus on locations such as: ~/.ssh/authorized_keys /root/.ssh/authorized_keys Service account SSH directories and configuration files File integrity monitoring can detect additions, removals, and modifications. Linux audit rules can also record changes and identify which process or user performed the action. Monitoring creates a timeline. A timeline reveals who changed what and when. That evidence becomes extremely valuable during incident response. Step 4: Review SSH Authentication Logs Linux authentication logs provide insight into how SSH keys are used after they are installed. Common locations include /var/log/auth.log, /var/log/secure, or journalctl. Review successful public-key authentication events rather than focusing only on failures. Several patterns warrant investigation: Logins originating from unfamiliar IP addresses. Authentication events occurring outside normal maintenance windows. Service accounts thatsuddenly begin interactive logins. Administrator accounts that have remained dormant for months and then become active again. One successful login might be legitimate. Twenty successful logins across ten servers from a previously unseen source network tell a different story. Step 5: Correlate Key Usage With User Behavior A valid key can still be used in an invalid way. Security teams should correlate SSH activity with information about users, devices, networks, and expected administrative behavior. Questions worth asking include: Did the login originate from an approved source IP? Does the user normally access systems from this network? Does the login align with the user's role and approved change tickets? Unauthorized SSH key usage often appears as a context mismatch rather than an authentication failure. The login works exactly as expected. Everything around it does not. Step 6: Look for Persistence Patterns Persistence leaves clues. Not always immediately, but attackers tend to follow recognizable patterns. Watch for a new SSH key appearing shortly after suspicious activity. High-privilege targets deserve special attention. Keys added to root accounts, infrastructure management accounts, or systems with broad sudo privileges carry elevated risk. Watch for the same key appearing across multiple hosts, as an attacker may distribute a trusted key widely. If a login is immediately followed by privilege escalation, file staging, or outbound network connections, you aren't looking at an admin—you’re looking at an adversary. Step 7: Close Audit Gaps Many SSH-related incidents are enabled by process failures rather than technical failures. Organizations often lack a centralized inventory of SSH keys. Alerting is frequently absent. A new key can be added to a production server without generating any notification. Vendor access deserves particular attention. External access is often granted quickly, but removal tends to happen much more slowly. What Security TeamsShould Alert On Security monitoring should generate alerts for: New keys added to privileged accounts Public-key logins from previously unseen source IPs Dormant users authenticating through SSH The same key appearing across unrelated accounts SSH activity outside approved maintenance windows Modifications to the SSH configuration that weaken access controls How to Respond When Abuse Is Suspected The first instinct is often to remove the key immediately. Be careful. Preserve authentication logs, shell history, audit records, and system artifacts before making changes whenever possible. Understanding how the key arrived on the system is just as important as removing it. Identify affected accounts first. Then determine which systems trust the key. Disable or remove suspicious keys only once evidence collection is complete. Rotate exposed keys. Check cron jobs, startup scripts, and scheduled tasks. Look for lateral movement because attackers rarely stop at one host when additional access is available. Prevention: Make SSH Key Trust Verifiable The strongest defense is reducing uncertainty. Every SSH key should have a documented owner, a defined purpose, and a known lifecycle. Centralized inventories help maintain that visibility. Regular reviews help remove stale access. Continuous monitoring helps identify suspicious changes before attackers can establish long-term persistence. Separate human access from service access. Treat SSH keys as privileged credentials, because that is exactly what they are. SSH keys are trusted access mechanisms, but trust alone is not a security control. Once a key is added, many organizations assume the problem is solved. Attackers benefit from that assumption. Unauthorized SSH key usage rarely resembles a brute-force attack. It rarely generates obvious authentication failures. It often looks like a successful login from a credential the system already trusts. That is why detection depends on visibility rather than simple access controls.The key that causes a future incident is often not the newest key in the environment. It is the one nobody remembered to question. Related Reading SSH Key Sprawl on Linux: Unmanaged Access Threats and Cleanup Guide Enhance Linux Server Security Through Effective SSH Best Practices Understanding Linux Persistence Mechanisms and Detection Tools . When security teams investigate unauthorized access on Linux systems, they often focus on passwords,. nobody, notices, authentication, succeeds, alerts, generated. . Dave Wreski
Jun 03, 2026
•
How to Secure My Network

166
 system stabilityauditlog management
Getting Started With System Logging in Linux Environment
System logging is the most reliable way of knowing which activities were carried out on your Linux system. This guide explains how to get started with Linux system logging. . System logs in Linux provide you with great insight into core activities on your PC or server infrastructure. They're critical for keeping your system stable and secure. System logs also provide you with an opportunity to audit various activities that have taken place in the past. This guide introduces you to the logging system in Linux. All the major activities carried out by core system applications and services are recorded in the form of logs and at the heart of all this is a system known as Syslog. . Enhance your understanding of fundamental functions with Linux logging for resilience and protection.. Linux Logging,System Administration,Log Management. . Brittany Day
Apr 12, 2021
•
How to Learn Tips and Tricks

Get the latest News and Insights
Get the latest Linux and open source security news straight to your inbox.
Community Poll
Should Linux servers automatically install security updates?
Search Topics
Powered By

Linux Security - Your source for Top Linux News, Advisories, HOWTOs and Feature Releases
QUICK LINKS
subscribe to newsletters!
Like staying secure? So do we.
Sign up for updates, tips, and alerts!