Audit Linux privileges now to limit compromise, escalation, and system-wide damage. Review Linux Privileges×


Stay Ahead With Linux Security HOWTOs

How to Learn Tips and Tricks incident response system monitoring
incident response system monitoring A Linux server can be fully patched, hardened, and compliant, yet still leave investigators unable to explain how an attacker got in. Without reliable Linux logging, even a well-secured system can become impossible to investigate. . Hardening defines what a system should allow, but logs reveal what actually happened. When visibility is incomplete, security teams lose the evidence they need to detect attacks, understand their scope, and determine how they unfolded. Why Linux Logging Must Come...
 Jul 23, 2026
How to Secure My Networkincident response network traffic
incident response network traffic Imagine logging into a production Linux server for routine maintenance and noticing background network activity connecting to an unfamiliar external IP address. Your endpoint protection agent is not popping up with an alert, there is no service failure, and on the surface, the system appears to be running normally. . For Linux administrators and security teams, such a situation is a moment of truth: Is this activity a sign of active intrusion or just a tool that was overlooked in the course of...
Jul 21, 2026
How to Harden My Filesystemsystem hardening open source security
system hardening open source security We all spend a lot of time defending our systems from external threats, but the amount of damage an attacker can cause often depends on what happens after they get in. A single compromised account doesn't always lead to a major incident. The real danger begins when that account has far more access than it actually needs. . That's exactly what the principle of least privilege is designed to prevent. By limiting users, services, and applications to only the permissions required for their jobs,...
Jul 20, 2026
How to Learn Tips and Tricksthreat detection system monitoring
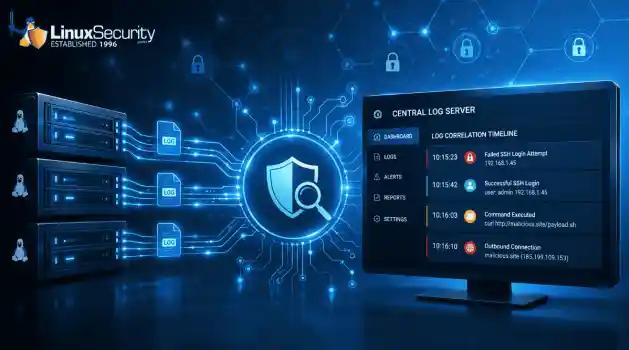
threat detection system monitoring For small security and IT teams, the "enterprise" dream of a fully automated SIEM often feels like a distant luxury. It’s a vision built on massive budgets and dedicated engineering teams—things that, frankly, most of us don't have. But here is the reality: you don’t need a six-figure platform to maintain a secure environment. . Linux systems are, by design, incredibly verbose. Every time a user authenticates, a process executes, or a configuration file changes, your system creates a record of...
Jul 17, 2026
How to Learn Tips and Tricksnetwork security centralized logging
network security centralized logging Linux systems generate a steady stream of authentication, service, kernel, and application logs. On most systems, those logs never leave the machine that created them. If you're responsible for ten or twenty servers, that means checking each one separately. If one disappears before you can investigate it, its logs may disappear with it. Centralized logging solves that by sending log messages to another server as they're created. Instead of searching every machine, you have one place to review...
Jul 15, 2026
 Refine HOWTOs
X Clear Filters
Get the latest News and Insights
Get the latest Linux and open source security news straight to your inbox.
Community Poll
Should Linux servers automatically install security updates?
Loading...
Explore Latest Linux Security HOWTOs
We found 0 articles for you...
160
 linuxsecurity considerationscontainer security
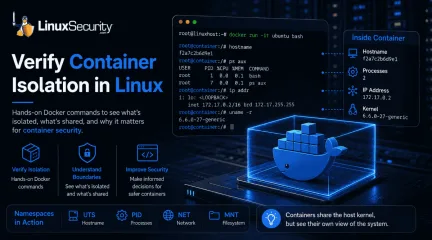
How to Check Docker Container Isolation in Linux
Docker makes containers feel like separate, lightweight virtual machines. They have their own hostnames, processes, and networking—but are they actually isolated? Many administrators assume they are without ever verifying the boundaries. If you’ve ever wondered what truly separates your application from the host, this guide is for you. We’ll use simple Docker commands to verify container isolation firsthand and uncover exactly what remains shared with the host. . What Is Container Isolation? Think of container isolation as a way to trick a process into thinking it has a server all to itself. If you’ve worked with virtual machines, you’re used to a hypervisor handling the heavy lifting—effectively carving out a slice of hardware. Containers are different. They don’t virtualize hardware; they use Linux namespaces to carve up the kernel’s view of the system. Basically, the kernel assigns labels to resources like network stacks or process lists. If a process in a container asks "What can I see?", the kernel only shows it the resources tagged with its specific namespace ID. It’s an illusion, sure, but it’s an incredibly effective one for keeping your applications from interfering with the host or each other. What Is Container Security? When people ask what container security is, they are usually looking for a way to keep their apps safe from start to finish. It’s not just one thing; it’s the whole process of managing your images, the runtime, and the host machine. The reason isolation is the biggest part of this is simple: if you don’t have a clear boundary, one bad script or one compromised app can easily reach into your host system. By knowing exactly what a container can (and can't) see, you can lock down your configuration and make sure that if one container fails, it doesn't take the whole server down with it. Step 1: Launch a Test Container with Docker Run To observe these boundaries, we’ll use the docker run command—the most common way to spin up a newcontainer. We are using the official Ubuntu image because it provides a familiar Linux userspace that is ideal for testing Docker commands. Run this command on your host: docker run -it ubuntu bash docker run : Creates and starts a new container instance. -it : Launches the container in interactive mode so you can run commands inside it. Once the command finishes, your terminal prompt will change. You are now working inside the container’s isolated environment. Step 2: Use Docker PS to Confirm the Container Is Running Open a second terminal window on your host and run: docker ps The output lists every active container, including its unique Container ID, image, uptime, and assigned name. Verify that your Ubuntu container appears in this list before moving to the next step. Step 3: Compare Hostnames to See Basic Isolation Let's see if the container truly has its own identity. Inside the container: Run hostname On your host: Run hostname You will see two different values. This is because the container uses the UTS (UNIX Timesharing System) namespace, which allows it to maintain a unique hostname independent of your machine. Step 4: Compare Running Processes Namespaces are at work here, too, preventing the container from seeing host-level processes. Inside the container: Run ps aux On your host: Run ps aux Inside the container, you will only see a small, clean list of processes, with bash as PID 1 because it is the first process started within that PID namespace. Meanwhile, your host terminal shows every system process. This PID namespace separation is vital for container isolation. Step 5: Use Docker Exec to Access a Running Container Administrators often need to debug a container that is already running in the background. For this, we use docker exec . Feature docker run docker exec Purpose Creates a new container Uses anexisting container State Starts a fresh environment Hooks into a running process Typical Use Initial testing/deployment Debugging or maintenance Run this on your host to jump back into your running container: docker exec -it bash Step 6: Compare Network Settings Run ip addr in both the container and the host. The container uses a separate network namespace, giving it its own virtual interfaces and a private IP address (usually in the 172.17.x.x range). This proves that the container has a private network stack, keeping its traffic separate from your host’s primary interfaces. Step 7: Compare Filesystems Create a file inside the container to test storage boundaries: touch /testfile.txt If you check your host’s current directory, you won't see this file. Although Docker stores the container's writable layer on the host, the file does not appear in your host's current working directory because the container has its own mount namespace. Step 8: See What Containers Still Share Finally, run this on both the host and the container: uname -r You will notice the kernel version is identical. This is the most critical lesson for container runtime security. Because containers share the host kernel, they do not provide the same "hard" security boundary as a virtual machine. According to official Linux kernel documentation , Linux namespaces provide logical partitioning, but they do not replace the need for secure kernel management. Common Container Isolation Mistakes Assuming Containers Are Virtual Machines: Containers are not hardware-virtualized. They are processes on your host, meaning a kernel-level exploit could impact the entire system. Running Privileged Containers: Using --privileged grants a container access to host devices, effectively bypassing many security namespaces. Using Host Networking: Using --net=host shares the host’s network namespace,removing all network isolation. Mounting Sensitive Directories: Mapping /etc or the Docker socket into a container can give the container full control over the host. Quick Reference: Observed Namespaces Namespace What You Verified UTS Different hostname PID Different process list Network Different interfaces and IP Mount Separate filesystem view Verify You've Observed Container Isolation Before you finish, ensure you’ve confirmed the following: Different hostname Different process list Different network interface Same kernel version File created inside the container is not visible in your host's working directory Container Security Best Practices To maintain a hardened environment, follow these container security best practices based on the CIS Docker Benchmark : Use Least Privilege: Never run your applications as root inside a container. Avoid Privileged Containers: Only use elevated privileges when absolutely necessary for hardware access. Keep Images Updated: Rebuild containers regularly using current base images to receive security patches and bug fixes. Patch Host Kernels: Since all containers share the host kernel, keeping your host OS updated is your primary defense against exploits. Audit Mounts: Regularly review which directories are mounted into your containers to prevent unauthorized host access. Final Takeaway You’ve now verified that containers provide effective logical isolation, but they are not the "air-gapped" environments that virtual machines are. Understanding these boundaries allows you to make informed container security decisions. Now that you’ve verified isolation firsthand, the next step is learning how Linux capabilities, cgroups, and seccomp further strengthen your environment. Exploring those features will help you move from basic containerusage to building truly resilient and secure systems. Want more Linux security news, vulnerability analysis, and software supply chain updates? Subscribe to the LinuxSecurity Newsletter and get the latest threats, advisories, and expert insights delivered directly to your inbox. . Explore how to verify Docker container isolation and understand its importance for securing Linux applications.. Docker Isolation, Container Security, Linux Best Practices. . MaK Ulac
 Jul 06, 2026
•
Jul 06, 2026
• How to Harden My Filesystem
166
 security advisorylinuxdocker
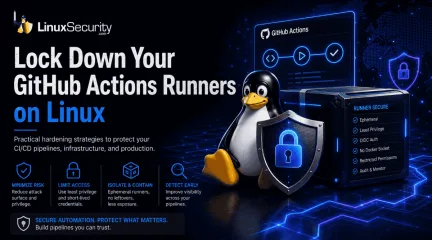
GitHub Actions Linux Self-Hosted Runners Security Risks 2025-30066
Self-hosted GitHub Actions runners give organizations far more flexibility than standard cloud-hosted runners. Teams can integrate internal infrastructure directly into CI/CD workflows, automate Kubernetes deployments, run custom tooling, and manage Linux-based build environments without relying entirely on external infrastructure. . That flexibility also creates a significant security risk. A compromised self-hosted GitHub Actions runner can hand attackers direct access to Kubernetes clusters, cloud credentials, package registries, and production deployment systems—often without exploiting a single Linux vulnerability. Recent compromises, such as the poisoning of the tj-actions/changed-files Action and the Codecov supply chain breach, demonstrated how attackers increasingly target CI/CD automation. This is because the pipeline itself often provides privileged access to infrastructure and production environments already. Unlike ephemeral cloud runners, self-hosted Linux runners frequently persist long after workflows complete. In many environments, they already sit close to Kubernetes clusters, internal repositories, package publishing systems, and cloud administration tooling. Why Self-Hosted GitHub Actions Runners Create Security Risks Self-hosted runners often inherit broad operational access because they handle container builds, infrastructure deployment, cloud provisioning, and release automation simultaneously. That concentration of privileged access makes the runner itself a high-value target. As workflows expanded, self-hosted runners gradually accumulated access to: cloud deployment credentials, Kubernetes environments, internal repositories, package publishing systems, infrastructure automation tooling, container registries, and production release pipelines. The risk becomes larger when organizations place runners directly inside trusted internal networks or allow workflows to interact directly with production infrastructure. Once attackerscompromise the workflow environment, the runner may become a pivot point for lateral movement deeper into the environment. Unlike traditional endpoint compromise, attackers frequently abuse legitimate CI/CD automation behavior rather than exploiting Linux directly. That operational normalcy makes malicious workflow activity much harder to detect. How to Use Ephemeral GitHub Actions Runners on Linux Persistent runners may retain credentials, temporary artifacts, shell histories, and environment variables long after workflows finish executing. That persistence creates additional opportunities for: credential theft, workflow persistence, artifact tampering, and lateral movement across infrastructure environments. Ephemeral runners reduce that exposure window because the environment is destroyed automatically after each workflow completes. If you are running on standalone Linux hosts, you can enforce this by using the --ephemeral flag during the registration process: ./config.sh --url [https://github.com/OWNER/REPO](https://github.com/OWNER/REPO) --token YOUR_TOKEN --ephemeral Many organizations now deploy ephemeral Linux runners using the GitHub Actions Runner Controller (ARC) for Kubernetes. This allows organizations to isolate workflows using namespaces, network policies, and tightly scoped service accounts. The goal is to prevent attackers from inheriting leftover state between jobs. How to Restrict Docker Socket Access on GitHub Actions Runners Exposing the Docker socket ( /var/run/docker.sock ) inside GitHub Actions workflows effectively grants root-level control over the runner host. Many Linux CI/CD environments expose this socket so pipelines can build containers directly, but that configuration becomes dangerous during workflow compromise because attackers may use Docker socket access to escape container isolation, mount sensitive host directories, or deploy privileged containers. Organizations should avoid exposing the Docker socket whenever possible.Safer alternatives include: rootless container builds, isolated build systems, BuildKit, or Kaniko. A standard Kaniko implementation in a Kubernetes-based runner looks like this: YAML - name: Build with Kaniko image: gcr.io/kaniko-project/executor:latest args: ["--dockerfile=Dockerfile", "--destination=my-registry.com/image:latest"] How to Remove Long-Lived Secrets From GitHub Actions Workflows Long-lived credentials create unnecessary exposure. Many workflow compromises specifically target GitHub Personal Access Tokens or cloud access keys stored inside repositories. Once exposed, those credentials may continue functioning long after defenders discover the breach. Organizations should replace static credentials with OIDC (OpenID Connect) . OIDC allows workflows to request temporary cloud credentials dynamically during execution. Major cloud providers, including AWS, Azure, and Google Cloud, already support OIDC integration, which significantly reduces the operational value of stolen credentials. A hardened OIDC configuration for AWS would look like this: YAML permissions: id-token: write contents: read steps: - name: Configure AWS Credentials uses: aws-actions/configure-aws-credentials@v4> with: role-to-assume: arn:aws:iam::1234567890:role/my-github-role aws-region: us-east-1 How to Restrict GitHub Actions Workflow Permissions Many GitHub Actions environments still run with broader repository permissions than workflows actually require. Overly permissive configurations, such as permissions: write-all , grant workflows unnecessary repository modification privileges. A safer baseline starts with an empty permission set, explicitly granting only the permissions required for the workflow itself: YAML permissions: {} # Grant only the specific scope required permissions: contents: read Security teams should also carefully review all workflows using the pull_request_target trigger. Because thistrigger executes using the permissions of the target repository rather than the untrusted fork, attackers may abuse it to expose repository secrets. How to Review GitHub Actions Workflow Changes Safely Workflow files should be treated like infrastructure code. Modifications inside .github/workflows/ can directly affect deployment systems, cloud authentication, and runner execution behavior. Organizations should require mandatory pull request reviews and use CODEOWNERS protection to ensure security teams audit every change. Plaintext # .github/CODEOWNERS .github/workflows/ @platform-security-team In many environments, modifying a workflow effectively changes production infrastructure behavior. Security teams should monitor for unexpected workflow additions or unauthorized permission changes that could indicate a supply chain compromise in progress. How to Restrict Outbound Traffic and Monitor Activity Many CI/CD compromises rely on transmitting secrets to attacker-controlled infrastructure. Organizations should restrict unnecessary outbound traffic from runners using firewall rules, DNS filtering, or Kubernetes NetworkPolicies . For example, you can lock down a Kubernetes runner pod to only communicate with GitHub IP ranges: YAML apiVersion: networking.k8s.io/v1 kind: NetworkPolicy metadata: name: runner-egress spec: podSelector: matchLabels: app: github-runner egress: - to: - ipBlock: cidr: 140.82.112.0/20 # GitHub IP Range Because attackers frequently operate using legitimate workflow credentials, detection often depends on identifying unusual operational behavior—such as unexpected curl execution or unauthorized cloud API activity. GitHub Actions Runner Hardening Checklist Use ephemeral runners to prevent persistence between builds. Replace long-lived cloud credentials with short-lived OIDC tokens. Remove Docker socket exposure by using Kaniko or BuildKit. Isolate runners from productionnetworks and Kubernetes control planes. Restrict outbound traffic to only essential GitHub and cloud endpoints. Enforce a "deny-all" permission baseline in every workflow YAML. Require mandatory reviews for any modification to .github/workflows/ . GitHub Actions workflows now sit directly inside the software supply chain. They build applications, publish packages, and deploy infrastructure across production systems every day. That operational position makes them extremely attractive targets. For Linux-heavy infrastructure running cloud-native workloads, the risk is significant because the pipeline is no longer just a support tool—it has become part of production itself. Want more Linux security hardening guides like this? Subscribe to our newsletter for practical tutorials on Linux infrastructure, CI/CD security, cloud-native operations, and open-source security best practices. . Self-hosted GitHub Actions runners offer flexibility but pose major security risks that organizations must address effectively.. Self-hosted GitHub, Actions runners, CI/CD security, Linux infrastructure, pipeline security. . MaK Ulac
May 15, 2026
•
How to Learn Tips and Tricks

166
 configurationdatabaselinux
Deploy Microsoft SQL Server in Docker On Linux Efficiently
Learn how to configure and connect to a Microsoft SQL Server Database on a Linux machine using Docker containers. . Microsoft SQL Server is a robust and widely used database management system (DBMS). Traditionally, SQL Server databases have been set up on dedicated servers or virtual machines, but Docker has changed all that. Let's take a look at how you can set up a SQL Server instance on a Linux container with Docker. . Discover the process of setting up and accessing Microsoft SQL Server on a Linux environment utilizing Docker containers in an optimal and streamlined manner.. Docker SQL Server, Linux Database Setup, Microsoft SQL Configuration, SQL Server on Linux. . Brittany Day
May 11, 2022
•
How to Learn Tips and Tricks
166
 securitydockercrowdsec
CrowdSec Guide: Automatic IP Banning for Docker Containers
While CrowdSec is most commonly used as a host-based defense mechanism, the free and open-source cybersecurity solution is also suitable for Docker environments. This tutorial demonstrates how to deploy a minimal yet complete applicative stack using Docker Compose and secure it with CrowdSec. . You will learn how to: Automatically ban malevolent IPs from accessing container services Manually add/remove and inspect ban decisions Monitor CrowdSec’s behavior (via CLI and Dashboards) . Discover how to protect your Docker Compose environments using CrowdSec, implementing IP bans for harmful entities while efficiently tracking security decisions.. Docker Security, CrowdSec Tutorial, Container Defense, Open Source Security. . Brittany Day
Sep 07, 2021
•
How to Learn Tips and Tricks
166
 firewalllinux kernelsandbox
How To Harden Docker Containers With Seccomp Security Profiles
Are you a Linux user looking to harden your Docker containers? If so, you'll want to explore Secure Computing Mode (Seccomp) - a Linux kernel feature that can be used to help run Docker in a more secure environment. . It is more like a sandbox environment that not only acts as a firewall for syscalls but also enables you to restrict the actions available within the Docker containers to the host’s Linux kernel. In this guide, you will learn how to run a container with and without the Seccomp profile. . Enhance the security of your Docker containers by implementing Seccomp profiles to restrict syscall operations, thereby reinforcing their safety.. Container Hardening, Seccomp Security, Linux Security. . Brittany Day
Aug 24, 2020
•
How to Learn Tips and Tricks

Get the latest News and Insights
Get the latest Linux and open source security news straight to your inbox.
Community Poll
Should Linux servers automatically install security updates?
Search Topics
Powered By

Linux Security - Your source for Top Linux News, Advisories, HOWTOs and Feature Releases
QUICK LINKS
subscribe to newsletters!
Like staying secure? So do we.
Sign up for updates, tips, and alerts!