Audit Linux privileges now to limit compromise, escalation, and system-wide damage. Review Linux Privileges×


Stay Ahead With Linux Security Features
 security advisory path traversal
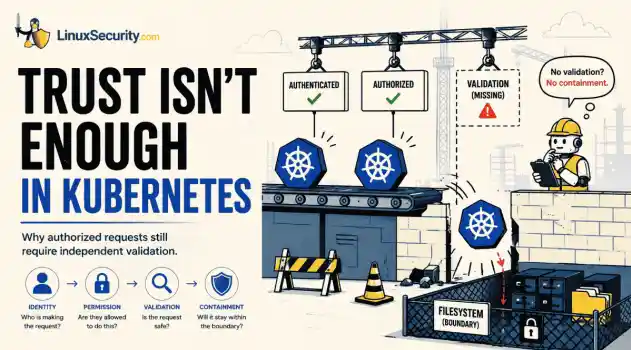
 Two newly fixed storage bugs in Kubernetes showed more than just a problem with path traversal. They found a common security flaw in the cloud: powerful parts often think that requests accepted by a higher system are safe to run. This is a simple lesson for the platform and security teams: RBAC can accept a request without showing that its parameters will stay within a certain filesystem boundary. This is clear from a new study from SentinelLabs into flaws in the Kubernetes CSI drivers for NFS...
 Jul 24, 2026
 security advisory update
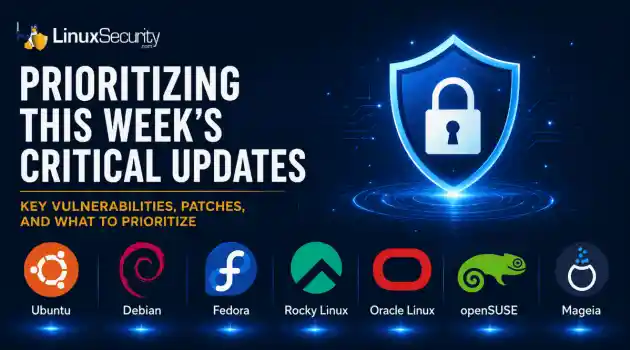
 A large volume of Linux security updates and advisories this week across major distributions once again, but it wasn't just the volume that was the story. Where maintainers and security teams focused their attention was evident in the concentration of fixes targeting Linux kernel updates, identity services, DNS infrastructure, and internet-facing software. . Instead of looking at each advisory in isolation, administrators gain more value from the general trends they reveal about Linux security...
Jul 23, 2026
 identity management security tactics
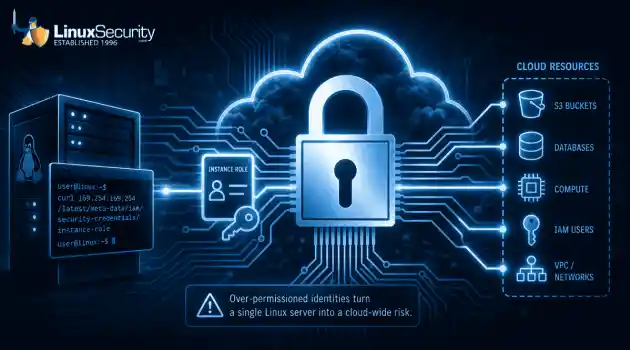
 For years, we secured our Linux infrastructure by building walls: VPCs, security groups, and hardened SSH configurations. We treated the cloud like a virtual data center, assuming that if we kept the "bad guys" out of the network, our workloads were safe. . That model is no longer sufficient. Today, one of the most common paths from an initial compromise to a major cloud breach is the identity assigned to your Linux workload. When an attacker gains code execution on a Linux instance—through a...
Jul 17, 2026
 security practices patch management
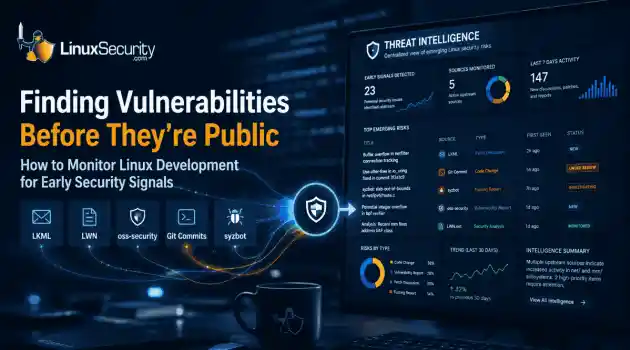
 Most of us don't hear about a kernel vulnerability until a CVE lands in our inbox or the vulnerability scanner starts complaining. By then, the patch isn't new anymore. Kernel developers may have been passing it around for review, arguing over the implementation, or revising it for days before anyone outside that community noticed it. None of those discussions are secret. They're sitting in mailing list archives, Git commits, and patch reviews where they've been the whole time. The strange...
Jul 14, 2026
 Linux security cyber attacks
 Every Linux server in your fleet produces thousands of events every minute. From journald logs and auditd records to kernel-level eBPF hooks, your systems are constantly talking. Most of that noise is just the mundane churn of system services, CI/CD runners, or routine administrative automation. But among that noise, an attacker might be establishing a foothold, moving laterally, or setting up persistence. The challenge for any security team is: how do you separate the routine from the...
Jul 13, 2026
 Refine features
X Clear Filters
Get the latest News and Insights
Get the latest Linux and open source security news straight to your inbox.
Community Poll
Should Linux servers automatically install security updates?
Loading...
Explore Latest Linux Security features
We found 7 articles for you...
102
 security advisorydenial of serviceRed Hat
Why Red Hat’s krb5 Update Matters for Linux and Windows Authentication
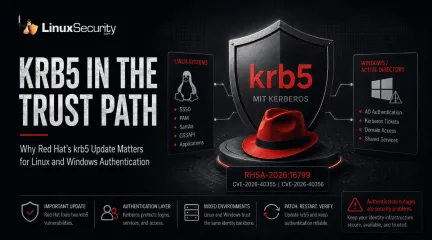
Red Hat released an Important krb5 security update for Red Hat Enterprise Linux 8 this week, addressing two vulnerabilities tracked as CVE-2026-40355 and CVE-2026-40356. On paper, it looks like another Linux package advisory. . Kerberos sits within the authentication layer that many enterprises use to connect Linux systems, Windows domains, Active Directory, file services, internal applications, and privileged-access workflows. When krb5 needs a security update, the concern is not just the package itself. It is the trust path behind it. The advisory listed in today’s security feed identifies RHSA-2026:16799 as an Important krb5 security update for RHEL 8. The issue is tied to MIT Kerberos 5 and specific NegoEx handling conditions that could allow an unauthenticated remote attacker to crash an affected process. This is not being described as credential theft or a full authentication bypass. That matters. But authentication-layer availability still matters, especially in mixed Linux and Windows environments where Kerberos helps determine who gets access to what. What Red Hat Fixed in the krb5 Update The update fixes two flaws in how MIT Kerberos 5 handles certain NegoEx authentication data. Instead of letting an attacker take over a system, the reported impact is that a specially crafted request could crash an affected process. For Linux teams, that still matters. krb5 often sits close to login flows, service authentication, identity integrations, and access control. A crash in the wrong process can interrupt more than one user session. It can affect file access, application access, administrative workflows, and service-to-service authentication. That is why Linux administrators should not dismiss the update simply because the impact reads like a denial-of-service attack. Why This Is More Than a Routine Package Update A RHEL system may use Kerberos directly. It may use SSSD. It may authenticate users through Active Directory . It may support Samba file shares, internal webapplications, automation systems, or administrative access that depends on Kerberos tickets in the background. In those environments, krb5 is not just another package. It is part of the access path. If that path breaks, the effect is operational first. Users cannot log in. Services fail to authenticate. File shares stop behaving correctly. Admins lose reliable access when they need it most. Logs fill with authentication errors that may obscure other activity. Those are not always breach scenarios, but they are security problems. Availability is part of security when the system being disrupted controls identity. Why Active Directory Environments Should Pay Attention Kerberos is closely tied to Microsoft Active Directory , but Linux systems rely on it too. In many organizations, Linux and Windows infrastructure share the same authentication backbone. A Linux server joined to Active Directory may use Kerberos to validate users, obtain tickets, and participate in domain-based access control. That makes this a Linux update with a Windows-relevant impact area. A Windows-heavy organization may still run Linux database servers, web applications, file services, monitoring platforms, container hosts, developer tooling, and CI/CD runners. If those systems authenticate through Active Directory, krb5 becomes part of the same identity chain. Not in the idea that this is a Windows vulnerability. It is not. The risk is that Linux systems often sit inside Windows-managed identity environments, and authentication flaws on one side can still affect the shared infrastructure on which both sides depend. How Authentication Outages Can Turn Into Security Problems The reported issue is narrower than a full Kerberos compromise. It depends on specific NegoEx handling conditions, and the public impact centers on crashing affected processes. That should keep the story grounded. Still, authentication bugs deserve attention because they sit close to critical workflows. A denial-of-service issue inauthentication can disrupt logins, interrupt access to internal systems, break service authentication, or create pressure during an incident. When users cannot authenticate, teams often move fast. Sometimes too fast. They restart services, bypass controls, delay policy enforcement, or open temporary access paths just to restore operations. Attackers do not always need to steal credentials to create useful disruption. Sometimes, they only need to make the identity unreliable. That is especially true in environments where Linux servers and Windows identity infrastructure are already tightly connected. What Linux Teams Should Check After Patching Linux teams running RHEL 8 should apply the krb5 update through normal security patching, then confirm that dependent services are restarted where needed. The update is rated Important in the feed, and the package sits close enough to authentication that it should not be pushed behind lower-risk maintenance. Admins should also check where Kerberos is actually used. In many environments, that list is longer than expected. Start with Linux systems joined to Active Directory. Review hosts using SSSD , PAM , Samba, LDAP integrations, GSSAPI-enabled applications, and services that depend on Kerberos-backed access. Pay special attention to file servers, administrative jump hosts, internal applications, and systems that support privileged workflows. CI/CD and automation systems are worth checking, too. If they rely on Kerberos-backed access to internal resources, authentication instability can affect builds, deployments, and operational tooling. After patching, monitor authentication logs for unusual failures, repeated crashes, or service restarts. A quiet patch is ideal. A noisy authentication layer usually means something else needs attention. What This Says About Linux and Windows Identity Risk This advisory is a useful reminder that Linux and Windows security are not separate in most enterprise networks. A Linux server may authenticateagainst Active Directory. A Windows user may access a Linux-hosted application. A Linux file server may depend on Kerberos tickets. A security team may need logs from both sides to understand what happened during an incident. The trust layer is shared, even when the operating systems are different. That is why krb5 updates matter. They are not always flashy, and they do not always point to immediate compromise. But they touch the systems that decide whether users, services, and administrators can access what they need. For Linux administrators, the takeaway is simple: authentication infrastructure belongs near the top of the patching queue. Not because every flaw is catastrophic, but because the systems behind login, identity, and service trust are too important to leave exposed. Bottom Line: Patch Authentication Before Trust Breaks The Red Hat krb5 update is not a dramatic vulnerability story. There is no confirmed domain takeover, no stolen credentials campaign, and no Linux privilege escalation chain in the advisory details provided. It still belongs on the radar. Kerberos is one of the places where Linux and Windows security meet. In enterprise environments, that overlap supports login flows, file access, service authentication, and administrative control. When krb5 is affected, the concern is not only the Linux package. It is the identity infrastructure behind it. That is what makes this update worth watching. Linux security is not only about patching exposed services or hardening the kernel. It is also about protecting the authentication paths that connect systems, users, and trust across the network. Stay Ahead of Linux Security & Authentication Risks Interested in more in-depth coverage of Linux security, enterprise authentication, Red Hat security updates, Kerberos risk, Active Directory integration, and infrastructure hardening strategies? Subscribe to the LinuxSecurity newsletter for weekly threat analysis, advisory coverage, and practical guidance for securing Linuxand open-source environments. Related Reading Red Hat Enterprise Linux 8.6 Security Update for Kerberos RedHat: RHSA-2022-8637:01 Important: krb5 security update Critical Linux-PAM Vulnerability Exposes Servers to Local Privilege Escalation RHEL 9.4 Security Enhancements: SELinux, Cryptography, More Comprehensive Linux Security Tools and Hardening Best Practices 2026 . Kerberos sits within the authentication layer that many enterprises use to connect Linux systems, Wi. released, important, security, update, enterprise, linux, address. . MaK Ulac
 May 14, 2026
•
May 14, 2026
•
102
 security advisoryimportantauthentication
PAM: Important Risks in Linux Authentication Trust Chain
PAM sits at the center of Linux authentication. Every login, SSH session, and privilege escalation request runs through it. It checks credentials, enforces policy, and chains together modules that decide who can access the system. Most teams rely on it daily without ever tracing what actually happens inside. . I started digging after seeing inconsistent login behavior on two identical hosts. Same credentials, same environment, different results. It didn’t look malicious — just unexplained. That small gap led to a deeper look at how PAM manages trust in Linux authentication. What stood out quickly was how much it depends on local configuration. PAM isn’t a single control. It’s a sequence of modules and assumptions that execute in order, each one influencing the next. Change that order, or slip in a new entry, and the system obeys it without question. That design makes PAM powerful but fragile. When configuration equals trust, mistakes and manipulation look the same until something breaks. This work outlines what I tested, how I verified behavior in controlled environments, and why Linux authentication chains remain one of the least examined trust boundaries in modern Linux security. Why I Investigated PAM and the Trust Behind Linux Authentication Chains My interest in PAM began with a simple question: how predictable is Linux authentication, really? I’ve trusted it for years without giving much thought to what happens between typing a password and seeing a prompt. Most of us do. But when you step back, PAM is the central broker of trust on every Linux system, and the assumptions around it often go untested. A few points drove me to dig deeper: PAM underpins every authentication event. SSH, sudo, console logins — they all funnel through the same modular chain. If one module misbehaves, the chain inherits that behavior. Configuration order defines trust. The sequence inside each file is not cosmetic; it determines which checks run, which are skipped, and howfailures propagate. Vendor defaults are not guarantees. Even official guidance, such as Red Hat’s System-level Authentication Guide , makes clear how easily local policies or automation can reshape authentication flow. Visibility is the hard problem. Each module is a trust decision point. Without baseline validation, it’s impossible to be certain which part of the stack actually decides user access. The Hidden Weak Point in Linux Authentication Chains PAM turned out to be less about authentication and more about execution flow. Each login, sudo call, or SSH session runs through a stack of modules, and that order decides what actually happens. Configuration is the control surface. I wanted to understand how that order affects trust, so I traced how modules load at runtime. On paper, it’s a linear process — one entry runs, passes, or fails, then moves to the next. In practice, that order defines who gets verified, what code runs, and under what authority. A few things stood out right away: PAM runs whatever is listed, in order, without validating intent. Shared objects ( .so files) are trusted as soon as they’re referenced. Nothing in the stack confirms that a module belongs or that it’s legitimate. Here’s what that looks like in configuration: Normal stack auth required pam_unix.so account required pam_unix.so Manipulated stack auth required pam_unix.so auth optional pam_exec.so /usr/local/bin/check_env account required pam_unix.so That single extra line executes a binary during authentication. If the file is altered or replaced, it runs anyway. The system follows the list exactly — no checks, no warnings. This isn’t an exploit chain. It’s a configuration path that allows persistence or data capture through normal system behavior. The Plague PAM backdoor used the same principle: a module reference that blended into legitimate authentication files. MITRE ATT&CK maps it to technique T1556.003 , covering manipulation of authentication configuration on Linux systems. To confirm the scope, I set up a proof of concept and observed PAM’s response to a modified authentication path. The stack executed the injected directive with full trust and continued the process as if nothing had changed. The weak point isn’t the modules themselves. It’s the assumption that configuration equals intent. PAM doesn’t question what it’s told, and most monitoring stops at file integrity or permission checks. That gap between what runs and what was meant to run is where attackers hide. It’s part of the authentication chain but rarely validated as one. Safe Proof of Concept: How I Tested PAM Behavior I recreated the authentication chain inside isolated virtual machines to observe PAM behavior safely. Each system mirrored a default installation from Debian and the Red Hat family to test for any distribution-level differences. The focus was strictly on behavior, not exploitation. Before altering anything, I built a baseline: Directory listings and cryptographic hashes for /etc/pam.d/* and /lib/security/*.so Package ownership checks to confirm vendor sources Checksum verification using debsums for Debian and rpm --verify for Red Hat systems After that, I introduced a benign marker. A single pam_echo line wrote a harmless message to /var/log/auth.log during login. No credentials were touched, and every change was reversible. The marker appeared in logs immediately after authentication, confirming execution within the chain. I reverted the system and verified that hashes and checksums returned to baseline. The experiment demonstrated that PAM executes configured modules without question — and that’s the issue. Even a trivial change in configuration can create a hidden execution path. Detecting those changes depends on continuous integrity validation, which frameworks like AIDE or guidance from Oracle’s auditd documentation shows itcan be done without invasive monitoring. The real risk isn’t in how PAM works, but in how confidently we assume it’s working as intended. Evidence Collection & Validation After confirming how PAM handled injected modules, I turned to validation. The goal was to capture artifacts that proved what had been executed, confirm that nothing persisted, and ensure each system returned to its original state. Every step was logged and repeatable. Evidence Type Purpose Tool Used Confidence File listings & hashes Baseline integrity sha256sum High Package ownership Confirm vendor source dpkg -S / rpm -qf High Package checksum Detect altered files debsums / rpm --verify High Syslog / auth.log entries Proof of execution journalctl / grep High Audit/AIDE alerts Detect configuration or module changes auditd / AIDE Medium These datasets told a consistent story: PAM executed exactly what was configured, and nothing outside those entries persisted once reverted. To confirm normal operation, I ran a few post-test checks: Re-calculated all hashes for /etc/pam.d/* and /lib/security/*.so ; each matched the pre-test baseline. Verified that ownership and package metadata pointed back to official repositories. Monitored authentication events for 24 hours post-reversion to confirm no residual log entries appeared. The process echoed principles outlined in NIST SP 800-63B — specifically, that assurance in an authentication system depends as much on ongoing validation as on initial configuration. This phase wasn’t about proving exploitation; it was about proving control. How I Detect PAM Manipulation in Linux Authentication Chains Detecting manipulation inside a PAM stack sounds easy in theory and tedious in reality. The logic is simple: know what belongs, watch for what doesn’t, and verify everything that can be verified. The work is in doingit consistently, across distributions that package and structure PAM differently. What actually worked for me: Diff vendor baselines for /etc/pam.d regularly. Keep serialized snapshots of your configuration and diff them against trusted versions. Distribution defaults are a good reference — I compared mine against examples from the Debian PAM administration guide to understand what “normal” looked like. Watch for pam_exec lines or .so paths outside /lib/security or /lib64/security . These are high-fidelity indicators of tampering because legitimate modules rarely live elsewhere. Verify packages using rpm --verify or debsums . If a file’s checksum diverges from its package metadata, you’re not dealing with a trusted binary. Combine that with ownership checks ( dpkg -S , rpm -qf ) to confirm source integrity. Detect unowned files early. A single .so or binary without a corresponding package is a high-confidence indicator of unauthorized code. Maintain SHA256 baselines for /lib/security/*.so . Static hashing gives you a repeatable trust anchor even when version numbers shift. Integrate file integrity monitoring. Lightweight tools like AIDE or auditd caught the few configuration drifts that manual reviews missed. They’re easy to tune and don’t interfere with the authentication flow. Focus on privileged systems first. Bastions, jump boxes, and gateway nodes are where manipulated PAM stacks cause the most damage. Security teams evaluating privileged administration controls often compare vaulting, session monitoring, and credential management approaches before selecting a platform. Reviewing comparisons such as One Identity Safeguard vs PAM alternatives can help illustrate how different privileged access models handle vaulting, session recording, and least-privilege enforcement in Linux environments. Strengthening Linux Security Posture That realization reshaped how I think about Linux PAM security — it’s not just abouthardening modules but proving they behave as intended. The goal was not to lock PAM down completely but to make any unauthorized change obvious and reversible. To reduce unnecessary standing privileges, Privileged Identity Management (PIM) can help organizations grant elevated access more deliberately and monitor it more closely. The first step was restricting write access to PAM directories. Only configuration management processes and a small set of administrators can modify /etc/pam.d or the module paths under /lib/security . Everything else is read-only. That single change eliminated accidental edits from maintenance scripts. Next, I introduced peer review for every authentication change. A second set of eyes on PAM configurations caught subtle ordering errors that would have slipped through if I worked alone. It slowed changes slightly but removed guesswork from production authentication paths. From there, I moved PAM stack management into version-controlled automation. Each configuration file is now tracked, reviewed, and deployed like code. Rollback became trivial, and diff history made it obvious when something changed intentionally or otherwise. To keep trust verifiable, I validate hashes and verify packages regularly. Hash validation runs on a schedule, and package checks rely on standard tooling such as rpm --verify and debsums . These checks are lightweight but reliable indicators that no hidden module has appeared between updates. Finally, I aligned my internal procedures with controls that map directly to the MITRE ATT&CK technique for PAM manipulation ( T1556.003 ) . The framework’s focus on configuration-based persistence reinforced what I had already observed in testing: authentication integrity requires consistent validation, not reactive cleanup. Combined with audit patterns modeled after Oracle’s audit rule examples, the result is a transparent and self-verifying authentication chain. Lessons Learned Working through this research forced me toquestion how much I actually understood about Linux authentication. I had always assumed that if a system was patched and configured correctly, its authentication chain could be trusted. That assumption turned out to be the weakest point. Even trusted defaults can hide execution paths that no one notices until something goes wrong. PAM does exactly what it is told, and that predictability can be turned against it. A single misplaced line or unverified module can shift control quietly and stay invisible inside normal log activity. Small, silent changes have major effects. I learned that integrity is not about hardening everything at once but about knowing what changed and why. The difference between security and exposure often comes down to a single unreviewed configuration. Visibility and validation are non-negotiable for long-term Linux security. The process reminded me that defenders have to think in systems, not incidents. Frameworks like MITRE ATT&CK echo the same idea: attacks succeed when assumptions go untested. My biggest takeaway was simple — trust is not a setting, it is something you prove every time the system authenticates a user. Closing Insights on PAM and Linux Authentication Integrity This work reminded me that PAM is not a niche subsystem hidden in configuration files. It is the foundation of Linux trust. Every authentication decision, privilege escalation, or login session depends on it behaving exactly as intended. For defenders, the only lasting protection is baseline awareness and constant verification. If you cannot prove what runs in your authentication chain, you are already accepting risk. Visibility is not optional; it defines whether a system is being monitored or merely assumed secure. What stood out most to me is how attackers rely on quiet persistence rather than complexity. When authentication becomes a place to hide, even small configuration changes can reshape trust across an entire system. The only way to counter that is through discipline — verifying,reviewing, and validating every layer of authentication before assuming it is safe. Genuine assurance in Linux security comes from proof, not perception. . Exploring PAM's intricate role in Linux authentication, highlighting hidden risks and validation strategies.. Linux Authentication, PAM Security, Trust Management, Configuration Integrity, Access Control. . Dave Wreski
Oct 27, 2025
•

102
 security advisorycriticalauthentication
CISA Alerts on Critical CVEs 2025-49151, 49152, 49153 in MICROSENS NMP Web+
If you’re managing industrial networks, critical manufacturing systems, or infrastructure that demands tight security, you’ll want to sit down for this one. MICROSENS NMP Web+, a popular network management platform, is in the spotlight after researchers discovered several critical vulnerabilities that essentially gift-wrap your systems for attackers. This isn’t just a fix-it-whenever-you-can scenario. We’re staring at vulnerabilities with CVSS v4 scores as high as 9.3—serious problems that require immediate attention. . These aren’t obscure bugs tucked away behind a labyrinth of layered defenses. Instead, CISA has warned they’re the kind of issues attackers can exploit with relative ease, targeting vulnerabilities in authentication and file management. If you’re running MICROSENS NMP Web+ version 3.2.5 (or earlier), it’s time to prioritize. Let’s dive into what’s at stake, how to mitigate it, and what your Linux and IT teams need to focus on today, not tomorrow, not next week. The Vulnerabilities — Breaking Down the Risks Here’s the quick rundown: three major vulnerabilities have been identified in MICROSENS NMP Web+, and they’re as bad as they sound. CVE-2025-49151 — Hardcoded Security Constants (CWE-547) This one’s a jaw-dropper. An attacker can reverse-engineer hardcoded constants to forge JSON Web Tokens (JWTs), bypassing authentication entirely. Think about that for a second: no credentials, no access control—just walk right in. The CVSS score is 9.3, and for good reason. CVE-2025-49152 — Insufficient Session Expiration (CWE-613) A less flashy but still dangerous issue: JWTs in these versions don’t expire. Once someone gains access, they can hold onto it indefinitely, effectively creating a golden ticket into your system. The CVSS score here is 8.7—still high but slightly less terrifying compared to the first one. CVE-2025-49153 — Path Traversal (CWE-22) If overwriting files and executing arbitrary code sounds like yourworst nightmare, pay attention to this one. It’s a path traversal vulnerability, allowing attackers to manipulate file paths and execute commands, even without authentication. Again, this lands at a 9.3 CVSS score—another critical severity issue. For context, these issues don’t just put a single system at risk. When exploited, the vulnerabilities could allow attackers to compromise an entire network, particularly in tightly integrated industrial control environments. The potential damage is magnified in critical infrastructure deployments—power plants, manufacturing lines, transportation systems—all key targets in the cybersecurity landscape lately. Why Does This Matter Right Now? These vulnerabilities don’t just open doors—they blow holes into the walls of systems that were already under constant threat from motivated attackers. The industrial and manufacturing spaces lean heavily on MICROSENS’ tools. These environments typically operate under tight uptime restrictions—patching isn’t fast or easy, but these CVEs aren’t the kind you let sit in your queue. Affecting industries around the globe, the vulnerabilities specifically target systems deployed in critical operational frameworks, where even slight disruptions could mean enormous downtime costs, safety implications, or worse. Attackers know this, and with the disclosed details public, there’s no reason to assume they won’t exploit it. What Should You Do — Immediately? Hands-on Linux admins, IT security pros, and network engineers—this is your checklist, plain and simple. Upgrade to MICROSENS NMP Web+ v3.3.0. MICROSENS has already released a fix in version 3.3.0. Regardless of the complexity of your patching workflow, deploying this update must be your top priority. Sticking to version 3.2.5 or earlier will only leave you exposed. Delays are not an option. Download the patched version, run your standard test environments (if you absolutely must), and roll it out. While you’re at it, triple-checkthat post-upgrade processes clear out any potential access granted to old JWT tokens, since these vulnerabilities leveraged persistent security issues. Harden Your Networks. If your systems are directly exposed to the internet, you've got a much bigger problem. Move quickly to isolate NMP Web+ servers and devices behind firewalls. Not doing so is practically handing attackers the keys. Segment these systems away from your general enterprise network, ideally with strict traffic rules governing cross-communication. Secure Remote Access. If remote management is required—and let’s face it, it often is—don’t rely on default configurations. Layer in a robust VPN (that you’ve recently updated), enforce multi-factor authentication (MFA) , and closely monitor all access attempts. It’s basic hygiene but effective. Implement Defense-in-Depth Strategies. No single tool is perfect. Combine intrusion detection systems, endpoint protection, and well-tuned logging mechanisms to catch suspicious activity quickly. If something smells fishy—a strange configuration change, odd traffic spikes—investigate it immediately. Educate Your Teams. This isn’t just a sysadmin problem—it’s systemic. Make sure your entire IT and security staff understand the nature of these vulnerabilities and how they might be weaponized. A well-trained team can often act as an initial line of defense against exploit attempts. Understanding The Bigger Picture When it comes to vulnerabilities like these, patches are the lifeline, but they’re only part of a larger puzzle. An effective response requires changes to the entire security model—reducing the attack surface, limiting trust relationships, and being constantly vigilant. MICROSENS’ latest release helps close the gaps, but exploits targeting software like NMP Web+ are a reminder of the ongoing challenges in managing critical infrastructure systems. The stakes are high because the environments where this software is deployed depend on uptime,and attackers know it. But that doesn’t mean we have to stand helplessly. Proper segmentation, tight controls, and timely patches will go a long way toward keeping your systems out of harm’s way. Don’t waste time on this one. Coordinate with your teams, upgrade to MICROSENS NMP Web+ v3.3.0, and build in the kinds of layered defenses that can blunt future threats. The risks are real, but with swift action and a strong strategy, you can avoid becoming the next headline. . Critical vulnerabilities in MICROSENS NMP Web+ demand immediate action and patching to protect industrial systems.. you’re, managing, industrial, networks, critical, manufacturing, systems, infrastructure. . Brittany Day
Jul 02, 2025
•
102
encryptionLinux securityauthenticationMastering SSH for Secure Linux Remote Server Management
Secure remote connections are essential when managing a Linux server, and one of the most widely used and trusted methods for remote server administration is Secure Shell (SSH) . SSH creates a protected channel over an insecure network by encrypting all information shared between the server and client, safeguarding data exchanged between them from potential attackers, eavesdroppers, hijackers, or manipulators of communication streams. . But why is SSH essential for secure Linux remote server connections, and how can we admins maximize its potential? In this article, I'll delve into SSH usage and share best practices for securing SSH. I'll also dispel popular myths regarding security and introduce my top open-source SSH tools, which are available to us all. Are you ready to master SSH for secure Linux remote server connections? Let's get going! Why Is SSH Essential for a Secure Linux Remote Server Connection? SSH (Secure Shell) is a protocol for secure remote management and control of systems. It uses encryption of client/server communication, including user credentials. Regarding security, SSH outperforms older methods like Telnet due to its encryption capabilities, which ensure confidentiality and data integrity over unencrypted communication methods like Telnet. Benefits of SSH for Linux remote server connections include: Encryption: Protects data from eavesdropping. Authentication: Provides robust authentication mechanisms via public key cryptography. Integrity: Data integrity checks prevent alteration during transit. Understanding SSH Key Types: RSA, DSA, ECDSA, and EdDSA SSH keys come in various types, such as RSA, DSA, ECDSA, and EdDSA, each offering its own characteristics and use cases. RSA keys are widely supported and provide excellent security while being relatively slower to implement; however, DSA keys offer comparable levels but tend to have lower adoption rates due to weaknesses. ECDSA keys using Elliptic Curve algorithms offer shorter andfaster options, while EdDSA keys specifically using Ed25519 algorithms are the most modern, secure, and performant of the available key types. Comparing the benefits and drawbacks of different key types, RSA keys balance security and speed but may become slower when more security is necessary. Due to security concerns, DSA keys have limited storage capabilities at 1024 bits and are not recommended. ECDSA keys offer shorter keys with faster operations and increased security, while EdDSA keys, with their superior performance, are considered an ideal solution. EdDSA, specifically its Ed25519 variant, is widely considered to provide an optimal balance of high security, performance, and future-proof cryptographic strength. Best Practices for Securing SSH When using SSH for secure remote access, following certain best practices to maximize security is essential. One such practice involves disabling root login. This prevents attackers from gaining root access and protects the most privileged account from unauthorized use. Furthermore, changing from Port 22 to another port, such as 2222, can obscure SSH access while decreasing automated attacks targeting its default port 22. Strong passwords and cryptographic keys with robust algorithms help protect authentication mechanisms against brute force attacks and other forms of compromise. Disabling password authentication in favor of public key authentication enhances security further. Two-factor authentication (2FA) provides additional layers of protection, combining something you know (password) and something you own (mobile device or hardware tokens for creating one-time passwords). Mobile apps like Google Authenticator , Authy, or hardware tokens can generate one-time passwords in two separate ways. It is crucial to remember that cloud servers require additional SSH security measures. Utilizing security groups to whitelist IP addresses allows control over who can connect via SSH, thus reducing the attack surface by only permitting trustedsources to connect. Automated incident response tools offered by cloud service providers allow real-time monitoring and responding to suspicious activities, thus decreasing the time attackers have to exploit vulnerabilities. Regular key rotation can ensure compromised keys are revoked immediately while protecting access control system integrity. What Are the Top Misunderstandings & Misconceptions about SSH Security? Numerous misconceptions and misapprehensions surrounding SSH security can create vulnerabilities if not adequately addressed. One such belief is the assumption that password authentication alone provides sufficient protection. In reality, public key authentication offers much more robust protection from unauthorized access. Another misperception is assuming SSH default configurations provide adequate security. Instead, it's important to tailor them precisely according to individual needs to maximize system protection against possible attacks. Debunking these misconceptions underscores the significance of adopting more secure practices. Public key authentication provides more robust and practical protection but must be implemented correctly to reap its full benefits. Likewise, using default ports for SSH connections may pose risks as automated attacks target these ports more often. Switching up ports frequently used for computerized attacks to non-standard ports makes it more difficult for attackers to locate and exploit SSH services. Asserting and clarifying misconceptions related to SSH security is paramount for enhancing SSH security while protecting systems against potential threats. Top 4 Open Source SSH Remote Monitoring and Management (RMM) Tools for Enhanced Security SSH Remote Monitoring and Management (RMM) tools are pivotal in maintaining server health and assuring SSH security. They offer visibility into server performance, identify anomalies quickly, and ensure server uptime, all essential aspects of proactive SSH security measures. Among my top open-source RMM tools forSSH security are fail2ban, Zabbix, Icinga, and Checkmk. Fail2Ban is an open-source software tool developed to safeguard Linux systems against brute-force attacks by tracking log files for suspicious patterns that indicate potential security breaches. Suppose it detects too many failed login attempts from a particular IP address or suspicious activities from that IP. In that case, the firewall updates its rules to temporarily or permanently block that IP. This boosts security for services like SSH, FTP, and web servers. Zabbix provides a comprehensive monitoring solution for networks and applications, offering metrics on server health and alert services. Zabbix can efficiently monitor SSH service availability and performance while detecting unusual SSH activities and providing alert services, making it the ideal tool for SSH remote monitoring and management. Icinga is a scalable system that monitors network resources while alerting users of potential issues. It tracks SSH login attempts and user activities to provide insights into possible security breaches, ultimately improving SSH security through informed monitoring. Checkmk is a powerful monitoring tool boasting broad compatibility and extensive features. It enables organizations to closely monitor SSH-related services and performance metrics and address any anomalies quickly—an effective way to manage SSH security. Organizations can significantly expand their capacity for effective surveillance management of their SSH infrastructure by employing such tools. What RMM tools are you using to monitor SSH? Which ones should we add here? Reach out to us on X @lnxsec and let us know! Final Thoughts on Mastering SSH to Improve Linux Server Security SSH is essential for secure server management over remote connections. It provides robust keys and configures servers securely. Employing additional measures like 2FA can enhance its security posture significantly. Utilizing RMM tools like Zabbix, Icinga, or Checkmk helps ensure theSSH service remains secure and operational while offering continuous monitoring and alert capabilities. I highly recommend implementing the above recommendations to protect SSH services and your Linux server. Mastering the principles and best practices I've shared here will prepare you to secure remote server connections while effectively managing your Linux infrastructure. . Explore the significance of SSH for secure remote Linux server connections and best practices for maximizing its security.. secure, remote, connections, essential, managing, linux, server, widely. . Brittany Day
Apr 11, 2025
•
102
 patch managementSELinuxauthentication
Comprehensive Security Tactics for Linux System Administrators
As cyber threats rapidly advance, Linux administrators and InfoSec professionals are essential defenders against increasingly sophisticated threats. Protectors of critical infrastructure and sensitive data, these experts must implement a wide array of security practices designed specifically to their unique challenges. . Drawing upon knowledge shared at LinuxSecurity.com , this article discusses advanced Linux security practices designed to ward off today's most dangerous cyber risks. Why Is Staying Informed the Bedrock of Linux Security? Knowledge is power in cybersecurity; knowledge is protection. Linux professionals prioritize keeping abreast of threats, vulnerabilities, and security trends. For this reason, LinuxSecurity.com is an indispensable source of up-to-date information, offering insights to identify and address potential breaches preemptively. Senior administrators should go beyond passive news consumption; they should actively engage in security forums, subscribe to threat intelligence feeds, and connect with the broader cybersecurity community. Platforms such as CVE and NIST provide extensive databases of vulnerabilities and exposures paired with automated alert systems, providing real-time threat intelligence essential for early detection and response. Patch Management: Beyond the Basics Advanced Linux administrators understand that effective patch management requires a different approach than simply applying updates automatically; they consider their systems' individual needs and configurations when considering strategies. An effective patch management protocol begins with prioritization. Administrators can assess vulnerabilities using the Common Vulnerability Scoring System (CVSS) and then prioritize patches based on potential impact and severity. While automation tools may assist, human oversight is always required to ensure patches do not disrupt critical operations or introduce new vulnerabilities. How Is SELinux A Mighty Fortification for Linux Systems? Security-Enhanced Linux (SELinux) is a highly effective weapon in the Linux security arsenal, but its complexity often deters wider adoption. Yet SELinux offers unparalleled granularity regarding access controls for experienced professionals who need precise control over who has access to what on their systems. Crafting custom SELinux policies requires an in-depth knowledge of one's network architecture and threat model, but audit2allow can assist this process by analyzing log files to generate policy modules that reflect actual system usage while restricting any unauthorized actions. Why Is Authentication The First Line of Defense? Robust authentication mechanisms are integral to protecting Linux systems from unauthorized access, yet many organizations depend on password policies as their only protection. Advanced administrators should look beyond simple password policies by adopting SSH key-based authentication multi-factor authentication (MFA) and investigating Pluggable Authentication Modules (PAM) for enhanced control over accessing systems. MFA adds another level of protection by requiring two verification forms beyond just passwords or keys, such as hardware tokens or mobile app-generated codes in high-security environments. MFA can more easily distinguish between impenetrable and compromised systems than without additional layers of defense. Why Is Continuous Education and Training Essential? Human factors in cybersecurity can often be the source of instability. Offering regular training to users and administrators, regular and updated education on password hygiene and phishing awareness, and more advanced topics such as secure coding practices , social engineering tactics, and how to respond in case of a suspected breach can drastically decrease the risks of security breaches. Senior Linux administrators can lead by example and champion a culture of security vigilance while constantly honing their skills to stay ahead of emerging threats. What Is the Importance of ServiceHardening and Attack Surface Reduction? Service hardening refers to configuring system services and applications to reduce vulnerabilities while restricting unnecessary functionalities. For Linux administrators, this usually means running regular audits of running services, disabling or terminating unnecessary ones, and using tools like systemd-analyze security to analyze potential service vulnerabilities in depth. Reducing the attack surface requires implementing network segmentation, strict firewall policies, and least privilege models for system access. Each measure makes it harder for attackers to gain entry and move laterally across networks. How Does Data Encryption Protect Data at Rest and in Transit? Securing sensitive data at rest and transit is an essential security practice in an age when data breaches can have devastating repercussions. Tools like GnuPG can offer end-to-end file encryption, while Linux Unified Key Setup (LUKS) offers robust disk encryption solutions. Transport Layer Security (TLS) encrypts data in transit between servers and clients, thus protecting against eavesdropping and man-in-the-middle attacks. Linux administrators should use only robust, modern cryptographic protocols that have been reviewed regularly to ensure compliance. Why Is Automating Security and Compliance Beneficial? Manual security audits and compliance checks can be time-consuming and potentially inaccurate in complex environments. At the same time, automation tools like OpenSCAP offer a solution by continuously evaluating systems against established baselines and producing reports with remediation scripts to address any issues found. Integrating security testing tools into the CI/CD pipeline enables continuous security analysis, helping ensure new code deployments do not introduce vulnerabilities into production environments. Why Should Admins and Organizations Adopt a DevSecOps Culture? The DevSecOps movement advocates for integrating security practices throughout the software development lifecycle . For Linux administrators, this means working closely with development teams to ensure security considerations remain paramount from inception through deployment. Infrastructure as Code (IaC) tools like Ansible , Terraform, and Kubernetes are essential. They enable security policies and configurations to be codified within version control alongside application code for consistency, repeatability, and auditability of security configurations across environments. Our Final Thoughts on the Importance of Implementing Advanced Linux Security Practices Comprehending advanced Linux security requires an integrated approach that combines technical know-how, strategic planning, and constant monitoring. By adopting advanced practices like those found at LinuxSecurity.com and taking advantage of resources like these, Linux administrators and InfoSec professionals can drastically enhance their organization's cybersecurity posture. . Delve into cutting-edge Linux security measures provided by LinuxSecurity.com, enhancing your protection against the ever-changing landscape of cyberattacks.. Advanced Linux Security, Cyber Threat Protection, InfoSec Best Practices. . Dave Wreski
Jul 20, 2024
•
102
 security advisoryauthenticationsecurity proxy
Sec-Wall Proxy: Authentication and SSL Configurations Examples
This article full of examples will show you various ways to test services secured using sec-wall, a feature-packed high performance security proxy. We'll be using cURL, a popular Linux command line tool and PycURL - a Python interface to cURL. As of version 1.0, sec-wall supports HTTP Basic auth, digest auth, custom HTTP headers, XPath-based authentication, WS-Security & SSL/TLS client certificates and each of the options is being shown below. . View the introduction in sec-wall: Open Source Security Proxy It is assumed that you'll be using the sec-wall's config.py file as listed below so it's worth pointing out that the server's SSL certificate uses a commonName of MySampleServer which means that you need to add the line similiar to the one below 127.0.0.1 MySampleServer to your /etc/hosts file. That's because the examples below do check the validity of the server's crypto material. The pki.zip (ZIP) attachment contains assorted keys and certificates while sec-wall-xpath_auth.xml and sec-wall-wsse_auth.xml contain data needed for invoking sec-wall using XPath-based and WS-Security authentication, respectively. config.py # -*- coding: utf-8 -*-# stdlib import os.path as path, uuid, sys # lxml from lxml import etree # Don't share it with anyone. INSTANCE_SECRET = '23e4da2148994e7ea0b85a9a03d01eb0' # May be shared with the outside world. INSTANCE_UNIQUE = uuid.uuid4().hex # Useful constants cur_dir = path.dirname(__file__) # Crypto keyfile = path.join(cur_dir, './crypto/server-key.pem') certfile = path.join(cur_dir, './crypto/server-cert.pem') ca_certs = path.join(cur_dir, './crypto/ca-chain.pem') server_type = 'https' # Where are we proxying the requests over to? target_host = ' # Credentials username = 'abc' password = 'abc' realm = 'Secure area' # ############################################################################## def basic_auth(): return { 'basic-auth': True, 'basic-auth-username': username, 'basic-auth-password': password, 'basic-auth-realm': realm, 'host': target_host, } def digest_auth(): return { 'digest-auth': True, 'digest-auth-username': username, 'digest-auth-password': password, 'digest-auth-realm': realm, 'host': target_host, } def custom_http_headers(): return { 'custom-http': True, 'custom-http-X-MyFancyUsername': username, 'custom-http-X-MyFancyPassword': password, 'host': target_host, } def xpath(): return { 'xpath': True, 'xpath-1': etree.XPath("/a/b/username/text() = '{0}'".format(username)), 'xpath-2': etree.XPath("//c/@password='{0}'".format(password)), 'host': target_host, } def wsse(): return { 'wsse-pwd': True, 'wsse-pwd-username': 'abc', 'wsse-pwd-password': 'abc', 'wsse-pwd-realm': realm, 'wsse-pwd-reject-empty-nonce-creation': True, 'wsse-pwd-reject-stale-tokens': True, 'wsse-pwd-nonce-freshness-time': sys.maxint, 'wsse-pwd-reject-expiry-limit': sys.maxint, 'host': target_host, } def ssl_cert(): return { 'ssl': True, 'ssl-cert': True, 'ssl-cert-commonName': 'My Client', 'ssl-cert-organizationName': 'My Company', 'host': target_host } urls = [ ('/basic_auth', basic_auth()), ('/digest_auth', digest_auth()), ('/custom_http_headers', custom_http_headers()), ('/xpath', xpath()), ('/wsse', wsse()), ('/ssl_cert', ssl_cert()), ] Basic auth cURL $ curl --basic -u abc:abc --cacert ./ca-chain.pem PycURL import pycurl curl = pycurl.Curl() url = ' ' # --basic switch curl.setopt(pycurl.HTTPAUTH, pycurl.HTTPAUTH_BASIC) # -u switch curl.setopt(pycurl.USERPWD, 'abc:abc') # --cacert switch curl.setopt(pycurl.CAINFO, './ca-chain.pem') curl.setopt(pycurl.URL, url) curl.perform() Digest auth cURL $ curl --digest -u abc:abc --cacert ./ca-chain.pem PycURL import pycurl curl = pycurl.Curl() url = ' ' # --digest switch curl.setopt(pycurl.HTTPAUTH, pycurl.HTTPAUTH_DIGEST) # -u switch curl.setopt(pycurl.USERPWD, 'abc:abc') # --cacert switch curl.setopt(pycurl.CAINFO, './ca-chain.pem') curl.setopt(pycurl.URL, url) curl.perform() Custom HTTP headers cURL $ curl -H "X-MyFancyUsername:abc" -H "X-MyFancyPassword:abc" --cacert ./ca-chain.pem PycURL import pycurl curl = pycurl.Curl() url = ' ' # -H switches curl.setopt(pycurl.HTTPHEADER, ['X-MyFancyUsername:abc', 'X-MyFancyPassword:abc']) # --cacert switch curl.setopt(pycurl.CAINFO, './ca-chain.pem') curl.setopt(pycurl.URL, url) curl.perform() XPath-based auth cURL $ curl --data @xpath_auth.xml --cacert ./ca-chain.pem PycURL import pycurl curl = pycurl.Curl() url = ' ' # --data switch # Note that it uses the file in Python instead of letting PycURL do it. curl.setopt(pycurl.POSTFIELDS, open('xpath_auth.xml').read()) # --cacert switch curl.setopt(pycurl.CAINFO, './ca-chain.pem') curl.setopt(pycurl.URL, url) curl.perform() WS-Security cURL $ curl --data @wsse_auth.xml --cacert ./ca-chain.pem PycURL import pycurl curl = pycurl.Curl() url = ' ' # --data switch # Note that it uses the file in Python instead of letting PycURL do it. curl.setopt(pycurl.POSTFIELDS, open('wsse_auth.xml').read()) # --cacert switch curl.setopt(pycurl.CAINFO, './ca-chain.pem') curl.setopt(pycurl.URL, url) curl.perform() SSL client cert cURL $ curl --cert client-cert.pem --key client-key.pem --cacert ./ca-chain.pem PycURL import pycurl curl = pycurl.Curl() url = ' ' # --key switch curl.setopt(pycurl.SSLKEY, './client-key.pem') # --cert switch curl.setopt(pycurl.SSLCERT, './client-cert.pem') # --cacert switch curl.setopt(pycurl.CAINFO, './ca-chain.pem') curl.setopt(pycurl.URL, url) curl.perform() Resources Visitus at Contact Dariusz Suchojad Download pki.zip (ZIP) Download sec-wall-xpath_auth.xml Download sec-wall-wsse_auth.xml . Integrating the sec-wall security proxy with HTTP requests using cURL and PycURL helps in authentication and SSL setup management effectively. Sec-Wall Security Proxy,cURL Authentication,SSL Configuration,Open Source Security Auth,PyCurl Examples. . Dave Wreski
Jun 07, 2011
•
102
authenticationsslinstallationInstalling Sec-Wall on Ubuntu: Secure Web Traffic with SSL/TLS
sec-wall, a recently released security proxy is a one-stop place for everything related to securing HTTP/HTTPS traffic. Designed as a pragmatic solution to the question of securing servers using SSL/TLS certificates, WS-Security, HTTP Basic/Digest Auth, custom HTTP headers, XPath expressions with an option of modifying HTTP headers and URLs on the fly. . This article is an introductory material that will guide you through the process of installing the software on Ubuntu and preparing the first security configuration - using HTTP Basic Auth with and without tunneling it through SSL/TLS. The core of sec-wall is a high-performance HTTP(S) server built on top of gevent framework which in turn is a Pythonic wrapper around the libevent notification library. Most of the project's dependencies may be fetched using apt-get and that's what will be used below. Note the installation of pip, an installer for Python packages, it will come in handy because Spring Python, another of the project's dependencies isn't available in Ubuntu repositories yet (although there's an ITP for that). Installing zdaemon with pip will make sure the command will be consistently available under the same name regardless of the Python version you're using. pip will also be used for installing sec-wall itself, the software's just too new for there being a DEB in the repositories. $ sudo apt-get install python-pip python-pesto python-gevent python-yaml python-lxml $ sudo pip install zdaemon $ sudo pip install springpython $ sudo pip install sec-wall And that's it, we can proceed to use sec-wall now. Firstly, an instance of the proxy needs to be initialized in an empty directory. That sets up the place for future internal log files, places a dot-prefixed 'hidden' file to mark the directory as belonging to a sec-wall instance and - most importantly - creates a skeleton config file, one that we need to customize. $ mkdir ~/sec-wall-tutorial $ sec-wall --init ~/sec-wall-tutorial Note the newly created~/sec-wall-tutorial/config.py file, it's the central place for configuring a sec-wall instance, that's where the actual configuration takes place. The file is a regular Python source code file which means it's very readable and there's no need for learning yet another specialized config format. Besides, being written in Python, it means the configuration can be fetched from any data source, be it an SQL database, LDAP etc. Let's have a closer look at the config.py file: # -*- coding: utf-8 -*-# stdlib import os.path as path, uuid # Don't share it with anyone. INSTANCE_SECRET = '12a857db5b1d49e887a0e448429d2826' # May be shared with the outside world. INSTANCE_UNIQUE = uuid.uuid4().hex # Useful constants cur_dir = path.dirname(__file__) # Crypto keyfile = path.join(cur_dir, './crypto/server-priv.pem') certfile = path.join(cur_dir, './crypto/server-cert.pem') ca_certs = path.join(cur_dir, './crypto/ca-cert.pem') # ############################################################################## def default(): return { 'ssl': True, 'ssl-cert': True, 'ssl-cert-commonName':INSTANCE_SECRET, 'host': 'http://' + INSTANCE_SECRET } urls = [ ('/*', default()), ] By default, no client applications are allowed in. To achieve it, an application is required to have an SSL/TLS certificate and that certificate's commonName field must be equal to an INSTANCE_SECRET variable which - as stated in the reference documentation and repeated in the config file - should always be a secret known only to sec-wall admins. The 'urls' variable is the starting point - that's where an URL pattern is being matched with the accompanying security configuration and as stated above, the default configuration is paired with a catch-all /* pattern, hence the result of no one being let in by default. Let's we'd like the URL paths beginning with /admin/ to be fenced with HTTP Basic Auth. What we need to do is to add add an URL pattern and have it use a propersecurity config, just like below: # -*- coding: utf-8 -*-# stdlib import os.path as path, uuid # Don't share it with anyone. INSTANCE_SECRET = '12a857db5b1d49e887a0e448429d2826' # May be shared with the outside world. INSTANCE_UNIQUE = uuid.uuid4().hex # Useful constants cur_dir = path.dirname(__file__) # Crypto keyfile = path.join(cur_dir, './crypto/server-priv.pem') certfile = path.join(cur_dir, './crypto/server-cert.pem') ca_certs = path.join(cur_dir, './crypto/ca-cert.pem') # ############################################################################## def admin(): return { 'basic-auth': True, 'basic-auth-username':'my-user', 'basic-auth-password':'my-password', 'basic-auth-realm':'Secure area', 'host': 'http://' } def default(): return { 'ssl': True, 'ssl-cert': True, 'ssl-cert-commonName':INSTANCE_SECRET, 'host': 'http://' + INSTANCE_SECRET } urls = [ ('/admin/ ', admin()), ('/*', default()), ] The expression '/admin/ ' should be read as an '/admin/' prefix followed by any URL path, the value of which will be stored in the 'my_path' run-time variable in case we'd like to use URL rewriting - but we won't be using it in the article. An important point is that the order of patterns in the 'urls' variable is important - had '/*' been on the first position, it would've been a quick match and the request would've been rejected with a 403 HTTP Forbidden response code. Use the sec-wall command to start the proxy, passing it the name of the directory the config.py file is in as its only argument, like here: $ sec-wall --start ~/sec-wall-tutorial The proxy will start on port 15100 by default so in another browser's tab fire up the address and witness the pop-up asking you for credentials (my-user/mypassword remember?). Now open the URL and you will be greeted with a "You are not allowed to access this resource" message, that because the latter URL fall intothe /* pattern whose course of action is to reject any requests. How about making the traffic be wrapped in SSL/TLS, how hard is it to expose the proxy through HTTPS instead of HTTP? The proxy needs to be stopped first: $ sec-wall --stop ~/sec-wall-tutorial Let's have a closer look at keyfile, certfile and ca_certs variables from the config file. They specify paths to PEM-formatted files to, respectively, the private key, certificate and the list of CAs the proxy is willing to trust. For the sake of keeping the article focused on sec-wall, we'll be using a set of already prepared crypto files that can be found in the attachment. Put the PEM files in a newly created ~/sec-wall-tutorial/crypto directory: $ mkdir ~/sec-wall-tutorial/crypto What's left now is to specify that the proxy's underlying server must be of 'https' instead of the default 'http' one. The 'server_type' variable does just that: # -*- coding: utf-8 -*-# stdlib import os.path as path, uuid # Don't share it with anyone. INSTANCE_SECRET = '12a857db5b1d49e887a0e448429d2826' # May be shared with the outside world. INSTANCE_UNIQUE = uuid.uuid4().hex # Useful constants cur_dir = path.dirname(__file__) # Crypto keyfile = path.join(cur_dir, './crypto/server-priv.pem') certfile = path.join(cur_dir, './crypto/server-cert.pem') ca_certs = path.join(cur_dir, './crypto/ca-cert.pem') server_type = 'https' # ############################################################################## def admin(): return { 'basic-auth': True, 'basic-auth-username':'my-user', 'basic-auth-password':'my-password', 'basic-auth-realm':'Secure area', 'host': 'http://' } def default(): return { 'ssl': True, 'ssl-cert': True, 'ssl-cert-commonName':INSTANCE_SECRET, 'host': 'http://' + INSTANCE_SECRET } urls = [ ('/admin/ ', admin()), ('/*', default()), ] And now the proxy may started and accessed at the address sothat the traffic between a client application and sec-wall is being encrypted. sec-wall is full of customization options yet all of them have sane defaults so that you don't have to deal with it at all if you're not interested in a given functionality. But these interesting features are there. For instance, you probably haven't noticed it but each time you were accessing sec-wall, the proxy was returning a pair of custom HTTP headers, X-sec-wall-invocation-id and X-sec-wall-invocation-id-signed whose purpose is to uniquely identify each of the requests proxied over and to prove the request has actually passed through sec-wall - it's useful when client and backend applications can't get to an agreement over who sent what and when. See the Firebug session's capture for an overview of how it looks like. That would conclude the introduction, don't hesitate to let us know if you'd like to learn more about sec-wall and don't forget that it's a friendly open-source project whose author is always keen to hear about what people would like to use the software for. In other words, it's there for you, speak up if you think anything's missing or should be better tailored towards your needs! Resources Visit us at Contact Dariusz Suchojad Download image of secured headers (PNG) Download certificates ZIP . This article is an introductory material that will guide you through the process of installing the s. sec-wall, recently, released, security, proxy, one-stop, place, everything, related, securing. . Dave Wreski
Apr 18, 2011
•
102
key managementauthenticationnetwork access controlSSH Best Practices: Secure Configuration for Enhanced Security
If you're reading LinuxSecurity.com then it's a safe bet that you are already using SSH, but are you using it in the best way possible? Have you configured it to be as limited and secure as possible? Read on for my best practices for using Secure Shell. . Introduction Ryan W. Maple If you're reading LinuxSecurity.com then it's a safe bet that you are already using SSH, but are you using it in the best way possible? Have you configured it to be as limited and secure as possible? The goal of this document is to kick in the new year with some best practices for SSH: why you should use them, how to set them up, and how to verify that they are in place. All of the examples below assume that you are using EnGarde Secure Linux but any modern Linux distribution will do just fine since, as far as I know, everybody ships OpenSSH. SSHv2 vs. SSHv1 There are numerous benefits to using the latest version of the SSH protocol, version 2, over it's older counterpart, version 1 and I'm not going into a lot of details on those benefits here - if you're interested, see the URL in the reference below or Google around. That being said if you don't have an explicit reason to use the older version 1, you should always be using version 2. To use SSHv2 by default but permit SSHv1, locate the "Protocol" line in your sshd_config file and change it to: Protocol 2,1 When doing 2,1 please note that the protocol selection is left up to the client. Most clients will default to v2 and "fall back" to v1, while legacy clients may continue to use v1. To force everybody to use SSHv2, change it to: Protocol 2 When you make this change don't forget to generate the appropriate HostKey's as well! SSHv2 requires the following keys: # HostKeys for protocol version 2 HostKey /etc/ssh/ssh_host_rsa_key HostKey /etc/ssh/ssh_host_dsa_key While SSHv1 requires: # HostKey for protocol version 1 HostKey /etc/ssh/ssh_host_key Once your changes are made, restartthe SSH daemon: # /etc/init.d/sshd restart [ SUCCESSFUL ] Secure Shell Daemon [ SUCCESSFUL ] Secure Shell Daemon From another machine, try SSH'ing in. You can use the -v option to see which protocol is being used, and the '-oProtocol=' option to force one or the other - for example, "ssh -v -oProtocol=2 " would force protocol version 2. Binding to a Specific Address or Non-Standard Port If you're running SSH on an internal, firewalled, workstation then you can probably skip this section, but if you're running SSH on a firewall or on a machine with two network interfaces, this section is for you. Out of the box OpenSSH will bind to every available network address; while convenient and suitable for most installations, this is far from optimal. If your machine has two or more interfaces then the odds are that one is "trusted" and the other is "untrusted." If this is the case, and you don't need nor want SSH access coming in on the untrusted interface, then you should configure OpenSSH to listen on a specific interface. To have OpenSSH only bind to your internal interface, 192.168.0.1 in the example below, locate the following line in your sshd_config file: ListenAddress 0.0.0.0 and change the 0.0.0.0 to 192.168.0.1: ListenAddress 192.168.0.1 To verify that this change took, restart OpenSSH and look at netstat: # /etc/init.d/sshd restart [ SUCCESSFUL ] Secure Shell Daemon [ SUCCESSFUL ] Secure Shell Daemon # netstat -anp | grep sshd tcp 0 0 192.168.0.1:22 0.0.0.0:* LISTEN 7868/sshd As you can see, the sshd daemon is now only listening on 192.168.0.1. SSH requests coming in any other interface will be ignored. Similarly, you may want to change the port that the SSH daemon binds to. Sometimes there is a functional need for this (ie, your employer blocks outbound 22/tcp) but there is also security-through-obscurity value in this as well. While not providing any real security benefit against a determined attacker, moving the SSH daemon off of port 22 protects youagainst automated attacks which assume that the daemon is running on port 22. To have OpenSSH bind to a port other than port 22, 31337 in the example below, locate the following line in your sshd_config file: Port 22 and change the 22 to 31337: Port 31337 To verify that this change took, restart OpenSSH and, again, look at netstat: # netstat -anp | grep sshd tcp 0 0 192.168.0.1:31337 0.0.0.0:* LISTEN 330/sshd Finally, to SSH into a host whose SSH daemon is listening on a non-standard port, use the -p option: ssh -p 31337 user@192.168.0.1 Using TCP Wrappers TCP Wrappers are used to limit access to TCP services on your machine. If you haven't heard of TCP Wrappers you've probably heard of /etc/hosts.allow and /etc/hosts.deny: these are the two configuration files for TCP Wrappers. In the context of SSH, TCP Wrappers allow you to decide what specific addresses or networks have access to the SSH service. To use TCP Wrappers with SSH you need to make sure that OpenSSH was built with the -with-tcp-wrappers. This is the case on any modern distribution. As I indicated earlier, TCP Wrappers are configured by editing the /etc/hosts.deny and /etc/hosts.allow files. Typically you tell hosts.deny to deny everything, then add entries to hosts.allow to permit specific hosts access to specific services. An example: # # hosts.deny This file describes the names of the hosts which are # *not* allowed to use the local INET services, as decided # by the '/usr/sbin/tcpd' server. # ALL: ALL # # hosts.allow This file describes the names of the hosts which are # allowed to use the local INET services, as decided # by the '/usr/sbin/tcpd' server. # sshd: 207.46.236. 198.133.219.25 In the example above, access to SSH is limited to the network 207.46.236.0/24 and the address 198.133.219.25. Requests to any other service from any other address are denied by the "ALL: ALL" in hosts.deny. If you try to SSH into a machine and TCP Wrappers denies your access, you'll seesomething like this: ssh_exchange_identification: Connection closed by remote host This simple configuration change significantly hardens your installation since, with it in place, packets from hostile clients are dropped very early in the TCP session -- and before they can do any real damage to a potentially vulnerable daemon. Public Key Authentication The last item I will cover is public key authentication. One of the best things you can do to tighten the security of your SSH installation is to disable password authentication and to use public key authentication instead. Password authentication is suboptimal for many reasons, but mostly because people choose bad passwords and attackers routinely try to brute-force passwords. If the systems administrator has chosen a bad password and he's permitting root logins... game over. Public key authentication is no silver bullet - similarly, people generate passphrase-less keys or leave ssh-agents running when they shouldn't - but, in my opinion, it's a much better bet. Just about every distribution ships with public key authentication enabled, but begin by making sure it is: RSAAuthentication yes PubkeyAuthentication yes Both of these options default to "yes" and the "RSAAuthentication" option is for SSHv1 and the "PubkeyAuthentication" option is for SSHv2. If you plan on using this authentication method exclusively, while you're there, you may want to disable password authentication: PasswordAuthentication no Before you proceed, make sure you have a terminal open on your target machine. Once you restart the SSH daemon you will no longer be able to log in without a key... which we haven't generated yet! Once you're sure, restart the SSH daemon: # /etc/init.d/sshd restart [ SUCCESSFUL ] Secure Shell Daemon [ SUCCESSFUL ] Secure Shell Daemon Now, from your desktop, try to SSH in to your target machine: $ ssh rwm@brainy Permission denied (publickey,keyboard-interactive). We're locked out! This is a good thing. The nextstep, on your desktop, is to generate a key: $ ssh-keygen -t dsa -C "Ryan's SSHv2 DSA Key (Jan 2008)" Generating public/private dsa key pair. Enter file in which to save the key (/home/rwm/.ssh/id_dsa): Enter passphrase (empty for no passphrase): ********** Enter same passphrase again: ********** Your identification has been saved in /home/rwm/.ssh/id_dsa. Your public key has been saved in /home/rwm/.ssh/id_dsa.pub. The key fingerprint is: 98:4d:50:ba:ee:8b:79:be:b3:36:75:8a:c2:4a:44:4b Ryan's SSHv2 DSA Key (Jan 2008) A few notes on this: You can generate a DSA (-t dsa), RSA (-t rsa), or SSHv1 (-t rsa1) key. In the example above I'm using dsa. I like to put the date I generated the key in the comment (-C) field, that way I can change it out every so often. You're entering a passphrase, not a password. Use a long string with spaces and punctuation. The longer and more complicated the better! The command you just ran generated two files - id_dsa, your private key and id_dsa.pub, your public key. It is critical that you keep your private key private, but you can distribute your public key to any machines you would like to access. Now that you have generated your keys we need to get the public key into the ~/.ssh/authorized_keys file on the target machine. The best way to do this is to copy-and-paste it - begin by concatenating the public key file: $ cat .ssh/id_dsa.pub ssh-dss AAAAB3NzaC1kc3MAAACBAL7p6bsg5kK4ES9BWLPCNABl20iQQB3R0ymaPMHK... ... ds= Ryan's SSHv2 DSA Key (Jan 2008) This is a very long string. Make sure you copy all of it and that you do NOT copy the newline character at the end. In other words, copy from the "ssh" to the "2008)", but not past that. The next step is to append this key to the end of the ~/.ssh/authorized_keys file on your target machine. Remember that terminal I told you to keep open a few steps ago? Type the following command into it, pasting the key you've just copied into the area noted KEY: echo "KEY" > > ~/.ssh/authorized_keys For example: echo "ssh-dss AAAA5kS9BWLPCN...s= Ryan's SSHv2 DSA Key (Jan 2008)" > > ~/.ssh/authorized_keys Now, try to SSH in again. If you did this procedure correctly then instead of being denied access, you'll be prompted for your passphrase: $ ssh rwm@brainy Enter passphrase for key '/home/rwm/.ssh/id_dsa': Last login: Thu Jan 10 14:37:14 2008 from papa.engardelinux.org [rwm@brainy ~]$ Viola! You're now logged in using public key authentication instead of password authentication. In Summary... SSH is a wonderful tool and is every systems administrators second best friend (Perl, of course, being the first :). It allows you to read your email from anywhere, provided you still use a terminal-based mail reader. It allows you to tunnel an xterm or X11 application from your home server to your desktop at work. It provides you a far superior alternative to FTP in SFTP and SCP. SSH is great but just like any tool, it's only as good as you use it. I hope that you found value in some of my best practices and if you have any of your own, leave them in the comments! Before I go, here are some additional resources on SSH: The OpenSSH Project SSH, The Secure Shell: The Definitive Guide Introduction to SSH Versions 1 and 2 Knock, Knock, Knockin' on EnGarde's Door (with FWKNOP) . Introduction Ryan W. Maple If you're reading LinuxSecurity.com then it's a safe bet that you are alr. you're, reading, linuxsecurity, already, using. . Brittany Day
Apr 24, 2010
•

Get the latest News and Insights
Get the latest Linux and open source security news straight to your inbox.
Community Poll
Should Linux servers automatically install security updates?
Search Topics
Powered By

Linux Security - Your source for Top Linux News, Advisories, HOWTOs and Feature Releases
QUICK LINKS
subscribe to newsletters!
Like staying secure? So do we.
Sign up for updates, tips, and alerts!