Overly broad permissions can turn one compromised account into a much larger security problem. Learn how to reduce unnecessary access, review privileges, and apply least privilege across modern Linux systems. Review Linux Privileges×


Stay Ahead With Linux Security Features
 identity management security tactics
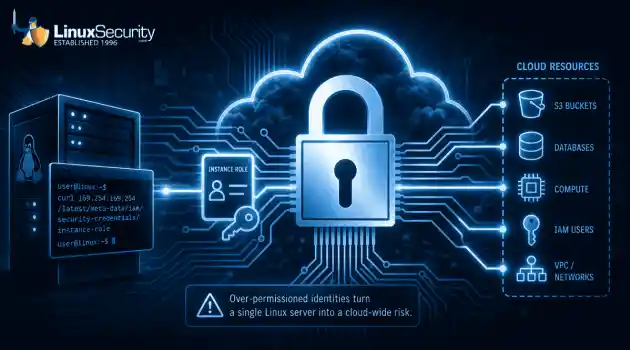
 For years, we secured our Linux infrastructure by building walls: VPCs, security groups, and hardened SSH configurations. We treated the cloud like a virtual data center, assuming that if we kept the "bad guys" out of the network, our workloads were safe. . That model is no longer sufficient. Today, one of the most common paths from an initial compromise to a major cloud breach is the identity assigned to your Linux workload. When an attacker gains code execution on a Linux instance—through a...
 Jul 17, 2026
 security practices patch management
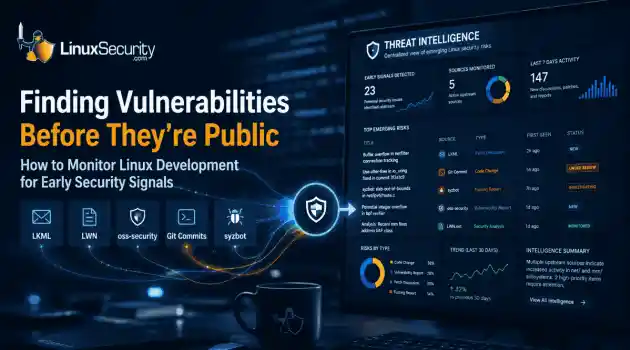
 Most of us don't hear about a kernel vulnerability until a CVE lands in our inbox or the vulnerability scanner starts complaining. By then, the patch isn't new anymore. Kernel developers may have been passing it around for review, arguing over the implementation, or revising it for days before anyone outside that community noticed it. None of those discussions are secret. They're sitting in mailing list archives, Git commits, and patch reviews where they've been the whole time. The strange...
Jul 14, 2026
 Linux security cyber attacks
 Every Linux server in your fleet produces thousands of events every minute. From journald logs and auditd records to kernel-level eBPF hooks, your systems are constantly talking. Most of that noise is just the mundane churn of system services, CI/CD runners, or routine administrative automation. But among that noise, an attacker might be establishing a foothold, moving laterally, or setting up persistence. The challenge for any security team is: how do you separate the routine from the...
Jul 13, 2026
 open-source infrastructure risk
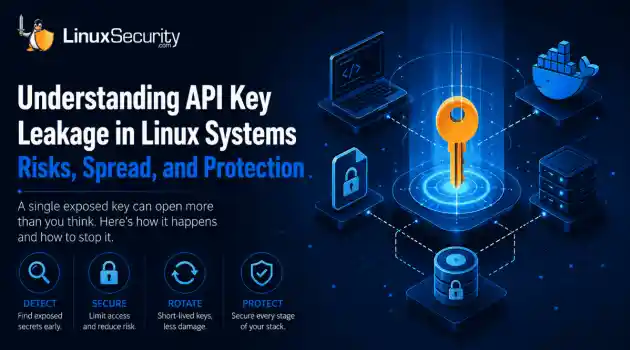
 Security scanners flag exposed API keys in public repositories every day. The initial response is usually predictable: delete the commit, revoke the credential, and move on. That’s a mistake. . In a real Linux environment, an API key never stays in one place. By the time it hits a public repo, it’s already everywhere. It’s in the CI/CD pipeline. It’s in your container registry. It’s in the build logs. It’s in the backups. Git makes this worse because the history never dies. Deleting a file in...
Jul 11, 2026
 open-source rootkit
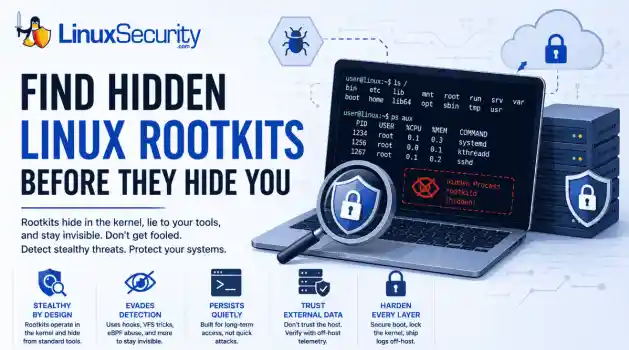
 Most of us think of Linux rootkits as ancient history—the stuff of 90s hacking forums and clunky malware that would crash your system if you looked at it the wrong way. But if you think they’ve gone away, you’re mistaken. They’ve just gotten smarter. . Modern attackers aren't using the noisy tools of the past. Today’s threats are surgical. Many of today’s most advanced Linux rootkits operate at the kernel level or abuse legitimate system features to blend in with normal traffic. They’re...
Jul 09, 2026
 Refine features
X Clear Filters
Get the latest News and Insights
Get the latest Linux and open source security news straight to your inbox.
Community Poll
Should Linux servers automatically install security updates?
Loading...
Explore Latest Linux Security features
We found -2 articles for you...
102
 security advisorydebianintegrity
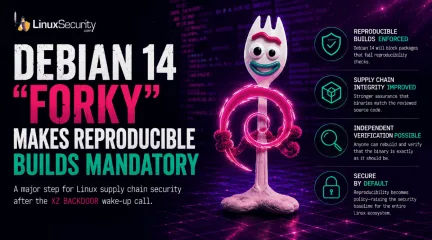
Debian 14 Makes Reproducible Builds Mandatory for Linux Packages
Debian 14 “Forky” will begin blocking packages that fail reproducibility checks, marking a major shift in how Linux distributions verify software integrity. . After the XZ backdoor scare, one thing got painfully clear across Linux. Most people installing packages still cannot verify whether the binary on their system actually matches the source code that the source code maintainers published. The project will begin blocking packages that fail reproducibility checks, turning reproducible builds from a recommended practice into something closer to policy. Debian’s release team confirmed that the migration infrastructure will reject both newly submitted packages and existing ones that regress into non-reproducible states. Debian Is Changing Linux Supply Chain Security At first glance, this sounds like internal packaging cleanup. It is bigger than that. Debian sits underneath a massive chunk of the Linux ecosystem, directly and through downstream distributions. Once Debian starts enforcing reproducibility at the migration level, maintainers and vendors across that chain will feel pressure to clean up build environments, remove inconsistencies, and make binaries independently verifiable. The timing is not accidental either. XZ exposed how much of the open-source supply chain still relies on assumptions rather than validation. Maintainers trust upstream code, users trust package repositories, distributions trust automated build systems, and almost nobody checks whether the shipped binary truly matches the reviewed source code after everything moves through CI pipelines and mirrors. Reproducible builds do not stop supply chain attacks on their own. They do make silent tampering harder to hide. If the same source code consistently produces identical binaries across separate systems, defenders and researchers get a practical way to detect when something in the build chain changes unexpectedly. What Is a Reproducible Build? A reproducible build generates identical binariesevery time the same source code is compiled under the same conditions. Not “similar.” Not functionally equivalent. Bit-for-bit identical. That means anyone, including independent rebuilders, researchers, distributors, or enterprise security teams, can rebuild a package themselves and verify that the resulting binary matches the one Debian distributes publicly. Without reproducibility, users effectively trust: the build server, the CI/CD pipeline, package maintainers, signing infrastructure, and every dependency involved in producing the final binary. With reproducibility, that trust becomes independently testable. Why the XZ Backdoor Changed Everything The XZ Utils compromise fundamentally changed how many Linux developers and security teams think about package integrity. The attack wasn’t hidden inside obvious source code changes. Instead, malicious code was introduced into release artifacts that diverged from the reviewed source repository. That exposed a dangerous blind spot in modern software distribution. Even if the source code appears legitimate, users still need a reliable way to verify that the binaries they install were actually built from that source and not modified somewhere in the release pipeline. Reproducible builds help close that gap. If independent rebuilders compile the same source and produce different hashes than the distributed binaries, something is wrong: The build environment may have been compromised, Artifacts may have been altered, Or the package contains hidden non-deterministic behavior. That verification capability has become increasingly important as supply chain attacks continue targeting: Package repositories, CI/CD systems, Developer tooling, Container pipelines, and open-source infrastructure. Why Linux Builds Become Non-Reproducible One reason reproducible builds took years to mature is that modern software pipelines contain countless tiny sources of non-determinism. Some are surprisingly mundane. A package built at 10:01 AM and rebuilt again one minute later may produce different hashes simply because archive metadata contains different timestamps. Compiling the same project inside /home/alice/project versus /build/project can leak different filesystem paths into debugging metadata, changing the final binary output. Even file ordering can break reproducibility. If a linker processes object files in a slightly different order due to filesystem behavior or parallel builds, the resulting binary hash may change despite identical source code. Other common causes include: locale settings, embedded build dates, randomized compression behavior, environment variables, CPU architecture differences and non-deterministic compiler output. Over time, Debian’s Reproducible Builds initiative developed tooling specifically designed to eliminate or diagnose these issues. Tools Behind Debian’s Reproducibility Push Several tools now form the backbone of Debian’s reproducibility ecosystem: SOURCE_DATE_EPOCH Standardizes timestamps during builds so packages stop embedding unpredictable build times. diffoscope Compares binaries, archives, packages, container images, ELF files, and other artifacts to pinpoint exactly why two builds differ. reprotest Builds packages multiple times under varying conditions to identify reproducibility failures. .buildinfo Files Record build dependencies, architecture details, and checksums so independent rebuilders can recreate the same environment. Independent Rebuilders External systems continuously rebuild packages and compare hashes against official Debian binaries to detect inconsistencies. Together, these tools move Linux package verification away from institutional trust and toward independently verifiable software delivery. How This Impacts Everyday Linux Users For developers and distro maintainers, reproducibility is a technical challenge. For regular Linuxusers, it’s fundamentally about trust. Reproducible builds increase confidence that downloaded packages were not silently altered somewhere between source code review and installation. In practical terms, that means researchers and rebuilders can independently verify whether Debian packages actually match their published source code. That matters during: supply chain attacks, compromised build infrastructure incidents, suspicious package updates, mirror tampering concerns, or large-scale CI/CD compromises. Most users will never manually rebuild packages themselves. But the existence of a verification ecosystem makes hidden tampering significantly harder to conceal. What Maintainers Will Need To Change Debian’s new enforcement policy introduces real operational pressure for maintainers. Packages that once built “well enough” may now fail migration if they cannot reproduce consistently. Maintainers will increasingly need to: remove embedded timestamps, normalize archive ordering, eliminate environment-specific metadata, stabilize compiler behavior, strip absolute filesystem paths, and audit build scripts for non-deterministic behavior. Common fixes often involve: using SOURCE_DATE_EPOCH, sorting linker inputs deterministically, applying -ffile-prefix-map or -trimpath, using deterministic compression flags, and testing packages repeatedly with reprotest. That work can be tedious, especially across thousands of packages and multiple architectures, but Debian has already made substantial progress. According to the broader reproducible builds project, Debian now reproducibly builds the overwhelming majority of packages in testing. The Impact Goes Beyond Debian Debian’s decision will likely influence far more than Debian itself. Many Linux distributions and infrastructure projects already participate in reproducibility efforts to varying degrees, including: Arch Linux, Alpine, Tails, Yocto, Guix, NixOS, and portions of the Fedora and Red Hat ecosystems. The broader cloud-native ecosystem is also paying attention. Reproducibility is becoming increasingly important for: container images, Kubernetes deployments, cloud CI/CD systems, signed build provenance, SBOM validation, and software supply chain frameworks like SLSA. Container infrastructure especially benefits from deterministic builds because distributed systems continuously rebuild and redeploy software across multiple environments. Inconsistent artifacts make auditing significantly harder. Reproducibility helps reduce that ambiguity. Reproducibility Is Not a Silver Bullet Reproducible builds do not automatically make software secure. A package can still be reproducible while containing malicious code if the source itself is compromised. What reproducibility provides is assurance that: Distributed binaries match audited source code, The release infrastructure did not silently alter artifacts, Independent parties can verify software integrity themselves. That distinction matters. For years, software distribution largely operated on institutional trust. Debian’s reproducibility push reflects a broader shift away from “trust the pipeline” and toward independently verifiable software delivery. In an era of increasingly sophisticated supply chain attacks, that may eventually become as fundamental to Linux security as package signing itself. Stay Ahead of Linux Security & Infrastructure Trends Interested in more in-depth coverage of Linux security, supply chain defense, open-source infrastructure, and enterprise hardening strategies? Subscribe to the LinuxSecurity newsletter for weekly analysis, threat updates, and technical insights from across the Linux ecosystem. Related Reading How the XZ Utils Backdoor Shook the Linux Ecosystem Why Software Supply Chain Attacks Are Becoming Harder To Detect Securing CI/CD Pipelines Against ModernOpen-Source Threats Ubuntu Dirty Frag Important Local Privilege Escalation Exploit Linux Could Soon Disable Vulnerabilities Without a Reboot: Kernel Killswitch . Debian 14 mandates reproducible builds to enhance software integrity, affecting Linux package verification.. Debian Security, Package Integrity, Reproducible Builds, Supply Chain Trust. . MaK Ulac
 May 12, 2026
•
May 12, 2026
•
102
 security advisorydebiansystem update
Installing Updates For Ubuntu 22.04 LTS And Debian 10: Security Steps
Whether you are a DevSecOps engineer responsible for managing your organization’s application infrastructure or you have your own personal Linux server that you use at home, the importance of keeping your systems safe and secure against malicious attacks by bad actors cannot be over emphasized. . While there are many aspects with regards to securing systems, one fundamental best practice is to continuously patch your systems and applications as soon as they are made available. The infamous WannaCry ransomware attack from the summer of 2017, that caused much grief to millions of users is a case in point. While the patch was made available much ahead of the actual attack, it was due to a sheer lack of security discipline that the attack was successful. “While Microsoft had released patches previously to close the exploit, much of WannaCry's spread was from organizations that had not applied these or were using older Windows systems that were past their end-of-life. These patches are imperative to an organization's cyber-security, but many were not applied because of needing 24/7 operation, risking having applications that used to work break, inconvenience, or other reasons.” (Source: WannaCry ransomware attack - Wikipedia ) This article will walk you through specific steps you need to patch your Ubuntu and Debian based systems for operating system packages. We shall cover the basics of commands you need to execute through the CLI and through the GUI. We shall also cover some additional tips and techniques for automation, package conflict resolution, kernel patches and how to manage docker/container-based security updates. How Can I Update Ubuntu via the Command-Line? Most programmers prefer the command line or programmatic execution of commands. This method is quicker, you have better control, and the commands can be easily incorporated into scripts that can be setup for regular execution through automation. If you are new to the topic, the Ubuntu command manuals is a goodplace to get started. The commands we shall cover pertaining to this topic are: apt update: This command only fetches the information on latest packages that can be upgraded. Note that it does not actually upgrade any packages on the system, only refreshes the index local to the system. This package information is obtained from standard official sources and then stored locally on the system. If ever you need to check from which sources the package information gets picked, you will see it in under /etc/apt/sources.list on the system. apt list –upgradable: This command will then display the packages that have updates available and therefore can be upgraded on the system. This information is based on the information fetched previously from the update command apt upgrade: This is the actual command that does the upgrade of the packages in the system. Once executed, the OS will be successfully upgraded. Note that this command can install new packages if the dependencies require it, but it will never remove packages. apt full-upgrade: This command does a little more than what the upgrade command does. In addition to upgrading new packages and installing new packages as required, it also removes existing installed packages if it determines that the dependencies are no longer required. Use this option with caution as it can cause unexpected system behavior if your application is dependent on a specific version of the package. apt autoremove: This command is used to remove unused packages which are no longer needed by the dependent packages. This can be executed after apt upgrade Note that all of this discussion is with respect to packages that are already on the system. If you need new packages that are not already there, you need to use the apt install command. As you research and look for commands on upgrading, you will come across apt-get commands with similar options of upgrade/update etc. So, what should you use and what is the difference? Bothare package management command line tools and there is a bit of history as to how the command evolved over the years. The apt CLI is the more recent (made available since Ubuntu 18.04 and Debian 10), preferred and the officially recommended tool. It is clearer in explaining what exactly it is doing, the options that come with apt are considered to be more user friendly and covers the range of frequently used options for the average user. The apt-get CLI, on the other hand, is more low level and contains a lot more options that are for the advanced user. So how does one typically sequence these commands? Once you are comfortable with what each of these does, you can combine them together into a single command that can be set up for automated regular execution. More about that in later sections. Here are a couple of screen captures to illustrate what you would see for some of the above commands. apt update: Here you can see the various ubuntu sources that it is fetching the package information from. apt list –upgradable: Here you can see, that from that list of package information fetched from earlier step, the packages that are having new versions and can be upgraded: apt upgrade -y: This command upgrades all the packages from the previous step and shows a neat progress bar as it proceeds. The -y option installs it silently without you having to prompt again. (Side Note: This is one example of how the apt is more user- friendly than the apt-get . You would not see the progress bar in the apt-get ). How Can I Update Ubuntu via the GUI? Some users may prefer the UI way of upgrading packages as it gives neat visual steps that tells you details of the packages that makes easy reading and unlike the CLI, prompts you that a restart of the system is required after install (if needed). The GUI way of upgrading is easy to do if you have only one or two systems to manage, personal installations and only on systems which have gnome or alternative desktopavailable. In the above section, we had installed Ubuntu Desktop and connected to the system using a VNC Server/VNC viewer. Depending on your system - there are many different ways to get to the GUI. To upgrade via GUI, open the Ubuntu “Activities” folder and search for the “Software Updater” Click on Details twisty to check the listing and description of the packages that will get upgraded. A dialogue box will appear to ask you for permission to install the updates right now or later. You can also use the checkbox selector to check/uncheck the packages that you want to install. (The equivalent of this in the CLI is to upgrade only the required package instead of a general upgrade on all packages). Click “Install Now” to begin the installation. Once the updated version of Ubuntu and the updated packages are installed on your system, a window may appear asking you to restart your system in order for the changes to take effect. And after restart, you get confirmation that the computer is up to date! Update Debian via the CLI Updating Debian via CLI uses the exact same set of commands as already demonstrated in the Ubuntu section. Ubuntu is the newer operating system based on the older Debian. They are very similar in many aspects and in the context of this article, the same commands for upgrade can be used. Update Debian via the GUI In this section, we used the GNOME Desktop that came with the default installation of Debian 10. Depending on your system setup, there may be several ways of getting to the GUI. So, to get started for upgrades, press the “Super key” on your keyboard. (It is a key with Windows logo if you are on a Windows machine. If it is an Apple keyboard it is the Command key.) Type "gnome-software" and click on the software icon. Click on the Updates tab on the popup as shown in the image. If there are updates available, it will show here. Click on Download . Next, it will prompt you forupdate and restart. Once updated and rebooted you will see a confirmation as below. Extras & Tips How to block upgrades on specific packages Sometimes, there is a need to block specific packages from getting upgraded as your application may have some dependencies on the specific version and upgrading it may have a detrimental effect on the application behaviour. You still want to upgrade all other packages in the system except those specific packages. This is where the apt mark hold and apt mark unhold commands will come in handy. In the example below, we do not want to upgrade the Jenkins package as it will break the Jenkins jobs running, so we hold back its upgrade. apt-mark hold jenkins apt update -y apt upgrade -y Later when you are ready to upgrade the package, you can execute the following: apt-mark unhold jenkins apt update -y apt upgrade -y How to perform a dry run to test the configuration As the name suggests, this parameter that can be combined with (most of) the apt commands, is very useful when you want to check what would happen if you executed an upgrade, without actually running it. So, from the following output, it lays out what would happen: that one new package will be installed, one package will not be upgraded, and a few packages will be upgraded. This lets you do a quick sanity check to see if this is what you really want. apt full-upgrade --dry-run Reading package lists... Done Building dependency tree Reading state information... Done Calculating upgrade... Done The following NEW packages will be installed: libzstd1 The following packages have been kept back: logdna-agent The following packages will be upgraded: apt dpkg libapt-pkg5.0 3 upgraded, 1 newly installed, 0 to remove and 1 not upgraded. Managing kernels that build up in the system over a period of time A special note should be mentioned regarding kernel upgrades. Every time youupgrade a kernel, a new version of the kernel gets installed. Over a period of time, these kernels can accumulate on the system and consume significant disk space. Whenever a new kernel gets installed as part of the upgrade, you can clean up the old ones. As a best practice you can keep three kernels, the current active one plus two old ones – so that you can fall back to the old one if needed. The Debian package “byobu” has a script “purge-old-kernels” that can be used for this purpose. apt install byobu purge-old-kernels --keep 3 You can learn more purge old kernels . To see all the kernels installed on the system, check using: dpkg --list | grep linux-image To see the list of currently active kernel uname -mrs In the system below there are three kernels and the active one is the latest version Managing automatic upgrades in GUI Search for the “Software & Updates” application in the GUI Click on the Updates tab and in the option for “When there are security updates:” , from the drop down, click on the “Download and Install automatically” option. The corresponding steps in Debian are very similar: Click on Update Preferences : And set it up for automatic upgrade using these options: Managing automatic upgrades through scripts Using the "unattended-upgrades" package you can set up the system for automatic upgrades including optional reboot, email notification etc. You can check for details AutomaticSecuri . Again, the above works when you have a few systems to manage. When you are talking about hundreds of systems with live running applications that cannot be afforded to be disrupted, you have to come up with a more organized custom approach with regression testing and scheduled downtimes built into your automation scripts. Managing upgrades in the containerized world As more organizations move towards microservices and containerization of their applications, the adoption of Ubuntubased base images for running the microservices and other containers can become a common practice. Here too, updating the OS vulnerabilities periodically becomes imperative. The easiest way to handle this is to have a line of code, that does the upgrades, in the Dockerfile of your service. This way every time your Docker image gets built; it is automatically up to date with the latest OS packages. # full-upgrade' -> the function of upgrade is to install the newest versions of all packages, also intelligently handles changing dependencies with new versions of packages # 'autoremove' -> Remove packages that were automatically installed to satisfy dependencies for some packages that are no longer needed. # 'autoclean' -> Clears out the local repository of retrieved package files RUN apt update && apt full-upgrade -y && apt autoremove -y && apt autoclean -y This same combination command can be used for automation on server systems. Managing vulnerabilities that cannot be remediated through upgrade Sometimes, you can run into situations when the packages do not get upgraded through any of these usual methods and yet your system is left vulnerable. (This can only get caught when you run vulnerability scans against the system). One such example would be when there are no more new versions available on the package, when the OS version has reached EOS/EOL. In such a case, you have to upgrade to the latest OS version and if you need to buy time, another option would be to manually remove that package and install an alternative, if required. Conclusion A typical application environment, whether a cloud or on-prem model, contains 100s or even 1000s of systems that need to be kept up to date with respect to operating system patches. Self-aware organizations should ensure that their security policies mandate timely application ofpatches that get released periodically from vendors. Keeping OS packages upgraded not only improves your security posture but will also improve the stability and performance of the system. This will take you one step closer to staying compliant to various regulatory certifications like HIPAA, GDPR, SOC2, ISO and so on. And finally, that makes your customers happy! About the Authors Mrudula Madiraju Mrudula Madiraju's technical career spans across multiple technologies, domains, customers, services and products. In her current role, she manages the Security Controls and Compliance of the Spark based Analytics Engine service on IBM Cloud. Whenever time permits, she loves to learn and share tidbits of epiphanies through sessions and writings. Connect with her on LinkedIn . Chetan Bhatia Chetan Bhatia is a seasoned DevSecurityOps consultant. He is an avid problem solver, and is skilled in Python, Unix scripting, Jenkins andTekton. Chetan is great at handling crisis situations, and never has to repeat a job more than once. “Automation Automation Automation” is his mantra. He currently leads the DevOps CI/CD pipeline development for the Spark based Analytics Engine service on IBM Cloud. Connect with Chetan on LinkedIn . . Ensure strong defense for your Debian and Ubuntu systems by following these steps for effective patch management and security upkeeping. Debian Updates, Ubuntu Security, Package Management, System Patching, Security Automation. . Brittany Day
Jul 12, 2021
•

102
 security advisorydebianDebian
Debian: CrowdSec v.1.0.X Security Advisory - Local REST API Features
Thank you to the Crowdsec project for contributing this article. The official release of CrowdSec v.1.0.X introduces several improvements to the previous version, including a major architectural change: the introduction of a local REST API. . This local API allows all components to communicate more efficiently to support more complex architectures, while keeping it simple for single-machines users. It also makes the creation of bouncers (the remediation component) much simpler and renders them more resilient to upcoming changes, which limits maintenance time. In the new 1.0 release, the CrowdSec architecture has been deeply remodeled: All CrowdSec components (the agent reading logs, cscli for humans, and bouncers to deter the bad guys) can now communicate via a REST API, instead of reading or writing directly in the database. With this new version, only the local API service will interact with the database (e.g. SQLite, PostgreSQL and MySQL). In this tutorial, we are going to cover how to install and run CrowdSec on a Linux server: CrowdSec setup Testing detection capabilities Bouncer set up Observability Set up the environment The machine I used for this test is a Debian 10 Buster t2.medium EC2. To make it more relevant, let’s start by installing nginx: $ sudo apt-get update $ sudo apt-get install nginx Configure the security groups so that both secure shell (SSH) (tcp/22) and HTTP (tcp/80) can be reached from the outside world. This will be useful for simulating attacks later. Install CrowdSec Grab the latest version of CrowdSec: $ curl -s https://api.github.com/repos/crowdsecurity/crowdsec/releases/latest | grep browser_download_url| cut -d '"' -f 4 | wget -i - Here is the installation process : $ tar xvzf crowdsec-release.tgz $ cd crowdsec-v1.0.0/ $ sudo ./wizard.sh -i The wizard helps guide installation and configuration. First, the wizard identifies services present on themachine. It allows you to choose which services to monitor. For this tutorial, go with the default option and monitor all three services: Nginx, SSHD, and the Linux system. For each service, the wizard identifies the associated log files and asks you to confirm (use the defaults again): Once the services and associated log files have been identified correctly (which is crucial, as this is where CrowdSec will get its information), the wizard prompts you with suggested collections. A collection is a set of configurations that aims to create a coherent ensemble to protect a technological stack. For example, the crowdsecurity/sshd collection contains a parser for SSHD logs and a scenario to detect SSH bruteforce and SSH user enumeration . The suggested collections are based on the services that you choose to protect. The wizard’s last step is to deploy generic whitelists to prevent banning private IP addresses . It also reminds you that CrowdSec will detect malevolent IP addresses but will not ban any of them . You need to download a bouncer to block attacks. This is essential to remember: CrowdSec detects attacks; bouncers block them. Now that the initial setup is done, CrowdSec should be up and running. Deter attacks with CrowdSec By installing CrowdSec, you should already have coverage for common Internet background noise. Check it out! Attacking a web server with wapiti Simulate a web application vulnerability scan on your Nginx service using Wapiti, a web application vulnerability scanner. You need to do this from an external IP, and keep in mind that private IPs are whitelisted by default : ATTACKER$ wapiti -u [*] Saving scan state, please wait... Note ======== This scan has been saved in the file /home/admin/.wapiti/scans/34.248.33.108_folder_b753f4f6.db ... On your freshly equipped machine, we can see the attacks in the logs : My IP triggered different scenarios : crowdsecurity/http-path-traversal-probing : detects path traversal probing attempts patterns in the URI or the GET parameters crowdsecurity/http-sqli-probbing-detection : detects obvious SQL injection probing attempts patterns in the URI or the GET parameters Bear in mind that the website you attacked is an empty Nginx server . If this were a real website, the scanner would perform many other actions that would lead to more detections. Checking results with cscli Cscli is one of the main tools for interacting with the CrowdSec service, and one of its features is visualizing active decisions and past alerts. The cscli decisions list command displays active decisions at any time, while cscli alerts list shows past alerts (even if decisions are expired or the alert didn't lead to a decision). You can also inspect a specific alert to get more details with cscli alerts inspect -d (using the ID displayed in the left-hand column of the alerts list). cscli offers other features, but one to look at now is to find out which parsers and scenarios are installed in the default setup. Observability Observability (especially for software that might take defensive countermeasures) is always a key point for a security solution. Besides its "tail the logfile" capability, CrowdSec offers two ways to achieve this: Metabase dashboards , and Prometheus metrics . Metabase dashboard cscli allows you to deploy a new Metabase and Docker . Begin by installing Docker using its official documentation . If you’re using an AWS EC2 instance, be sure to expose tcp/3000 to access your dashboard. cscli dashboard setup enables you to deploy a new Metabase dashboard running on Docker with a random password. Prometheus metrics While some people love visual dashboards, others prefer different kinds of metrics. This is where CrowdSec’s Prometheus integration comes into play. One way to visualize these metrics is with cscli metrics : The cscli metrics command exposes only a subset of Prometheus metrics that are important for system administrators . You can find a detailed description of the metrics in the documentation. The metrics are split into various sections : Buckets: How many buckets of each type were created, poured or have overflowed since the daemon startup? Acquisition: How many lines or events were read from each of the specified sources, and were they parsed and/or poured to buckets later? Parser: How many lines/events were delivered to each parser, and did the parser succeed in processing the mentioned events? Local API: How many times was each route hit and so on? Viewing Crowdsec’s Prometheus metrics via cscli metrics is more convenient but doesn’t do justice to Prometheus. It is out of scope for this article to deep dive into Prometheus, but these screenshots offer a quick look at what CrowdSec's Prometheus metrics look like in Grafana. Defend attacks with bouncers CrowdSec's detection capabilities provide observability into what is going on. However, to protect yourself, you need to block attackers, which is where bouncers play a major part. Remember: CrowdSec detects, bouncers deter. Bouncers work by querying CrowdSec’s API to know when to block an IP . You can download them bouncers directly from the CrowdSec Hub : For this example, use cs-firewall-bouncer . It directly bans directly any malevolent IP at the firewall level using iptables or nftables Note: if you used your IP to simulate attacks, unban your IP before going further: sudo cscli decisions delete -i X.X.X.X Install the bouncer First, download the bouncer from the Hub: $ wget githubusercontent $ tar xvzf cs-firewall-bouncer.tgz $ cd cs-firewall-bouncer-v0.0.5/ The bouncer can be installed with a simple install script: The install script will check if you have iptables or nftables installed and prompt you to install if not. Bouncers communicate withCrowdSec via a REST API, so check that the bouncer is registered on the API. The last command ( sudo cscli bouncers list ) shows our newly installed bouncer. Test the bouncer Warning: Before going further, ensure you have another IP available to access your machine and that you will not kick yourself out. Using your smartphone's internet connection will work. Now that you have a bouncer to protect you, try the test again. Try to access the server at the end of the scan : ATTACKER$ curl --connect-timeout 1 curl: (28) Connection timed out after 1001 milliseconds See how it turns out from the defender’s point of view. For the technically curious, cs-firewall-bouncer uses either nftables or iptables. Using nftables (used on Debian 10 by default) creates and maintains two tables named crowdsec and crowdsec6 (for IPv4 and IPv6 respectively). $ sudo nft list ruleset … table ip crowdsec { set crowdsec_blocklist { type ipv4_addr elements = { 3.22.63.25, 3.214.184.223, 3.235.62.151, 3.236.112.98, 13.66.209.11, 17.58.98.156, … } } chain crowdsec_chain { type filter hook input priority 0; policy accept; ip saddr @crowdsec_blocklist drop } } table ip6 crowdsec6 { set crowdsec6_blocklist { type ipv6_addr } chain crowdsec6_chain { type filter hook input priority 0; policy accept; ip6 saddr @crowdsec6_blocklist drop } } You can change the firewall backend used by the bouncer in /etc/crowdsec/cs-firewall-bouncer/cs-firewall-bouncer.yaml by changing the mode from nftables to iptables (ipset is required for iptables mode). Get involved We would love to hear your feedback about this latest release. If you are interested in testing the software or would like to get in touch with the team, check the following links: our website GitHub repository Gitter . This localAPI allows all components to communicate more efficiently to support more complex archite. crowdsec, thank, project, contributing, article, official, release. . Brittany Day
Mar 01, 2021
•

Get the latest News and Insights
Get the latest Linux and open source security news straight to your inbox.
Community Poll
Should Linux servers automatically install security updates?
Search Topics
Powered By

Linux Security - Your source for Top Linux News, Advisories, HOWTOs and Feature Releases
QUICK LINKS
subscribe to newsletters!
Like staying secure? So do we.
Sign up for updates, tips, and alerts!